Understanding Taylor Pool Test Kits
Taylor pool test kits are essential for maintaining safe and balanced swimming pool water, ensuring a delightful experience. These kits offer accurate
measurements, utilizing reliable chemical reagents and color-comparison techniques for precise water analysis. Proper use, following detailed
instructions, is crucial for optimal pool health and swimmer safety, as highlighted in various diagnostic and analytical documents.
What is a Taylor Pool Test Kit?
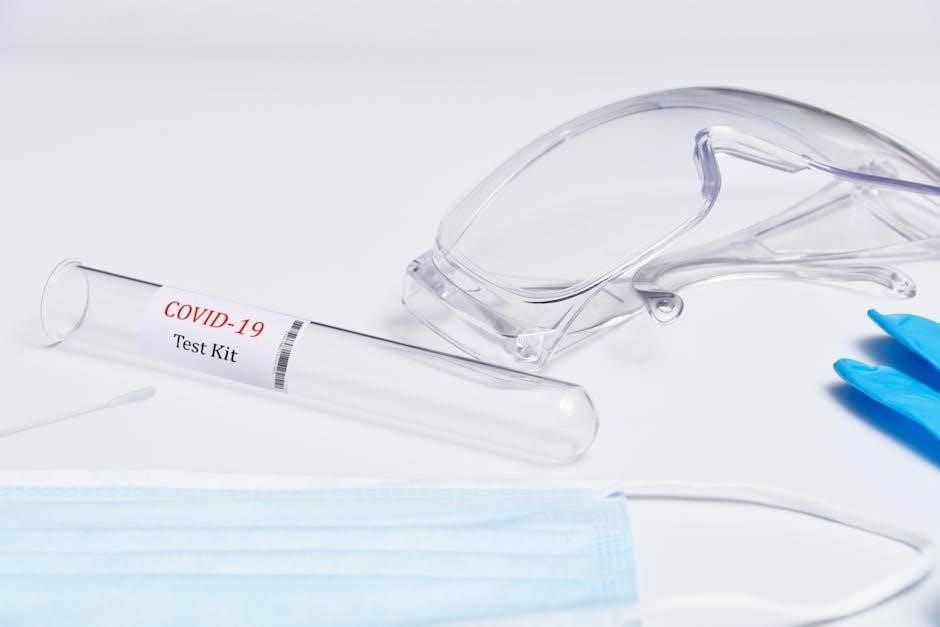
A Taylor Pool Test Kit is a comprehensive system designed for home or professional use, enabling accurate chemical analysis of swimming pool water. Unlike simple dip strips, Taylor kits utilize liquid reagents and precise color comparisons to determine key water chemistry parameters. These parameters include free and total chlorine, pH, total alkalinity, calcium hardness, and cyanuric acid levels – all vital for swimmer comfort and pool equipment longevity.
These kits aren’t merely tools; they’re a proactive approach to pool maintenance, preventing issues like algae growth, corrosion, and scaling. The kits often include a durable carrying case, reagent bottles, testing blocks or vials, a color comparator, and detailed instructions. The precision offered by Taylor kits surpasses basic testing methods, providing reliable data for informed adjustments to pool chemistry. Diagnostic parameters, as seen in related analytical studies, emphasize the importance of accurate measurements for optimal results.
Types of Taylor Test Kits Available
Taylor offers a diverse range of pool test kits catering to varying needs and budgets. The K-2006 is a popular choice, providing comprehensive testing for chlorine, pH, alkalinity, calcium hardness, and cyanuric acid. For simpler needs, the K-2005 focuses on essential parameters like chlorine and pH. Digital options, such as the Taylor Digital Titrator, offer enhanced accuracy and ease of reading, minimizing subjective color interpretation.
Beyond these, specialized kits exist for specific concerns, like salt water pools or spa water analysis. Some kits utilize tablet reagents for convenience, while others employ liquid reagents for potentially greater precision. Understanding the differences is crucial when selecting a kit. Following instructions carefully, regardless of the kit type, ensures reliable results. The availability of various kits reflects the importance of tailored water analysis, mirroring the refinement seen in diagnostic methodologies and quality control processes, as highlighted in analytical documentation.
Getting Started with Your Test Kit
Before beginning, familiarize yourself with all components and the instructions. Proper preparation, including rinsing vessels with sample water, is vital for accurate results and reliable analysis.
Kit Contents: A Comprehensive List
Taylor pool test kits are available in various configurations, but a typical comprehensive kit includes several essential components. You’ll find reagent bottles for testing parameters like Free Chlorine (DPD), pH, Total Alkalinity, Calcium Hardness, and Cyanuric Acid (Stabilizer). These reagents often come in liquid or tablet form.
Furthermore, a kit usually contains a durable test block or comparator, designed to hold water samples and facilitate color comparison. Test blocks feature designated spaces for each reagent and sample, ensuring organized testing. Plastic test vials or tubes are also included for mixing reagents and water samples. A detailed instruction booklet is paramount, providing step-by-step guidance on performing each test and interpreting the results.

Some advanced kits may include a digital colorimeter for more precise readings, eliminating subjective color interpretation. Additionally, a sample spoon or scoop is provided for accurate reagent dispensing. Finally, a protective carrying case is often included for convenient storage and portability, safeguarding the kit’s components.
Safety Precautions When Handling Reagents
Taylor pool test kit reagents, while essential for accurate water analysis, require careful handling to ensure personal safety. Always avoid contact with skin and eyes; wear appropriate protective gear, such as gloves and eye protection, during testing. In case of skin contact, immediately rinse the affected area with copious amounts of water.
Never mix different reagents together, as this could create hazardous chemical reactions. Store reagents in a cool, dry, and well-ventilated area, away from direct sunlight and extreme temperatures. Keep reagents out of reach of children and pets, preventing accidental ingestion or exposure. Do not ingest any of the reagents under any circumstances.
When disposing of used reagents or test samples, follow local regulations for chemical waste disposal. Avoid inhaling reagent fumes; perform tests in a well-ventilated space. Rinse test vessels thoroughly after each use, preventing cross-contamination. Always refer to the kit’s instruction manual for specific safety guidelines related to each reagent.
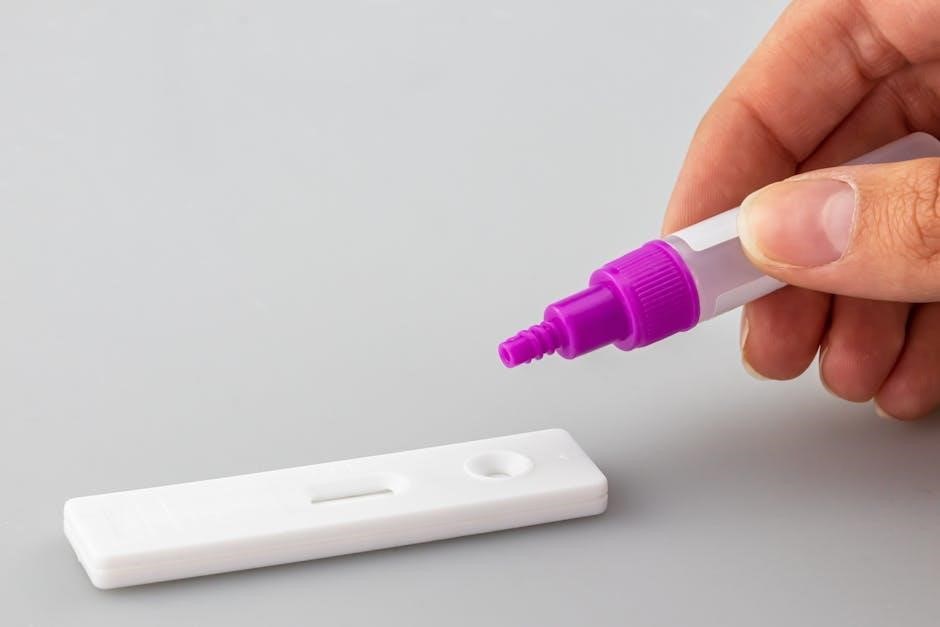
Performing the Tests
Taylor test procedures involve filling designated test blocks with a precise water sample volume, adding the appropriate reagent tablets, and swirling gently.
Compare the resulting color to the provided chart for accurate readings.
Testing for Free Chlorine (DPD Method)
To test free chlorine using the DPD method with a Taylor kit, first, fill the free chlorine test block to the indicated line with pool water. Then, carefully add one DPD reagent tablet, ensuring it falls to the bottom. Allow the tablet to fully dissolve, gently swirling the block to aid the process – avoid vigorous shaking.
After the tablet dissolves, a pink tint will develop; the intensity of the color corresponds to the chlorine level. Compare the color of the water in the test block against the color chart provided with your kit. Match the sample color as closely as possible to determine the parts per million (ppm) of free chlorine present in your pool water.
It’s crucial to perform this test in a well-lit area and view the color chart against a white background for accurate results. Remember to rinse the test block thoroughly with pool water after each use to prevent cross-contamination and ensure future test accuracy. Consistent monitoring of free chlorine is vital for effective sanitation.
Testing for pH Levels
To accurately measure pH with your Taylor test kit, begin by filling the pH test block to the designated line with a sample of your pool water. Introduce one pH reagent tablet into the block, allowing it to settle and dissolve completely. Gently swirl the block to facilitate dissolution, but avoid shaking vigorously, which could introduce errors.
As the tablet dissolves, the water will change color. This color change is directly related to the pH level of your pool water. Carefully compare the resulting color in the test block to the color chart provided with your kit. Find the closest matching color on the chart to determine the pH reading.
Ensure adequate lighting and view the color chart against a white background for optimal accuracy. After each test, thoroughly rinse the pH test block with pool water to prevent any residual chemicals from affecting subsequent readings. Maintaining proper pH balance is fundamental for swimmer comfort and sanitizer effectiveness.
Testing for Total Alkalinity
Determining total alkalinity is crucial for pH stability. Begin by filling the total alkalinity test block to the indicated line with a pool water sample. Add the specified number of total alkalinity reagent tablets – typically two – into the block. Allow the tablets to fully dissolve, gently swirling the block to aid the process, avoiding vigorous shaking.
Once dissolved, the water will develop a pink hue. Compare the resulting color to the total alkalinity color chart included with your Taylor kit. Match the sample color as closely as possible to a color on the chart to determine the alkalinity level, expressed in parts per million (ppm).
If the color is too dark to read accurately, dilute the sample with distilled water and retest. Remember to account for the dilution when interpreting the results. Rinse the test block thoroughly with pool water after each use to prevent cross-contamination and ensure accurate future readings.
Testing for Calcium Hardness
Assessing calcium hardness prevents scaling or corrosive water. First, fill the calcium hardness test block to the designated line with a representative pool water sample. Introduce the calcium hardness reagent tablets – usually two – into the block, ensuring they fully submerge. Gently swirl the block to facilitate tablet dissolution, avoiding forceful agitation.
After the tablets dissolve, the water will exhibit a reddish-purple color. Carefully compare the sample’s color against the calcium hardness color chart provided with your Taylor test kit. Select the color on the chart that most closely matches your sample’s hue to determine the calcium hardness level, measured in parts per million (ppm).
If the color is too intense for accurate comparison, dilute the sample with distilled water and retest, remembering to adjust for the dilution factor. Thoroughly rinse the test block with pool water after each test to maintain accuracy and prevent reagent interference in subsequent analyses.
Testing for Cyanuric Acid (Stabilizer)
Cyanuric acid (CYA), or stabilizer, protects chlorine from sunlight degradation. To test, fill the cyanuric acid test block to the indicated line with a pool water sample. Add the provided cyanuric acid reagent tablets – typically three – into the block, allowing them to completely dissolve. Gently swirl the block to aid dissolution, avoiding vigorous shaking.
Following tablet dissolution, the sample will develop a blue color. Compare the resulting color against the cyanuric acid color chart included with your Taylor test kit. Identify the color on the chart that best matches your sample’s shade to determine the CYA level, expressed in parts per million (ppm).
If the color is too pale or intense for accurate matching, repeat the test with a fresh sample. Proper CYA levels are crucial for chlorine effectiveness; maintaining the recommended range ensures optimal sanitation. Rinse the test block thoroughly with pool water after each use to prevent cross-contamination.
Interpreting Your Results
Taylor test kit results require careful interpretation against ideal ranges for each parameter. Accurate readings, combined with understanding water chemistry,
ensure a safe and enjoyable swimming experience for all users.
Ideal Water Chemistry Ranges
Maintaining proper water balance is paramount for swimmer comfort, equipment longevity, and sanitizer effectiveness. Taylor test kits empower you to achieve this balance by providing the data needed to adjust chemical levels. Here’s a breakdown of ideal ranges:
- Free Chlorine: 1-3 ppm (parts per million). This ensures effective disinfection against bacteria and algae.
- pH: 7.2-7.8. Maintaining this range prevents corrosion, scaling, and maximizes chlorine’s efficiency.
- Total Alkalinity: 80-120 ppm. Alkalinity acts as a pH buffer, preventing drastic fluctuations.
- Calcium Hardness: 200-400 ppm. Proper calcium levels protect pool surfaces from etching or scaling.
- Cyanuric Acid (Stabilizer): 30-50 ppm. Stabilizer protects chlorine from sunlight degradation, extending its lifespan.
Deviations from these ranges can lead to various issues. Low pH causes corrosion, while high pH reduces chlorine effectiveness. Imbalanced alkalinity makes pH control difficult. Regularly testing and adjusting these levels, guided by your Taylor kit results, is key to a healthy pool.
Troubleshooting Common Test Results
Interpreting Taylor test kit results sometimes requires troubleshooting. Cloudy or inaccurate readings often stem from reagent contamination or expired test packets. Always ensure reagents are stored correctly and haven’t surpassed their shelf life. If free chlorine reads zero, despite adding chlorine, check cyanuric acid levels – high stabilizer can hinder chlorine’s effectiveness.
Low pH, despite adding pH increaser, might indicate insufficient total alkalinity; address alkalinity first. High pH can be lowered with muriatic acid, but do so gradually, retesting frequently. Greenish water suggests algae growth, requiring shock treatment and algaecide. Cloudy water could indicate poor filtration or imbalanced calcium hardness.
Remember, accurate testing relies on following instructions precisely. If issues persist, consult a pool professional. Diagnostic parameters, as seen in analytical studies, emphasize the importance of consistent and reliable testing for optimal water quality.
Maintaining Your Test Kit
Taylor kits demand careful upkeep for accuracy. Store reagents cool, dry, and away from sunlight. Regularly clean test blocks, and replace reagents promptly when expired, ensuring reliable results.
Reagent Storage and Shelf Life
Taylor test kit reagents are sensitive and require proper storage to maintain their accuracy and effectiveness. Always store reagents in a cool, dry place, ideally between 60°F and 80°F (15°C and 27°C). Avoid direct sunlight and exposure to extreme temperatures, as these can degrade the chemicals and compromise test results.
It is crucial not to mix reagents from different kits or even within the same kit if they are not intended to be combined. Each reagent is formulated for a specific purpose, and combining them can lead to inaccurate readings or even hazardous reactions. Keep reagent bottles tightly sealed when not in use to prevent contamination and evaporation.
Each reagent has a specific shelf life, clearly marked on the bottle or packaging. While some reagents may remain usable slightly beyond the expiration date, it’s best practice to replace them promptly to ensure reliable results. Discard any reagents that have changed color, become cloudy, or show signs of deterioration. Regularly checking expiration dates and replacing reagents as needed is a vital part of maintaining a dependable testing system for your pool.
Cleaning and Care of Test Blocks/Equipment
Maintaining the cleanliness of your Taylor test kit components is paramount for accurate results. After each use, thoroughly rinse the test block or comparator with distilled or deionized water to remove any residual chemicals. Avoid using tap water, as minerals present can interfere with future tests.
Inspect the test block regularly for any cracks, discoloration, or buildup. If you notice any damage, replace the block to ensure reliable readings. For glass test vials or comparators, handle them with care to prevent breakage. Clean them gently with a soft cloth and mild detergent if necessary, ensuring complete rinsing afterward.
Proper drying is also essential. Allow all components to air dry completely before storing them in their designated case. This prevents mold growth and ensures the reagents don’t become diluted. Avoid abrasive cleaners or harsh chemicals, as they can damage the plastic or glass. Consistent cleaning and careful handling will extend the life of your test kit and guarantee accurate pool water analysis.