The Little Green Machine is a portable carpet and upholstery cleaner designed for spot and stain removal, offering powerful suction and effective cleaning solutions.
This guide provides essential information for optimal performance, ensuring a fresh and revitalized living space with ease and efficiency.
What is the Little Green Machine?
The Little Green Machine, often referring to the Bissell SpotClean Pro or similar models, is a compact, portable deep cleaner specifically engineered for tackling localized messes. Unlike full-sized carpet cleaners, it excels at quickly addressing spills, stains, and dirt on carpets, rugs, upholstery, and even stairs.
Its core function revolves around using pressurized cleaning solution and powerful suction to lift and remove embedded grime. The machine features a handheld spray trigger and various specialized tools to target different surfaces and stain types effectively; It’s a popular choice for pet owners, families with children, or anyone seeking a convenient solution for maintaining clean living spaces between professional cleanings.
The device’s compact size and ease of use make it a versatile addition to any home cleaning arsenal.
Key Features and Benefits
The Little Green Machine boasts several key features enhancing its cleaning prowess. Powerful suction effectively lifts dirt and stains, while the integrated spray trigger allows for precise application of cleaning solution. Specialized tools, included with the machine, cater to various surfaces – carpets, upholstery, and stairs – ensuring optimal results.
Benefits include portability for easy maneuverability, a compact design for convenient storage, and quick drying times. Its effectiveness in removing pet stains and odors is a significant advantage. The machine’s user-friendly operation simplifies the cleaning process, saving time and effort. Ultimately, it delivers a professional-level clean in a compact, accessible package.

Setting Up Your Little Green Machine
Proper setup is crucial for optimal performance. This involves carefully unboxing all components, correctly filling the water tanks, and securely attaching the hose and desired cleaning tools.
Unboxing and Component Check
Carefully unpack your Little Green Machine, ensuring all components are present. You should find the main unit, the spray hose, a tank for clean water, a separate dirty water tank, and various specialized cleaning tools.
Inspect each item for any visible damage incurred during shipping. Verify the hose connects securely to the machine and that the tanks are free from cracks or leaks. Confirm the presence of the power cord and any included sample cleaning solutions.
Refer to the parts diagram in the included documentation to cross-reference all components. If anything is missing or damaged, immediately contact Bissell customer support for assistance before proceeding with setup. A complete component check guarantees a smooth cleaning experience.
Filling the Clean Water Tank
Locate the clean water tank, typically a translucent container, and remove it from the Little Green Machine. Unscrew the tank cap and carefully fill it with warm tap water. Do not use hot water, as it could damage the machine.
Add a Bissell cleaning solution specifically designed for the Little Green Machine, following the dilution instructions on the bottle. Avoid using excessive soap, as this can leave residue on surfaces.
Securely replace the tank cap, ensuring a tight seal to prevent leaks during operation. Gently reinsert the filled tank back into the machine, aligning it correctly with the designated slot. Proper filling ensures optimal cleaning performance and protects the device.
Attaching the Hose and Tools
Locate the hose and firmly connect it to the designated port on the back of the Little Green Machine. Ensure a secure connection to prevent detachment during use. Next, select the appropriate cleaning tool for your surface – a tough brush for carpets, or a softer one for upholstery.
Attach the chosen tool to the end of the hose, clicking it into place until it locks. The Little Green Machine often includes specialized tools for stairs and hard-to-reach areas. Properly attached tools maximize cleaning effectiveness and protect surfaces.
Verify all connections are snug before powering on the device, preventing leaks and ensuring optimal suction.

Operating the Little Green Machine
Powering on initiates the cleaning process; select the appropriate mode for your surface. Utilize the spray trigger for targeted stain removal, ensuring effective cleaning.
Powering On and Off
To power on your Little Green Machine, locate the power button, typically found on the main unit. Press firmly to activate the device; a green indicator light will illuminate, confirming operation. Ensure the machine is properly connected to a functioning power outlet before attempting to turn it on.
For shutdown, press the power button again. The green light will extinguish, indicating the machine is off. Always disconnect the power cord from the outlet when the machine is not in use, or during maintenance procedures. This prevents accidental activation and ensures safety. Never force the power button; if it doesn’t respond, check the power connection first.
A small green LED on the MC Control indicates operational status, confirming the machine is ready for cleaning tasks.
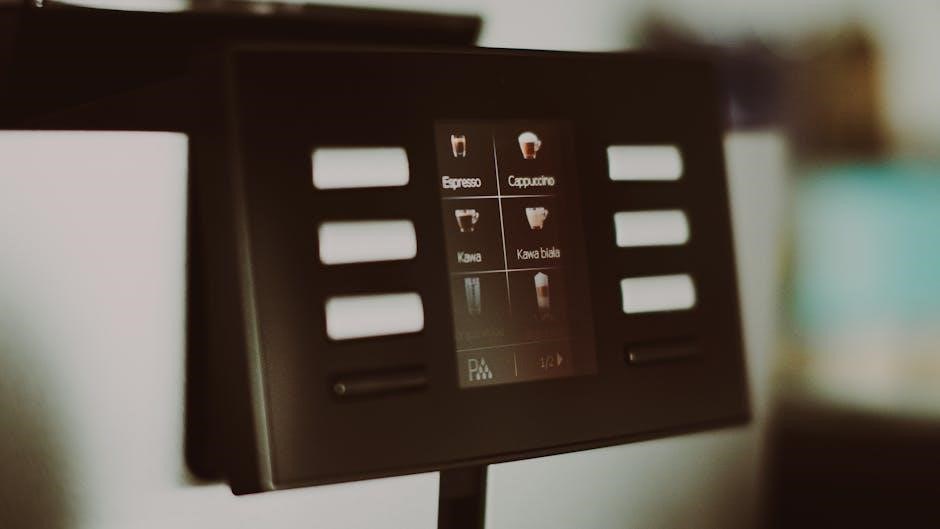
Selecting the Cleaning Mode
The Little Green Machine typically features multiple cleaning modes tailored for different surfaces and stain levels. While specific models vary, common options include a standard cleaning mode for general messes and a deep clean mode for stubborn stains.
Mode selection is usually achieved via buttons or a dial on the machine’s control panel. Refer to your model’s specific instructions for precise operation. Some machines offer a “Spot Clean” setting for focused stain treatment. Ensure the appropriate tool is attached for the selected mode – for example, use the crevice tool for tight spaces.
On the MC Control, the selected mode is often indicated by illuminated icons. Always check the chosen setting before initiating cleaning.
Using the Spray Trigger
The spray trigger on your Little Green Machine controls the release of cleaning solution onto the targeted surface. It’s crucial for effective stain removal and overall cleaning performance. Typically, a continuous press of the trigger dispenses the solution, while releasing it stops the flow.
For optimal results, hold the nozzle close to the stain and apply a moderate, even spray. Avoid over-saturating the area, as this can lead to prolonged drying times. Combine trigger operation with back-and-forth motions for thorough coverage.
Remember to periodically check the cleaning solution level and refill as needed. A consistent spray pattern ensures even distribution and maximum cleaning power.

Cleaning Different Surfaces
The Little Green Machine excels on carpets, upholstery, and stairs. Utilize appropriate tools and cleaning solutions for each surface type to achieve optimal results.
Carpets and Rugs
For carpets and rugs, begin by pre-treating stubborn stains with a suitable cleaning solution. Attach the HydroRinse tool for deep cleaning, utilizing a slow, overlapping motion to avoid over-saturation.
Ensure the spray trigger is used in short bursts, allowing the machine to extract the dirty water effectively. Focus on high-traffic areas and spots requiring extra attention.
After cleaning, allow the carpet to air dry completely. For delicate rugs, test the cleaning solution in an inconspicuous area first. Regular cleaning helps maintain carpet freshness and extends its lifespan, preventing dirt buildup and preserving color.
Remember to rinse thoroughly to remove any remaining cleaning solution residue.
Upholstery
Cleaning upholstery with the Little Green Machine requires a gentle approach. Utilize the upholstery tool, which is designed for delicate fabrics, and always test a hidden area first to ensure colorfastness.
Apply a light mist of cleaning solution, avoiding over-wetting the fabric. Work in sections, using overlapping strokes to lift dirt and stains. The suction power effectively removes moisture and debris, leaving upholstery refreshed.
For textured fabrics, brush gently to restore the pile. Allow the upholstery to air dry completely, avoiding direct sunlight. Regular cleaning prevents permanent staining and maintains the fabric’s appearance and longevity.
Remember to empty the dirty water tank frequently during the process.
Stairs
Cleaning stairs with the Little Green Machine can be efficiently achieved using the hose and appropriate tools. Begin at the top step and work downwards to prevent re-soiling already cleaned areas.
Employ the crevice tool for edges and tight spaces, and the upholstery tool for larger step surfaces. Apply cleaning solution sparingly, focusing on visible stains or high-traffic areas.
Utilize overlapping strokes, ensuring thorough cleaning without oversaturating the carpet or fabric. The powerful suction effectively removes dirt and moisture, leaving stairs fresh and revitalized.
Allow each step to dry completely before use to avoid slips. Regular stair cleaning maintains a safe and hygienic environment.

Maintenance and Troubleshooting
Regular maintenance ensures optimal performance. Emptying tanks, cleaning brushes, and addressing issues like paper jams or valve checks are crucial for longevity.
Emptying the Dirty Water Tank
Properly emptying the dirty water tank is essential after each use to maintain hygiene and prevent unpleasant odors. Locate the tank, typically at the base of the Little Green Machine, and carefully detach it following the manufacturer’s instructions.
Hold the tank firmly over a suitable drain or sink to avoid spills. Slowly release the cap or emptying mechanism, allowing the dirty water to drain completely. Inspect the tank for any remaining debris and rinse thoroughly with clean water before reattaching it to the machine.
Ensure the tank is securely locked into place to prevent leaks during operation. Regular emptying contributes to the machine’s efficiency and extends its lifespan.
Cleaning the Brushes and Tools
Maintaining clean brushes and tools is crucial for optimal cleaning performance and preventing cross-contamination. After each use, detach the brush head or tool from the Little Green Machine. Rinse it thoroughly under warm running water to remove any lingering dirt, debris, or cleaning solution residue.
For stubborn buildup, use a mild detergent and a soft brush to gently scrub the bristles. Ensure all soap is rinsed away completely. Allow the brush and tools to air dry completely before reattaching them to the machine.
Regular cleaning prevents clogging and ensures hygienic operation, prolonging the life of your Little Green Machine’s accessories.
Addressing Common Issues ─ Paper Jams
Although rare, paper jams can occasionally occur within the Little Green Machine, typically due to foreign objects being sucked into the hose or internal components. If a jam happens, immediately power off the machine and disconnect it from the power source. Locate the access point – often a removable panel or guide – as indicated in the machine’s diagrams.
Carefully lower any metal guides and gently remove any jammed material. Avoid using sharp objects that could damage the internal parts. Ensure all debris is cleared before reassembling the machine.
Restart the machine and test its functionality. If jams persist, consult the troubleshooting section or contact customer support.
Checking the Stop Valve

A properly functioning stop valve is crucial for maintaining consistent pressure and preventing leaks within the Little Green Machine. To check the valve, ensure the machine is powered off and disconnected from the electrical outlet. Locate the stop valve – its position is detailed in the machine’s schematic.
Visually inspect the valve for any signs of damage, such as cracks or obstructions. Confirm it’s fully open during operation and closes securely when the machine is off. If the valve appears faulty or doesn’t operate smoothly, it may require replacement.
Rectifying a defective stop valve is essential for safe and effective machine operation.
High Pressure Switch Continuity Check
The high-pressure switch is a vital safety component, preventing operation if water pressure is insufficient. To check its continuity, disconnect the Little Green Machine from power. Locate the switch – consult the machine’s diagram for its exact position. Using a multimeter set to continuity mode, test across the switch’s terminals.
A continuous circuit indicates a functioning switch. An open circuit signifies a faulty switch needing replacement. Ensure accurate readings by verifying the multimeter’s battery and probe connections.
A lack of continuity can prevent the machine from starting; addressing this issue is crucial for restoring functionality.
Main PCB Inspection
The Main Printed Circuit Board (PCB) controls all machine functions. Before inspection, disconnect the Little Green Machine from the power source! Carefully remove the PCB housing, noting the cable connections. Visually inspect the board for any signs of damage – burnt components, swollen capacitors, or broken traces.
Look for loose connections or corrosion. Gently reseat any loose connectors. If damage is evident, the PCB may require professional repair or replacement. Do not attempt repairs if you lack electronic repair expertise.
Document any findings with photos before reassembly, ensuring all connections are secure.

Advanced Features & Tips
Unlock deeper cleaning with specialized solutions and spot treatment techniques. Prolong your machine’s life through regular maintenance and proper storage practices.
Using Cleaning Solutions
Selecting the right cleaning solution is crucial for optimal results with your Little Green Machine. Bissell offers a range of formulas specifically designed for carpets, upholstery, and pet stains. Always refer to the solution’s label for dilution instructions, as using too much can leave residue.
For general cleaning, a mild carpet cleaning solution is recommended. For tougher stains, consider a specialized formula targeting pet odors or grease. Avoid using harsh chemicals like bleach or ammonia, as they can damage the machine and surfaces.
When mixing solutions, always add water to the tank first, then the appropriate amount of cleaning concentrate. This prevents excessive foaming. Regularly flush the machine with clean water after using cleaning solutions to maintain peak performance and prevent buildup.
Spot Cleaning Techniques
Effective spot cleaning with your Little Green Machine requires a systematic approach. Begin by blotting up any excess liquid with a clean cloth, working from the outside of the stain inwards to prevent spreading. Attach the appropriate tool – the Tough Stain Tool is ideal for concentrated areas, while the HydroRinse tool excels at rinsing.
Apply a small amount of cleaning solution directly to the stain, then activate the spray trigger in short bursts. Gently scrub the area with the tool, avoiding excessive saturation.
Utilize the suction to extract the dirty water and solution. Repeat the process if necessary, and finish with a clean water rinse to remove any remaining residue. Allow the area to air dry completely.
Extending the Life of Your Machine
Prolonging the lifespan of your Little Green Machine hinges on consistent maintenance. Always empty both the clean and dirty water tanks after each use to prevent mold and mildew growth. Regularly clean the brushes and tools, removing any accumulated debris or hair. Inspect the hose for cracks or blockages, and ensure it’s properly attached.
Avoid using harsh chemicals or abrasive cleaners, as these can damage internal components; Store the machine in a dry, cool place, away from direct sunlight.
Periodically check the stop valve and high-pressure switch for proper functionality, addressing any issues promptly to avoid more significant repairs. Following these steps will ensure years of reliable performance.
Safety Precautions
Always unplug the Little Green Machine before maintenance. Avoid using near flammable liquids. Ensure proper electrical grounding and follow all usage guidelines carefully.
Electrical Safety
Prioritize electrical safety when operating your Little Green Machine. Always ensure the power cord is undamaged and free from any visible wear or tear. Never operate the machine with a damaged cord or plug, as this presents a significant shock hazard.
Avoid using extension cords unless absolutely necessary, and if used, select one with an amperage rating equal to or greater than the machine’s rating.
Crucially, always unplug the Little Green Machine from the electrical outlet before performing any maintenance, cleaning, or troubleshooting procedures. Do not immerse the machine, cord, or plug in water or other liquids.
Keep the cord away from heated surfaces and sharp edges. If the machine exhibits any electrical malfunctions, discontinue use immediately and consult a qualified technician for repair.
Proper Usage Guidelines
To ensure effective cleaning and prolong the life of your Little Green Machine, adhere to these guidelines. Always pre-treat stubborn stains before using the machine. Avoid over-wetting surfaces; use short bursts of the spray trigger for controlled application.
Direct the cleaning solution onto the stain, not directly onto the machine. Utilize the appropriate tools for different surfaces – the tough stain tool for carpets and the upholstery tool for furniture.
Remember to overlap cleaning strokes for thorough coverage. After cleaning, allow the treated area to air dry completely. Avoid walking on wet carpets or sitting on damp upholstery. Regularly rinse the clean water tank to prevent buildup and maintain optimal performance.

Warranty Information
The Little Green Machine is covered by a one-year limited warranty against defects in materials and workmanship from the date of purchase.
This warranty does not cover misuse or damage; see the full details for claim procedures.
Coverage Details
The Little Green Machine’s warranty covers defects in materials and workmanship under normal household use for one year from the purchase date. This includes issues with the motor, pump, and electrical components. The warranty is valid only for the original purchaser and requires proof of purchase.
However, the warranty does not cover damage resulting from misuse, abuse, neglect, unauthorized repair, or commercial use. Normal wear and tear, such as brush wear, is also excluded. Accidental damage, or damage caused by liquids other than clean water, voids the warranty. Modifications to the machine will also invalidate the warranty coverage.
Any attempted repairs by unauthorized personnel will void the warranty.
Claim Process
To initiate a warranty claim for your Little Green Machine, contact Bissell Consumer Care via their website or phone number, providing your machine’s model number, serial number, and date of purchase. You’ll need to describe the defect in detail and provide proof of purchase.
Bissell may request photos or videos of the issue to aid in the assessment. If the claim is approved, Bissell will, at their discretion, repair or replace the defective machine or component. Return shipping costs may be the responsibility of the customer, depending on the nature of the defect.
Ensure the machine is securely packaged to prevent further damage during transit. Keep all documentation related to the claim for your records.