Article Plan: Instruction Manual for Old Singer Sewing Machines
This comprehensive guide details restoring and operating vintage Singer machines. It covers identification, dating, threading, troubleshooting, and maintenance. Downloadable manuals and resources are included, ensuring successful sewing experiences with these classic machines.
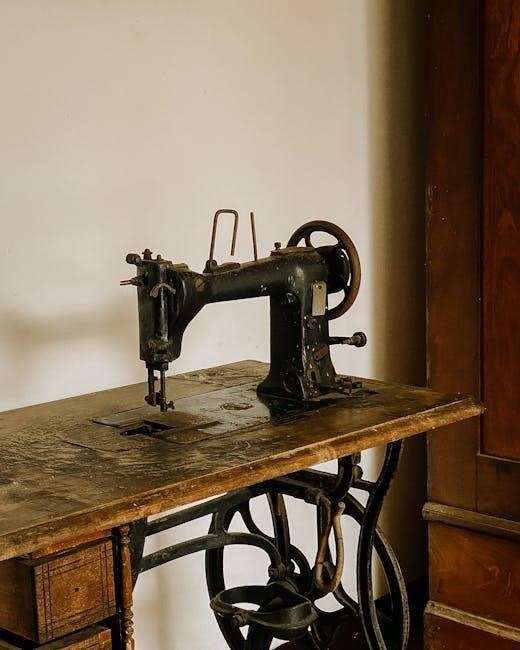
For over a century, Singer sewing machines have represented quality, durability, and innovation in the world of sewing. From the pioneering work of Isaac Singer in 1851, with his patent for the first practical sewing machine, the brand has become synonymous with home crafting and professional tailoring alike. These machines, often passed down through generations, possess a unique charm and capability that modern machines sometimes lack.
This manual is dedicated to the preservation and operation of these vintage treasures. Whether you’ve inherited a family heirloom or discovered a Singer at a flea market, understanding its mechanics and proper care is crucial. Many models, like the 15-91, 15K, and 15K1, continue to function beautifully with minimal maintenance. The Singer Heavy Duty 4452 exemplifies the brand’s ongoing commitment to robust construction and performance.
This guide will equip you with the knowledge to identify your machine, date its production, and navigate its unique features. We’ll explore threading techniques, common issues, and essential maintenance procedures, ensuring your vintage Singer continues to create for years to come. Embrace the legacy of Singer and rediscover the joy of sewing with a piece of history!
II. Identifying Your Singer Model
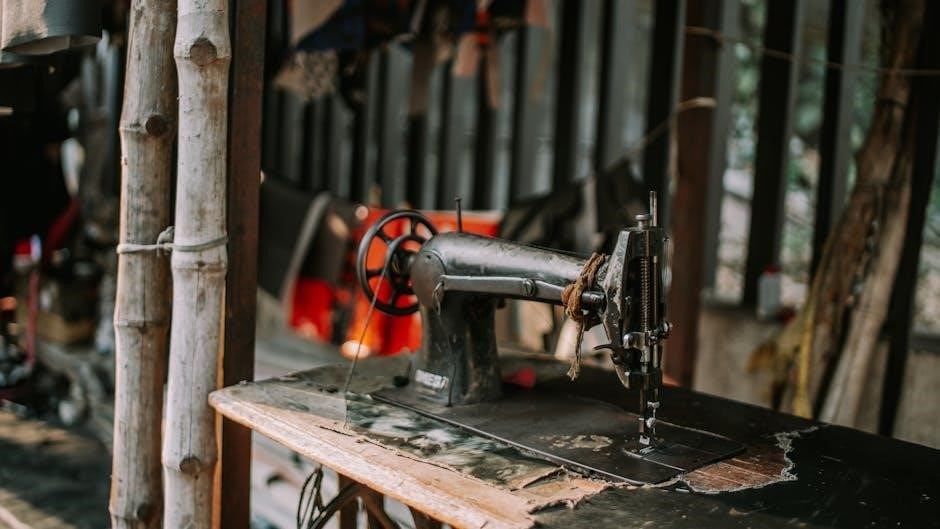
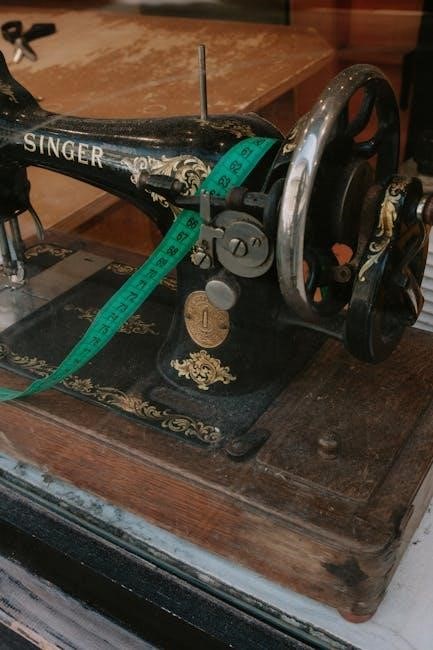
Accurately identifying your vintage Singer sewing machine is the first step towards proper care and maintenance. Singer produced a vast array of models over the years, each with unique characteristics and features. The model number is typically located on a plate affixed to the machine, often on the front, side, or beneath the bed. Common examples include the 15-91, 15K, and 15K1, each representing variations in design and functionality.
Look closely at the machine’s physical attributes. Consider the type of cabinet it came with (if any), the style of the handwheel, and the presence of any distinctive decals or markings. The shape of the machine’s body and the configuration of its components can also provide clues. Resources like online forums and dedicated Singer websites offer extensive databases and image galleries to aid in identification.
Once identified, you can access specific manuals and resources tailored to your model. Understanding your machine’s specific features will unlock its full potential and ensure you’re using the correct techniques and parts. Don’t hesitate to consult with experienced Singer enthusiasts for assistance – their knowledge is invaluable!
III. Dating Your Singer Sewing Machine
Determining the age of your vintage Singer isn’t always straightforward, but it’s crucial for understanding its history and potential value. The serial number, typically found on the same plate as the model number, is the primary key to dating. Singer’s serial number system evolved over time, and charts are readily available online to decode these numbers.
Early machines (pre-1900) often have serial numbers that correspond directly to the year of manufacture. Later models utilize more complex numbering schemes, requiring reference to specific dating charts. Be aware that serial number databases aren’t always 100% accurate, as records weren’t always meticulously kept.
Consider the machine’s features and design elements. Certain decals, treadle iron styles, and mechanical components were specific to certain eras. Comparing your machine to images of known dated models can provide additional clues. Resources like the Singer Manufacturing Company historical archives and online enthusiast communities can offer expert insights. Knowing the age helps appreciate the craftsmanship and historical significance of your Singer machine.
IV. Essential Parts of a Vintage Singer Machine
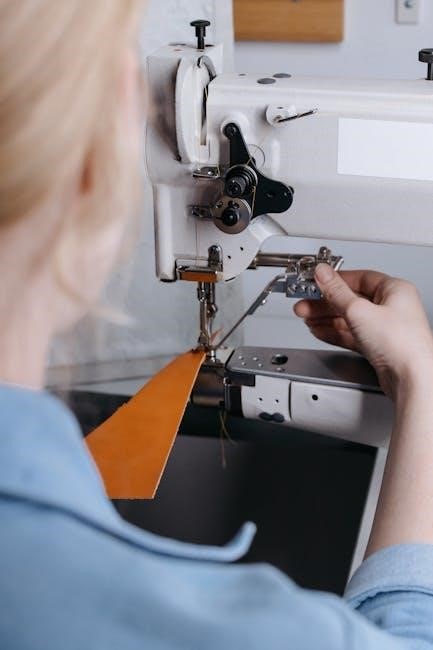
Understanding the components of your vintage Singer is fundamental to its operation and maintenance. The handwheel, prominently positioned on the right, controls the stitching process. The presser foot, attached via a shank, holds the fabric in place. The feed dogs, located beneath the presser foot, advance the fabric with each stitch.
The bobbin winder, essential for preparing the lower thread, is typically located on the upper right side. The tension discs regulate thread flow, impacting stitch quality. The needle clamp securely holds the needle, while the needle bar moves it up and down. The spool pin supports the thread spool.
The shuttle or bobbin case houses the lower thread, creating the interlocking stitch. The treadle (on treadle machines) or the motor powers the machine. Familiarizing yourself with these parts, and their functions, will empower you to confidently use and care for your classic Singer. Regular inspection of these components ensures smooth and reliable performance.
V. The Handwheel and its Function
The handwheel is arguably the most recognizable feature of a vintage Singer sewing machine. Located on the right side, it’s a large wheel directly connected to the machine’s internal mechanisms. Turning the handwheel, either by hand or via a treadle/motor, drives the needle up and down, creating stitches.
Clockwise rotation typically lowers the needle, while counter-clockwise raises it. Always turn the handwheel towards you to maintain control and prevent accidental injury. It’s crucial to never force the handwheel if resistance is felt, as this could indicate a problem within the machine.
The handwheel also allows for precise stitch placement and manual control, especially useful for intricate work or when starting/stopping. Experienced users often utilize the handwheel for delicate maneuvers. Understanding its function is paramount for operating your Singer effectively and safely. Regularly check for smooth rotation, as any stiffness could signal a need for lubrication or maintenance.
VI. The Bobbin Winder Mechanism
The bobbin winder is a vital component, ensuring a consistently filled bobbin for seamless sewing. Located typically at the top or side of the machine, it’s designed to wind thread evenly onto the bobbin. Engaging the bobbin winder usually involves moving a lever or knob, disengaging the needle mechanism.
Proper threading is crucial for successful bobbin winding; follow your machine’s specific diagram. The thread passes through tension discs before winding onto the bobbin, controlling the thread’s tightness. Monitor the winding process, ensuring even distribution and preventing thread from slipping.
Most Singer models feature an automatic stop mechanism, halting the winder when the bobbin is full. However, always observe to avoid overfilling. Regular cleaning of the bobbin winder area is essential to remove lint and debris, maintaining optimal performance. A malfunctioning bobbin winder can lead to uneven stitches or thread breakage, so prompt attention is key.
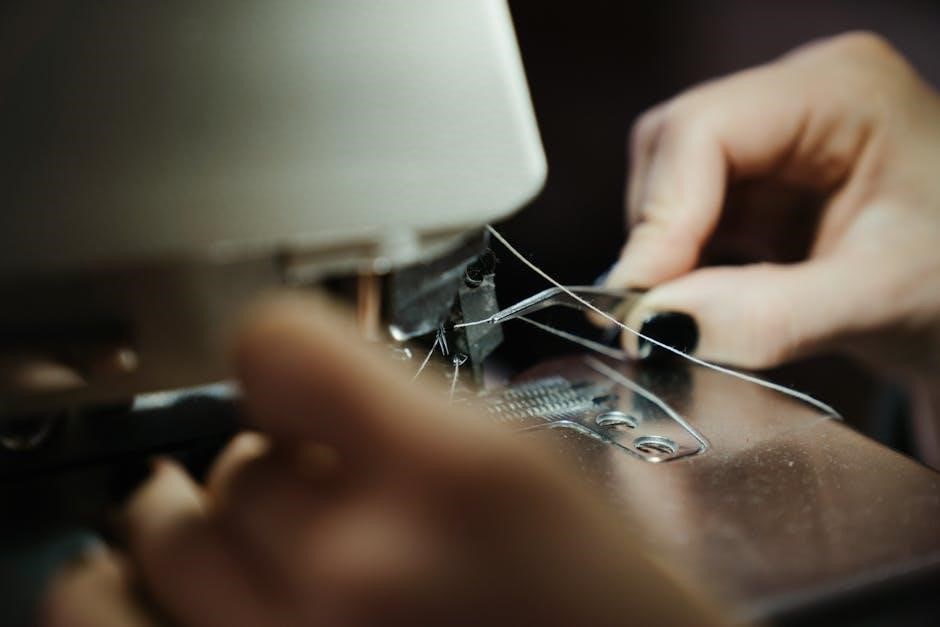
VII. Threading a Vintage Singer Machine
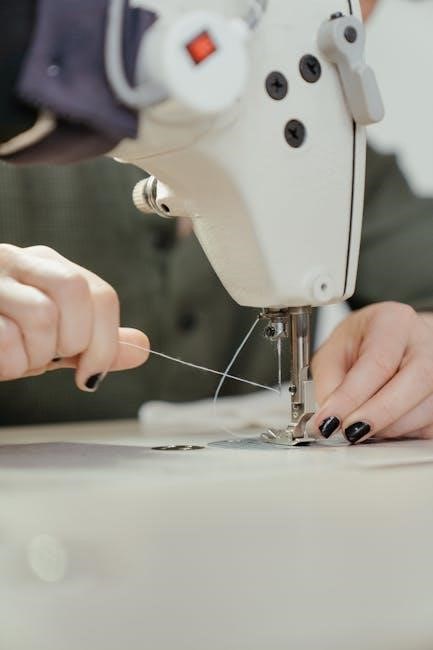
Threading a vintage Singer requires precision, following a specific path to ensure proper stitch formation. Begin by raising the presser foot, which opens the tension discs for easy thread passage. Consult your machine’s manual for the correct threading diagram, as variations exist between models.
Typically, the thread starts from the spool pin, then guides through several thread guides, and finally through the tension assembly. Ensure the thread is securely seated within the tension discs, as this controls stitch quality. Next, thread the take-up lever, a crucial step for consistent stitch length.
Finally, guide the thread through the needle clamp and thread the needle from front to back. Using the correct needle size and type is vital for optimal performance. Always test the threading with a scrap fabric before starting your project. Proper threading prevents issues like thread bunching and skipped stitches, guaranteeing a smooth sewing experience.
VIII. Upper Threading Guide
The upper threading guide on a vintage Singer is a series of components designed to control thread flow and tension. Starting at the spool pin, ensure the spool rotates freely without catching. The first guide typically directs the thread downwards towards the tension assembly.
The tension discs are critical; the thread must seat firmly between them. Incorrect tension leads to looping or tight stitches. Following the tension assembly, the thread usually passes through a drop feed guide, ensuring consistent thread delivery to the needle. Next is the take-up lever, which moves up and down with the machine, pulling thread from the spool.
Proper threading of the take-up lever is essential for stitch formation. Finally, the thread is guided through a final eyelet or thread guide before being threaded through the needle. Regularly check these guides for lint or debris, as obstructions can disrupt thread flow. A clean and properly threaded upper guide ensures smooth, even stitches.
IX. Lower Threading (Bobbin) Guide
The lower threading, or bobbin winding and insertion, is crucial for balanced stitch formation in vintage Singers. Begin by placing the bobbin onto the bobbin winder spindle, ensuring it clicks into place. Engage the bobbin winder by pushing the winder knob to the right. Guide the thread through the tension disc on the bobbin winder, applying gentle pressure.

Start the machine slowly, allowing the bobbin to fill evenly. Once full, the winder should automatically stop. Remove the bobbin and trim the thread. Next, locate the bobbin case – often accessed via a sliding plate. Insert the bobbin into the bobbin case, ensuring the thread unwinds in the correct direction, typically counter-clockwise.
Guide the thread through the tension spring on the bobbin case. Finally, re-insert the bobbin case into the machine and gently pull the thread up through the needle plate hole. Correct bobbin threading is vital for preventing nesting and ensuring a clean stitch.
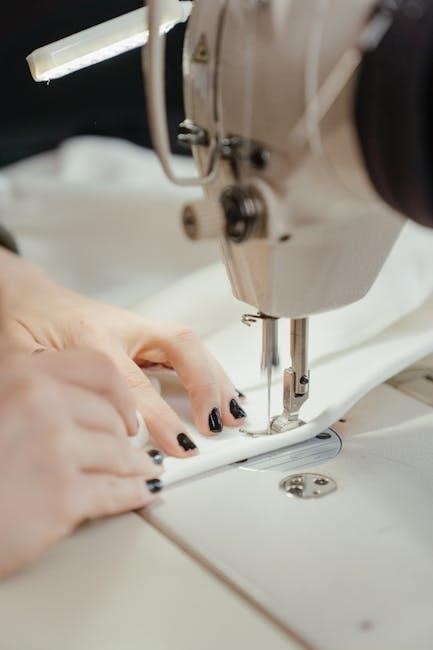
X. Basic Sewing Techniques
Mastering fundamental sewing techniques unlocks the full potential of your vintage Singer. Before starting, always test your stitch settings on scrap fabric. Begin with straight stitching, a cornerstone of sewing. Ensure even fabric feeding by gently guiding the material – never pulling or pushing. Maintain a consistent seam allowance using the markings on the needle plate as a guide.
Backstitching secures the beginning and end of seams, preventing unraveling. To backstitch, sew a few stitches forward, then engage the reverse lever and stitch backwards over the previous stitches. Repeat this process several times for a secure finish. Practice controlling the sewing speed; slower speeds are ideal for intricate work or turning corners.
Proper fabric handling is key. Avoid stretching knit fabrics and use a walking foot if available. Regularly check your stitch quality and adjust tension as needed. These basic techniques form the foundation for more complex sewing projects, allowing you to confidently create beautiful and durable items.
XI. Straight Stitching
Straight stitching is the most fundamental technique on any Singer sewing machine, old or new. Begin by selecting the straight stitch setting, typically indicated by a line or number on the stitch selector dial. Adjust the stitch length according to your fabric and project needs; shorter stitches are ideal for delicate fabrics, while longer stitches suit heavier materials. Thread the machine correctly (refer to sections VII & VIII) and wind a bobbin (section VI) before starting.
Place your fabric under the presser foot, aligning the edge with the desired seam allowance marking on the needle plate. Lower the presser foot to secure the fabric. Gently depress the foot pedal to begin sewing, guiding the fabric smoothly – avoid pulling or pushing. Maintain a consistent speed for even stitches. Observe the stitch formation; it should be uniform and consistent on both sides of the fabric.
For accurate seams, use a seam guide or the markings on the needle plate. Practice on scrap fabric to refine your technique before tackling your project. Remember to backstitch at the beginning and end of the seam to secure the stitches.
XII. Backstitching
Backstitching is crucial for securing seams on vintage Singer sewing machines, preventing unraveling and ensuring durability. After completing a line of straight stitching (section XI), engage the backstitch lever – typically located behind or to the side of the needle. This lever reverses the machine’s direction.
Gently sew backwards over the last few stitches, approximately ¼ to ½ inch, depending on the fabric weight and desired security. Release the backstitch lever to return to forward stitching. Continue sewing your seam, and repeat the backstitching process at the end. This creates a reinforced anchor for the thread.
Consistent backstitching is key; avoid excessively long or short reverse stitches. Some older Singer models may require manually turning the handwheel backwards to achieve backstitching. Always test your backstitching on scrap fabric to ensure it’s secure and doesn’t create puckering. Properly secured seams are essential for long-lasting, well-crafted projects, especially with vintage fabrics.
XIII. Common Problems and Troubleshooting
Vintage Singer sewing machines, while durable, can encounter issues. Thread bunching (section XIV) is frequent, often caused by improper threading, incorrect tension, or a dirty machine. Needle breakage (section XV) can stem from using the wrong needle type for the fabric, a bent needle, or forcing the fabric. Skipped stitches often indicate a dull or damaged needle, or incorrect threading.

If the machine sews slowly, it may need oiling (section XVII) or have lint buildup obstructing moving parts. A jammed bobbin usually requires careful removal of tangled thread and re-insertion of the bobbin. Always disconnect the power before attempting any repairs. Refer to the machine’s manual (available online – see section XX) for specific troubleshooting steps.
Regular cleaning and maintenance (section XVIII) prevent many problems. Don’t attempt complex repairs if you’re uncomfortable; seek a qualified sewing machine technician. Remember that patience and careful observation are key to diagnosing and resolving issues with these classic machines.
XIV. Thread Bunching Issues
Thread bunching is a common frustration with vintage Singers. The primary culprit is usually incorrect threading – meticulously re-thread both the upper (section VIII) and lower (section IX) threads, ensuring they follow the correct path. Incorrect tension is another frequent cause; adjust the tension dial incrementally, testing after each adjustment. Too much tension can cause bunching, as can too little.
A dirty machine accumulates lint and debris, hindering smooth operation. Clean the bobbin area (section IX) and feed dogs thoroughly; Using the wrong type of thread for your fabric can also contribute to bunching. Ensure you’re using a quality thread appropriate for the material. Check the needle; a bent or dull needle can disrupt the thread path.
Finally, verify the bobbin is wound correctly and inserted properly. If bunching persists, consult your machine’s manual (section XX) or seek assistance from a qualified technician. Remember to always test on scrap fabric before sewing your project.
XV. Needle Breakage Solutions
Needle breakage on vintage Singers is often preventable. The most common cause is using the incorrect needle type or size for the fabric. Always match the needle to the material’s weight and weave – heavier fabrics require stronger needles. Ensure the needle is fully inserted and correctly positioned; a loose or improperly seated needle is vulnerable.
Forcing the fabric through the machine is a major contributor to breakage. Let the machine feed the fabric naturally; avoid pulling or pushing. Check the needle plate; a damaged or misaligned plate can cause the needle to strike it. Inspect the presser foot; ensure it’s applying even pressure. A bent needle, even slightly, should be replaced immediately.
Regularly oiling your machine (section XVII) reduces friction and stress on the needle. Using SINGER branded needles (as recommended in manuals) ensures compatibility and quality. If breakage continues, examine the timing of your machine; this may require professional adjustment. Always wear safety glasses when sewing.
XVI. Maintaining Your Vintage Singer
Consistent maintenance is crucial for preserving your vintage Singer’s functionality and longevity. Regular cleaning, detailed in section XVIII, removes lint and debris that can impede performance. Oiling and lubrication (section XVII) are paramount; use sewing machine oil specifically, applying it to all moving parts – avoid over-oiling. Inspect belts and gears for wear and tear, replacing them as needed.
Periodically check the handwheel and bobbin winder (sections V & VI) for smooth operation. Tighten any loose screws or bolts, but avoid over-tightening. Dust the exterior with a soft cloth to prevent rust and corrosion. Store your machine covered when not in use, protecting it from dust and humidity.
Refer to your specific model’s manual (available for download – see section XX) for tailored maintenance instructions. Addressing minor issues promptly prevents them from escalating into major repairs. A well-maintained Singer will provide decades of reliable service, embodying the quality and craftsmanship of a bygone era.
XVII. Oiling and Lubrication
Proper lubrication is vital for a smoothly functioning vintage Singer. Use only sewing machine oil – never household oils, greases, or lubricants – as these can gum up the delicate mechanisms. Apply oil sparingly to all moving parts, including the bobbin winder, shuttle hook, and any gears visible during operation. Focus on points where metal rubs against metal.
Access points for oiling are often small holes or caps; consult your model’s manual (section XX) for specific locations. After oiling, operate the handwheel (section V) several times to distribute the oil evenly. Wipe away any excess oil to prevent staining fabric. Avoid oiling the motor directly unless specifically instructed in the manual.
Regular oiling – typically every few hours of use, or at least monthly – prevents friction and wear. Insufficient lubrication leads to increased resistance, noise, and potential damage. Singer recommends branded needles (section IX) alongside proper oiling for optimal performance and longevity of your treasured machine.
XVIII. Cleaning Procedures
Regular cleaning prevents lint and dust buildup, ensuring smooth operation of your vintage Singer. Begin by disconnecting the power source (if applicable) and removing the bobbin case (section IX). Use a soft brush – an old toothbrush works well – to gently remove lint from the bobbin area, feed dogs, and around the needle plate. Avoid using compressed air, as it can force debris deeper into the machine.
For stubborn lint, a small piece of lint-free cloth dampened with sewing machine oil can be helpful. Wipe down the exterior of the machine with a soft, dry cloth. Avoid abrasive cleaners or solvents, which can damage the finish. Periodically, remove the needle plate and clean underneath it, paying attention to the feed dog mechanism.
A clean machine operates more efficiently and produces better stitch quality. Combine cleaning with regular oiling (section XVII) for optimal performance and longevity. Remember to consult your specific model’s manual (section XX) for any unique cleaning instructions or recommendations from Singer regarding your machine’s care.
XIX; Finding Replacement Parts
Sourcing replacement parts for vintage Singers requires patience and research. Many online retailers specialize in vintage sewing machine components, offering a wide selection of needles, bobbins, belts, and more. eBay is also a valuable resource, often featuring original Singer parts from individual sellers.
When ordering parts, accurately identify your machine’s model number (section II) to ensure compatibility. Serial numbers can further refine the search, especially for older models. Websites dedicated to vintage Singer machines often have parts diagrams and forums where owners share information and sources.
Consider joining online communities and Facebook groups focused on vintage sewing machines; members frequently trade or sell parts. If you’re unsure about a part’s compatibility, consult a qualified sewing machine technician. Genuine Singer parts are ideal, but high-quality aftermarket alternatives are often available. Preserving these machines relies on continued access to replacement components.
XX. Resources for Vintage Singer Owners
Numerous resources support owners of vintage Singer sewing machines. Singer’s official website provides downloadable manuals for many models, including those referenced earlier, offering a starting point for troubleshooting and maintenance. ISMACS (International Sewing Machine Collectors’ Association) is a premier organization, offering extensive archives, forums, and expert advice.
Online forums dedicated to vintage sewing machines, like those found on Reddit and dedicated websites, foster a collaborative community where owners share knowledge, tips, and parts sources. YouTube hosts a wealth of instructional videos demonstrating repairs, threading techniques, and basic sewing skills specific to vintage Singers.
Local sewing machine repair shops often have technicians experienced with older machines. Consider investing in a good repair manual specific to your model. These resources empower owners to maintain, repair, and enjoy their classic Singer machines for years to come, ensuring their legacy continues.