Goodman GSX16 Installation Manual PDF: A Comprehensive Plan
Goodman GSX16 installation relies heavily on readily available PDF manuals, including technical and installation guides like GSX160601. These resources, often referencing Service Manual RS6200006, are crucial for qualified HVAC technicians.
The Goodman GSX16 series represents a significant offering in high-efficiency condensing units, designed for residential air conditioning applications. These units, frequently detailed in accompanying installation manuals – notably the GSX160601 Goodman GSX16 Installation Manual – provide a balance of performance and affordability. Understanding the series begins with recognizing its core function: delivering reliable cooling while optimizing energy consumption.
These 16 SEER units are often paired with various indoor systems, requiring technicians to consult both the GSX16 documentation and the specific instructions for the accompanying furnace or air handler. The Goodman GSX16 Technical Manual and related guides emphasize the importance of qualified installation, as improper setup can impact efficiency and longevity.
Furthermore, resources like the Goodman Mfg Air Conditioner GSX16 User Guide, while aimed at end-users, highlight the need for professional servicing and adherence to safety protocols. Crucially, all installation, operation, and troubleshooting information is comprehensively covered within Service Manual RS6200006, making it a central reference point.

Understanding the GSX16 Technical Specifications
Delving into the GSX16’s technical specifications is paramount for correct installation, as detailed within the Goodman GSX16 Installation Manual (GSX160601). These units boast a 16 SEER rating, indicating high energy efficiency. A critical aspect is the factory refrigerant charge, pre-set for 15 feet of refrigerant line length; exceeding this requires supplemental charging, guided by the manual’s procedures.
Electrical data, prominently displayed on the unit’s nameplate (S&R plate), must be verified before wiring. The Goodman GSX16 Technical Manual stresses the importance of matching voltage and amperage requirements. Suction line connections often necessitate the use of adapters (typically 1” to 1 ¼”), a detail consistently highlighted in installation guides.
Understanding the unit’s capacity, dimensions, and weight – all found within the documentation – is vital for proper placement and mounting. Service Manual RS6200006 provides in-depth electrical schematics and troubleshooting charts, essential for technicians. Proper specification adherence ensures optimal performance and warranty validity.
Locating the Official Goodman GSX16 Installation Manual (PDF)
Finding the official Goodman GSX16 Installation Manual in PDF format is crucial for a successful and compliant installation. Several online resources host these documents. A primary source is the Goodman Manufacturing website itself, often requiring a dealer login for access to comprehensive technical literature, including GSX160601.
However, publicly accessible PDFs are frequently available through HVAC-specific forums, contractor websites, and document-sharing platforms. Searching for “Goodman GSX16 Technical Manual PDF” or “GSX16 Installation Manual” yields numerous results. Be cautious of unofficial sources and always verify the document’s revision date and completeness.
Service Manual RS6200006, frequently referenced within the installation guides, may be downloaded separately. Ensure the downloaded PDF is the correct version for your specific GSX16 model, as specifications can vary. Always prioritize official Goodman documentation for accuracy and warranty compliance.
Safety Precautions for GSX16 Installation
GSX16 installation demands strict adherence to safety protocols, as emphasized in the official Goodman manuals. These systems contain high-voltage components and pressurized refrigerant, posing significant risks if handled improperly. The manuals explicitly state they are for qualified, professionally trained HVAC technicians only, underlining the importance of expertise.
Prior to commencing work, disconnect all electrical power to the system; Wear appropriate personal protective equipment (PPE), including safety glasses, gloves, and work boots. Exercise extreme caution when handling refrigerant, avoiding contact with skin and eyes. Proper ventilation is essential during refrigerant charging and recovery procedures.
Always follow local and national electrical codes. Incorrect wiring can lead to fire hazards or equipment damage. Refer to Service Manual RS6200006 and the unit’s data plate for specific electrical requirements. Never attempt to modify or bypass safety devices. Prioritize a safe working environment throughout the entire installation process.
Tools and Materials Required for Installation
A successful GSX16 installation necessitates a comprehensive toolkit and specific materials. Standard HVAC tools are essential, including a refrigerant recovery machine, vacuum pump, manifold gauge set, and tubing cutter. Electrical tools like wire strippers, crimpers, and a multimeter are also crucial for safe and accurate wiring connections.

Beyond basic tools, the Goodman GSX16 installation often requires specialized adapters – specifically, adapters for suction line connections, as noted in several manuals. Refrigerant linesets, insulation, and brazing materials are also necessary. Depending on the installation, additional materials like mounting brackets, electrical conduit, and weatherproof connectors may be needed.
Always consult the installation manual and the unit’s data plate to confirm specific requirements. The installer is responsible for supplying these necessary components. Referencing Service Manual RS6200006 can clarify any material ambiguities and ensure a compliant installation.
Pre-Installation Checklist & Site Preparation
Prior to commencing GSX16 installation, a thorough pre-installation checklist is vital. Verify the indoor unit – furnace or air handler – is compatible and prepared for connection, referencing its specific installation instructions for wiring details. Ensure adequate space around the condensing unit for proper airflow and servicing, adhering to Goodman’s mounting guidelines.
Site preparation includes confirming a stable and level mounting surface for the outdoor unit. Electrical supply must be verified to match the unit’s specifications, as indicated on the S&R plate. Confirm the availability of the correct refrigerant lineset and ensure it’s properly sized for the GSX16’s capacity.
Review the Goodman GSX16 Installation Manual PDF and Service Manual RS6200006 to identify any specific site requirements or potential obstructions. A well-prepared site streamlines the installation process and ensures optimal system performance.
Electrical Connections & Wiring Diagrams
Electrical connections for the Goodman GSX16 are critical and must be performed by a qualified technician. Always disconnect power before beginning any electrical work. Refer to the unit’s S&R plate for precise electrical data and wiring diagrams, as these can vary based on the specific model.
The GSX16 Installation Manual PDF details the proper wiring configuration for both the condensing unit and the indoor unit (furnace/air handler). Pay close attention to grounding requirements to ensure safety and prevent electrical hazards. Correctly identify and connect the line voltage, low voltage control wires, and any necessary safety devices.
Service Manual RS6200006 provides supplemental wiring information and troubleshooting guidance. Double-check all connections for tightness and proper insulation before restoring power. Improper wiring can lead to system malfunction or damage.
Refrigerant Charging Procedures (15ft Charge)
The Goodman GSX16 units are factory charged for 15 feet of refrigerant piping. Any additional length requires careful calculation and the addition of refrigerant, following procedures outlined in the GSX16 Installation Manual PDF. Technicians must use the correct type of refrigerant specified by Goodman.
Proper refrigerant charge is vital for optimal system performance and efficiency. Overcharging or undercharging can lead to reduced cooling capacity, compressor damage, and increased energy consumption. The manual details superheat and subcooling target values for accurate charging.
Service Manual RS6200006 offers detailed guidance on refrigerant charging techniques and troubleshooting related to refrigerant issues. Always use calibrated gauges and follow established industry best practices. Leak testing is crucial after charging to ensure system integrity.
Suction Line Connections & Adapter Requirements
Goodman GSX16 installations frequently necessitate the use of adapters for proper suction line connections. The GSX16 Installation Manual PDF explicitly states that the installer is responsible for supplying these adapters, typically transitioning from ¾” to 1” or other required sizes.
Correct suction line sizing is critical for efficient refrigerant flow and preventing compressor issues. Improperly sized lines can lead to reduced cooling capacity and potential system failure. The manual provides guidance on determining the appropriate line size based on the length of the refrigerant run.
Service Manual RS6200006 details specific torque specifications for suction line connections, ensuring a leak-free seal. Always use approved brazing materials and techniques. Thoroughly inspect all connections after installation and before charging the system.

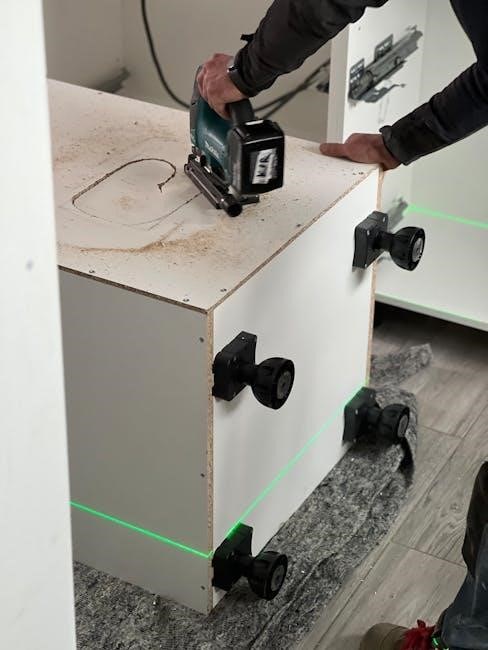
Condensing Unit Placement & Mounting Guidelines
The Goodman GSX16 Installation Manual PDF emphasizes careful consideration of condensing unit placement. Adequate clearance around the unit is vital for proper airflow, ensuring efficient operation and preventing overheating. Maintain sufficient space for service access, as detailed in the documentation.
Mounting the unit on a level surface is crucial to minimize vibration and noise. Use appropriate mounting pads to absorb vibrations and protect the surrounding structure. The manual specifies recommended mounting heights and suggests avoiding locations exposed to direct sunlight or extreme weather conditions;

Service Manual RS6200006 provides detailed diagrams illustrating proper mounting techniques and clearance requirements. Ensure the mounting surface can support the unit’s weight when fully charged with refrigerant. Adhering to these guidelines maximizes system lifespan and performance.
Indoor Unit Compatibility (Furnace/Air Handler)
The Goodman GSX16 Installation Manual PDF stresses the importance of matching the GSX16 condensing unit with compatible indoor units – furnaces or air handlers. Referencing the installation instructions accompanying the indoor unit is paramount for correct wiring connections and configuration. The manual highlights that specific wiring configurations vary depending on the chosen indoor unit model.
Compatibility charts within the documentation detail approved combinations, ensuring optimal system performance and efficiency. Utilizing an incompatible indoor unit can lead to reduced cooling capacity, system malfunctions, and potential warranty issues.
Service Manual RS6200006 offers further guidance on system integration, including airflow considerations and control system compatibility. Always verify the indoor unit’s electrical data against the GSX16’s specifications, as noted on the unit’s nameplate, before proceeding with installation.
Startup and System Testing Procedures
Following a Goodman GSX16 installation, the Installation Manual PDF outlines a precise startup sequence. Initially, set the room thermostat to COOL mode, with the fan switch in the AUTO position. Subsequently, lower the temperature setting significantly below the current room temperature to initiate the cooling cycle.
Allow the system sufficient time to stabilize – the manual doesn’t specify an exact duration, but emphasizes observing for consistent operation. Technicians should verify proper airflow across both the indoor and outdoor coils.

Comprehensive system testing includes checking refrigerant pressures, superheat, and subcooling to ensure optimal charge levels. Electrical connections must be re-verified for tightness and correct voltage. Service Manual RS6200006 provides detailed troubleshooting steps if the system fails to operate correctly during startup or testing.
Troubleshooting Common Installation Issues

The Goodman GSX16 Installation Manual PDF and, crucially, Service Manual RS6200006, address frequent installation challenges. A common issue involves incorrect suction line connections, often requiring ⅞” to 1 ½” adapters – these are not supplied and must be sourced by the installer.
Refrigerant charge discrepancies are also prevalent. The unit is pre-charged for 15 feet of liquid line; longer runs necessitate additional refrigerant, calculated according to the manual’s guidelines. Electrical faults, such as incorrect wiring or voltage issues, can prevent startup.
If the system doesn’t cool, verify thermostat settings, airflow, and refrigerant charge. The manual emphasizes checking the unit’s Samp;R plate for accurate electrical data. Technicians should systematically review wiring diagrams and consult the troubleshooting sections within RS6200006 for detailed diagnostic procedures.
Referencing Service Manual RS6200006
Service Manual RS6200006 is repeatedly cited within the Goodman GSX16 Installation Manual PDF as the definitive resource for comprehensive guidance. It extends beyond basic installation, covering operation and detailed troubleshooting procedures. Technicians are consistently directed to this manual for resolving complex issues encountered during setup and maintenance.
The manual provides in-depth explanations of system components, electrical schematics, and refrigerant charging specifics. It details diagnostic flowcharts to pinpoint the source of malfunctions, offering step-by-step instructions for repair. RS6200006 also clarifies safety precautions and provides essential technical data not found in the quick-start installation guides.
Essentially, while the installation manual offers a streamlined process, RS6200006 serves as the complete technical reference, ensuring a thorough understanding of the GSX16 system and facilitating effective, long-term service.

GSX16 System Charge and Temperature Control
Proper refrigerant charge is critical for GSX16 performance, and the Goodman GSX16 Installation Manual PDF highlights this. Units are factory-charged for 15 feet of refrigerant line, necessitating adjustments for longer runs. Technicians must carefully calculate and add refrigerant as needed, referencing the unit’s nameplate for specific data.
Temperature control verification is a key step in the startup procedure. The manual instructs setting the thermostat to COOL, with the fan on AUTO, and lowering the temperature significantly below the room temperature. This allows the system to stabilize and confirms proper cooling operation.
Monitoring superheat and subcooling levels, as detailed in supporting documentation like Service Manual RS6200006, is essential for fine-tuning the charge. Accurate temperature readings ensure optimal efficiency and prevent system damage, guaranteeing reliable comfort.
Warranty Information and Registration
The Goodman GSX16 Installation Manual PDF, while primarily focused on installation, directs users to separate warranty documentation for detailed coverage information. Understanding the warranty terms is crucial for both installers and homeowners, outlining responsibilities and limitations.
Proper registration of the GSX16 unit is essential to activate the full warranty benefits. The manual typically provides instructions or directs users to the Goodman website for online registration. Timely registration ensures seamless claims processing should any issues arise.
Keep the installation date and model/serial number readily available, as these are required for warranty claims. Retaining proof of purchase and installation records is also highly recommended. Referencing Service Manual RS6200006 may offer additional warranty-related guidance.