Orbit 4 Station Easy Dial Manual: A Comprehensive Plan
This manual details installation, programming, and troubleshooting for the Orbit 4 Station Easy Dial controller, ensuring efficient irrigation system management and optimal performance.
Welcome to the Orbit 4 Station Easy Dial Controller! This user-friendly controller simplifies automated irrigation for residential lawns and gardens. Designed for ease of use, it allows precise scheduling of watering cycles for up to four independent zones. This manual provides comprehensive instructions for installation, programming, and maintenance, ensuring optimal performance and water conservation. Whether you’re a seasoned landscaper or a first-time user, this guide will help you harness the full potential of your irrigation system. Familiarize yourself with its features to achieve a lush, healthy landscape while minimizing water waste.
Understanding the Controller’s Features
The Orbit 4 Station Easy Dial boasts several key features for efficient irrigation. Its intuitive dial interface allows for quick and easy programming of watering schedules. Independent zone control enables customized watering for different landscape areas. Cycle and Soak functionality promotes deeper root growth and reduces runoff. A manual override option provides immediate watering control when needed. Seasonal Adjustment settings optimize water usage based on changing weather conditions. This controller supports flexible scheduling, accommodating diverse plant needs and promoting water conservation. These features combine to deliver a reliable and user-friendly irrigation experience.
Controller Components & Identification
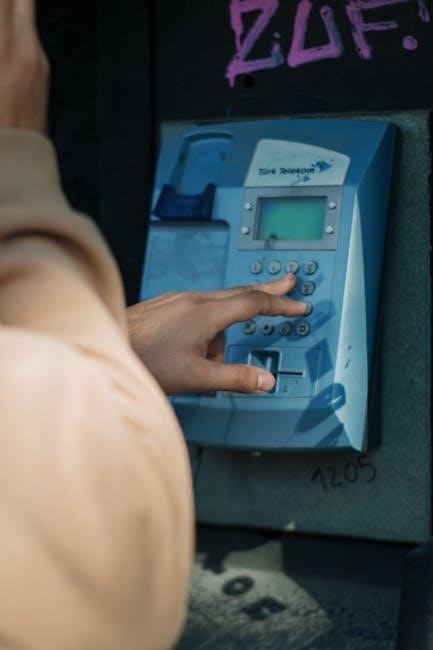
The Orbit 4 Station Easy Dial controller comprises several identifiable components. The front panel features the Easy Dial selector for programming, a digital display for time and schedule viewing, and zone indicator lights. The internal components include a circuit board housing the programming logic, valve connection terminals for solenoid wiring, and a battery compartment for backup power. The controller’s enclosure protects these components from the elements. Identifying these parts is crucial for installation, troubleshooting, and maintenance. Familiarize yourself with each component to ensure proper operation and longevity of your irrigation system.
Initial Setup and Installation
Before operating your Orbit 4 Station Easy Dial controller, proper setup is essential. Begin by unpacking all components and verifying their condition. Select a suitable mounting location, protected from direct weather exposure. Ensure proximity to a power outlet and the valve solenoids. Installation involves securely mounting the controller to a wall or surface, followed by connecting the valve solenoid wires to the designated terminals. Finally, connect the power supply. Careful adherence to these steps guarantees a stable foundation for your automated irrigation system, preventing future operational issues.
Mounting the Controller

Securely mounting the Orbit 4 Station Easy Dial controller is crucial for longevity and reliable operation. Choose a location sheltered from direct sunlight, rain, and extreme temperatures. Utilize the provided mounting screws to attach the controller to a sturdy wall or surface. Ensure the mounting surface can support the controller’s weight. Maintain easy access for programming and maintenance. Avoid mounting near metal objects that could interfere with the signal. Proper mounting protects the internal components from environmental damage, ensuring years of dependable performance.
Wiring the Valve Solenoids
Correctly wiring the valve solenoids to the Orbit 4 Station Easy Dial controller is essential for proper zone operation. First, disconnect power to the controller. Connect each solenoid wire to the corresponding terminal, matching zone numbers. Ensure wires are securely fastened to prevent loose connections. Use appropriately sized wire connectors for a reliable connection. Double-check all wiring before restoring power. Incorrect wiring can damage the controller or solenoids. Refer to the wiring diagram included in this manual for accurate connections and safe installation practices.
Programming the Controller: Basic Operation
The Orbit 4 Station Easy Dial controller offers intuitive programming for efficient watering schedules. Begin by turning the dial to the “Program” setting. Use the dial to navigate through the zones, assigning each a number. Next, set the run time for each zone using the minutes dial, adjusting based on plant needs and soil type. Select the start time and frequency of watering, considering weather patterns. Save your program by returning the dial to “Auto.” Regularly review and adjust the schedule for optimal water conservation and plant health.
Setting the Current Time and Date
Accurate time and date settings are crucial for proper controller operation. To set the current time, turn the dial to the “Set Clock” position. Utilize the dial to adjust the hour, then press the “Select” button to move to the minutes. Repeat the process for setting the date – month and day. Confirm your selections by returning the dial to the “Auto” position. Ensure the correct AM/PM setting is chosen. Regularly verify the time, especially after power outages or daylight saving time changes, for consistent scheduling.

Assigning Zones and Run Times
Proper zone assignment and run time configuration are vital for efficient watering. Begin by turning the dial to the “Program” position. Select the zone you wish to program (1-4); Use the dial to set the desired run time for that zone, in minutes. Consider plant type and sprinkler head output when determining run times. Repeat this process for each zone, customizing the watering schedule to meet specific landscape needs. Remember to press “Select” after each adjustment to save your settings.
Advanced Programming Options
The Orbit 4 Station controller offers features beyond basic scheduling for optimized water management. Explore “Cycle and Soak” functionality to prevent runoff on slopes or compacted soil, dividing longer run times into shorter cycles. Utilize “Seasonal Adjustment” to globally increase or decrease run times based on weather patterns, conserving water during cooler months. These advanced settings, accessible through the “Program” mode, allow for a tailored irrigation plan. Careful consideration of these options ensures efficient and responsible water usage throughout the year.
Cycle and Soak Functionality
The Cycle and Soak feature is ideal for challenging landscapes prone to runoff. This setting divides a programmed watering duration into multiple shorter cycles, interspersed with a “soak” period. This allows water to fully absorb into the soil before the next cycle begins, minimizing waste and maximizing effectiveness. Configure the soak duration based on soil type – clay requires longer soak times than sandy soil. Access this function within the zone programming menu, adjusting settings to suit specific landscape needs for optimal hydration and conservation.
Seasonal Adjustment Settings
Orbit’s Seasonal Adjustment feature allows you to globally increase or decrease watering run times, adapting to changing weather patterns throughout the year. This eliminates the need to manually adjust each zone individually. During hotter, drier months, increase the percentage to deliver more water; conversely, reduce it during cooler, wetter periods to conserve water. Access this setting through the main program menu, inputting a percentage adjustment (-90% to +100%). Regularly review and modify this setting for efficient water usage and a healthy landscape;
Manual Operation and Override Functions
The Orbit controller offers both manual zone operation and temporary override capabilities, providing immediate control over your irrigation system. Manual operation allows you to activate individual zones directly, bypassing the programmed schedule – ideal for testing or spot-watering. Override functions temporarily suspend the scheduled program for a selected zone, running it for a specified duration. These features are accessible via dedicated buttons on the controller’s faceplate, offering convenient, on-demand adjustments. Remember to return to scheduled programming after utilizing these functions for consistent irrigation.
Running Zones Manually
To run a zone manually with the Orbit 4 Station Easy Dial controller, simply rotate the dial to the “Manual” setting. Then, select the desired zone number using the corresponding buttons. Press the “Run” or “Start” button to initiate watering for that specific zone. The zone will operate continuously until you manually stop it by rotating the dial to another setting, like “Off” or another programmed schedule. This is useful for quick tests or addressing localized dry spots, offering immediate irrigation control without altering your programmed schedule.
Temporary Override Settings
The Orbit 4 Station Easy Dial controller allows for temporary overrides of your programmed schedule. To utilize this feature, select the zone you wish to adjust and enter the override duration using the appropriate buttons. This overrides the scheduled run time for that zone only, for the specified period. The controller will revert to the normal programmed schedule after the override duration expires. This is ideal for accommodating unexpected weather changes or temporary landscaping needs, providing flexible irrigation adjustments without permanent schedule alterations.

Troubleshooting Common Issues
Encountering problems with your Orbit 4 Station Easy Dial controller? Common issues include a lack of power – verify the transformer is correctly plugged in and functioning. If a valve isn’t activating, check the solenoid wiring for loose connections or damage. Ensure the zone is properly programmed and hasn’t been accidentally skipped. Inspect the valve itself for obstructions. Regularly reviewing these basic checks can resolve many common operational hiccups, restoring your irrigation system to optimal performance and preventing costly repairs.
No Power to the Controller
If your Orbit 4 Station Easy Dial controller displays no power, begin by verifying the transformer is securely plugged into a working electrical outlet. Test the outlet with another device to confirm it’s functioning correctly. Inspect the transformer itself for any visible damage. Check the low-voltage wiring connections at both the controller and the transformer, ensuring they are tight and corrosion-free. A blown fuse within the controller is also a possibility; consult the manual for fuse replacement instructions.
Valve Not Activating
When a valve fails to activate with the Orbit 4 Station Easy Dial controller, first manually test the valve solenoid by directly applying power (following safety precautions!). Verify the corresponding zone is properly programmed with sufficient run time in the controller’s schedule. Inspect the valve wiring for breaks or loose connections, ensuring secure attachment at both the valve and controller terminals. Check for obstructions within the valve itself, like debris. A faulty solenoid valve may require replacement; confirm compatibility before installing a new one.
Dealing with Login and Account Access Problems (Related to Online Account Management)
If encountering login issues with your Orbit account, initiate the “Forgot Password” process. Ensure the email address used matches the one registered with Orbit; If access remains blocked, verify your phone number is current, as verification codes are often sent via SMS. Contact Orbit support directly if the registered phone number is outdated and inaccessible. Be cautious of phishing attempts; only use the official Orbit website for account recovery. Regularly review account activity for suspicious logins and enable two-factor authentication if available.

Password Reset Procedures

To reset your Orbit account password, navigate to the official Orbit website’s login page and click the “Forgot Password” link. Enter the email address associated with your account. A password reset link will be sent to that address. Click the link and follow the instructions to create a new, strong password. If you don’t receive the email, check your spam or junk folder. Ensure the new password meets Orbit’s complexity requirements. For security, avoid reusing passwords from other accounts. Contact Orbit support if issues persist.
Updating Contact Information (Phone Number/Email)

To update your contact details, log in to your Orbit account through their official website. Navigate to the “Account Settings” or “Profile” section. Locate the fields for your phone number and email address. Edit the information as needed, ensuring accuracy. Save the changes. If you encounter issues accessing these settings, or if the system doesn’t accept your updates, contact Orbit’s customer support for assistance. Keeping your contact information current is crucial for account recovery and important notifications.
Security Concerns and Account Protection
Protecting your Orbit account is paramount. Be vigilant for suspicious login activity, such as unrecognized locations or devices. Regularly review your account history for any unauthorized changes. Utilize a strong, unique password and avoid reusing passwords across multiple platforms. If available, enable two-factor authentication for an added layer of security. Be cautious of phishing attempts and never share your login credentials via email or untrusted links. Report any suspected security breaches to Orbit’s support team immediately to mitigate potential risks.
Recognizing Suspicious Login Activity
Identifying unusual account access is crucial for security. Look for logins from unfamiliar IP addresses or geographic locations. Pay attention to logins occurring at odd hours or from devices you don’t recognize, like a Firefox browser you never use. Be alert for password reset requests you didn’t initiate. If you receive notifications about account changes you didn’t make, investigate immediately. Unusual activity could indicate unauthorized access, potentially leading to compromised control of your irrigation system and personal data. Report any concerns promptly.
Two-Factor Authentication Options (If Available)
Enhance your account security with two-factor authentication (2FA), if Orbit offers it. 2FA adds an extra layer of protection beyond your password. Typically, this involves receiving a unique code via text message or an authenticator app on your smartphone during login. Even if someone obtains your password, they cannot access your account without this second verification factor. Regularly review Orbit’s security settings to determine if 2FA is available and enable it immediately. This significantly reduces the risk of unauthorized access and protects your irrigation system.
Understanding Error Codes and Diagnostics

The Orbit 4 Station Easy Dial controller utilizes error codes to signal malfunctions. These codes, displayed on the unit’s screen, pinpoint issues like wiring faults, solenoid problems, or sensor failures. Consult the manual’s dedicated error code section for a comprehensive list and their corresponding solutions. Diagnostic tests, if available, can further isolate the problem. Regularly checking for error codes proactively identifies potential issues before they escalate. Accurate interpretation of these signals minimizes downtime and ensures your irrigation system operates efficiently, preventing water waste and plant damage.
Winterizing the Controller
Proper winterization protects your Orbit 4 Station Easy Dial controller from freezing temperatures. Begin by disconnecting the power supply. Next, manually run each zone to blow out any remaining water from the valves and pipes, preventing cracks. Disconnect and drain the backflow preventer. Remove the controller’s battery to prevent corrosion. If the controller is housed outdoors, consider covering it with a waterproof shield. These steps safeguard the unit against damage, ensuring reliable operation when spring arrives and minimizing costly repairs or replacements during the off-season.
Maintaining the Controller for Longevity
Regular maintenance extends the life of your Orbit 4 Station Easy Dial controller. Periodically cleaning the controller unit with a damp cloth removes dust and debris, preventing corrosion. Inspect the wiring for any signs of damage or loose connections. Annually, perform battery replacement procedures, even if the controller appears functional, as old batteries can leak and cause internal damage. Ensure the controller’s enclosure remains sealed to protect against moisture. Following these simple steps guarantees years of reliable performance and minimizes potential issues.
Cleaning the Controller Unit

To effectively clean your Orbit 4 Station Easy Dial controller, begin by disconnecting the power supply. Use a soft, damp cloth – avoid abrasive cleaners or solvents. Gently wipe the exterior housing, paying attention to areas where dust and debris accumulate. For stubborn dirt, lightly dampen the cloth with mild soapy water, ensuring it’s wrung out thoroughly. Never spray liquids directly onto the unit. Carefully clean around the dial and buttons. After cleaning, allow the controller to dry completely before restoring power, preventing potential electrical issues and ensuring optimal functionality.
Battery Replacement Procedures
To replace the battery in your Orbit 4 Station Easy Dial controller, first disconnect the power supply. Locate the battery compartment, typically on the controller’s circuit board. Carefully remove the old battery, noting its orientation for correct replacement. Install a fresh battery of the same type – usually a 9-volt – ensuring proper polarity. Incorrect polarity can damage the controller. Securely close the battery compartment. Reconnect the power and verify the controller retains its programmed settings. Regular battery replacement ensures continued operation during power outages, preserving your irrigation schedule.
Frequently Asked Questions (FAQs)
Q: My controller isn’t powering on. Check the power adapter and ensure it’s securely connected. Q: A zone isn’t activating. Verify the valve solenoid wiring and that the zone is properly programmed. Q: I forgot my programming. Reset the controller to factory defaults and reprogram. Q: Can I use this with a rain sensor? Yes, connect a compatible rain sensor to the designated terminal. Q: How often should I replace the battery? Annually, or when the low battery indicator appears. Q: Where can I find replacement parts? See the ‘Resources and Support’ section.
Resources and Support
For comprehensive assistance, visit Orbit’s official website at Orbitonline.com. Explore detailed support pages, downloadable manuals, and troubleshooting guides. Replacement parts, including solenoids and adapters, can often be found through online retailers like Amazon or directly from the Orbit website. Contact Orbit’s customer support team via phone or email for personalized assistance. Online forums and communities dedicated to irrigation systems can also provide valuable peer-to-peer support and solutions to common issues.
Orbit’s Official Website and Support Pages
Orbit’s website, www.orbitonline.com, serves as the primary hub for product information and support. Navigate to the “Support” section to access a library of downloadable manuals, including the specific manual for the 4 Station Easy Dial controller. Frequently Asked Questions (FAQs) address common issues and provide quick solutions. You’ll also find instructional videos demonstrating setup, programming, and troubleshooting steps. Utilize the online contact form or phone number listed on the site to reach Orbit’s customer service team directly for personalized assistance.
Finding Replacement Parts
Replacement parts for the Orbit 4 Station Easy Dial controller can be sourced through several channels. Begin by visiting Orbit’s official website, www.orbitonline.com, and navigating to the “Parts” or “Accessories” section. Major home improvement retailers like Home Depot and Lowe’s often stock common replacement components, such as solenoids, faceplates, and wiring connectors. Online marketplaces like Amazon and eBay also offer a wide selection from various vendors. When ordering, ensure compatibility by referencing your controller’s model number.
Compatibility with Smart Home Systems (If Applicable)
The standard Orbit 4 Station Easy Dial controller does not natively integrate with popular smart home ecosystems like Amazon Alexa, Google Assistant, or Apple HomeKit. It operates as a standalone irrigation management solution. However, smart home integration is possible through the addition of a compatible smart irrigation module, such as the RainMachine Mini-8 or similar devices. These modules connect to the controller’s wiring and provide Wi-Fi connectivity, enabling remote control and voice command functionality via a linked smart home hub.
Understanding the Warranty Information
Orbit warrants the 4 Station Easy Dial controller against defects in materials and workmanship for a period of one (1) year from the date of original purchase. This warranty covers repair or replacement of the defective unit, at Orbit’s discretion. The warranty is void if the controller has been subjected to misuse, abuse, neglect, accident, or unauthorized modification. Proof of purchase is required for all warranty claims. Damage resulting from improper installation, electrical surges, or acts of nature are not covered.
Safety Precautions and Warnings
Always disconnect power before servicing or installing the Orbit 4 Station Easy Dial controller to prevent electrical shock. Ensure wiring connections are secure and comply with local electrical codes. Do not expose the controller to excessive moisture or extreme temperatures. This device is intended for outdoor use, but protect it from direct rain and flooding. Keep the controller out of reach of children. Improper installation or use could result in property damage or personal injury. Regularly inspect wiring for damage and replace as needed.
Regulatory Compliance Information
The Orbit 4 Station Easy Dial controller complies with relevant FCC regulations for electromagnetic interference. This device has been tested and found to meet the limits for a Class B digital device. Operation is subject to the following two conditions: (1) This device may not cause harmful interference, and (2) this device must accept any interference received, including interference that may cause undesired operation. Modifications not expressly approved by Orbit could void warranty and regulatory compliance. Refer to Orbit’s website for detailed compliance statements and documentation.