Accu-Chek Guide Blood Glucose Meter: A Comprehensive User Plan
Welcome! This guide provides detailed instructions for effectively using your Accu-Chek Guide meter, empowering you to manage your health with confidence and precision.
The Accu-Chek Guide is a blood glucose monitoring system designed for simplicity and accuracy, helping individuals with diabetes effectively manage their condition. This meter isn’t just a device; it’s a partner in your health journey, offering a seamless testing experience and valuable insights into your glucose levels.
Its user-friendly design prioritizes ease of use, even for those new to self-monitoring. The Accu-Chek Guide aims to reduce the stress often associated with blood glucose testing, making it a more comfortable and manageable part of your daily routine. Beyond simple readings, it offers features like spill-proof test strip vials and a bright, easy-to-read display.
This comprehensive guide will walk you through every step, from setting up the meter to interpreting your results, ensuring you feel confident and empowered in taking control of your diabetes management. We’ll cover all aspects, including troubleshooting and maintenance, to maximize the benefits of your Accu-Chek Guide.
What’s Included in the Accu-Chek Guide Kit?
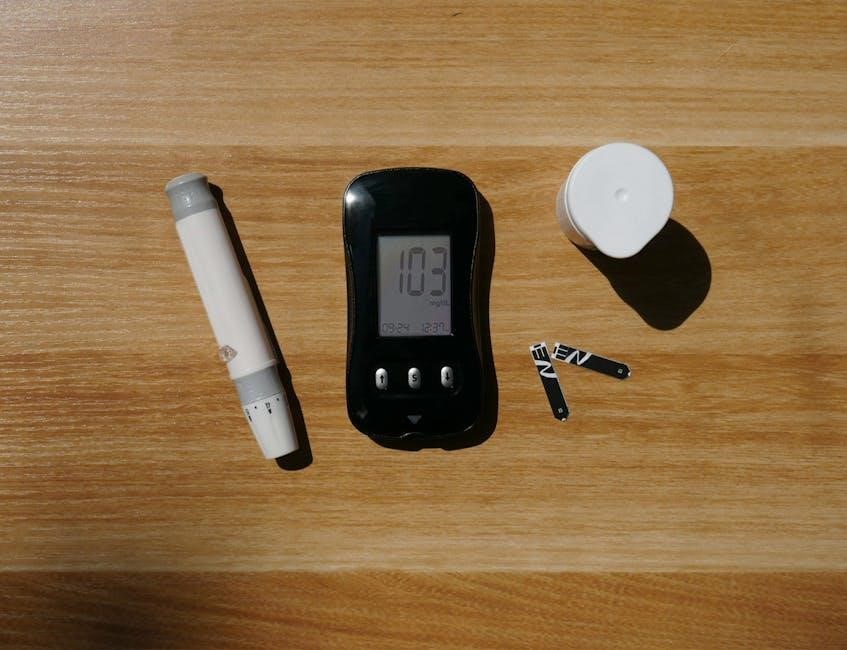
Your Accu-Chek Guide kit contains everything you need to begin monitoring your blood glucose levels immediately. Inside the box, you’ll find the Accu-Chek Guide meter itself, the core of the system for displaying your results. A lancing device is included, along with a sample pack of lancets for comfortable finger pricking.
Crucially, the kit also provides a test strip vial and a test strip chip – the chip is essential for the meter to recognize and correctly interpret the test strips. A set of batteries is included to power the meter, ensuring it’s ready for use. You’ll also receive a quick reference guide for fast access to key information.
Finally, the kit contains a user manual, offering detailed instructions and troubleshooting tips. Please retain all components and the manual for future reference and to ensure optimal use of your Accu-Chek Guide system.
Understanding the Meter’s Components
The Accu-Chek Guide meter is designed for simplicity and ease of use. The large, brightly lit display clearly shows your blood glucose readings, along with helpful icons indicating meter status and potential issues. Below the display are navigation buttons – typically a menu button, and up/down arrows – used to access settings and review your test results history.
On the side of the meter, you’ll find the port for inserting the test strip chip, which is vital for accurate readings. The meter’s back houses the battery compartment. The test strip port itself is located on the front, accepting the test strips for analysis.
Familiarizing yourself with these components will help you operate the meter confidently. Remember to refer to the user manual for detailed diagrams and explanations of each feature. Understanding these parts ensures a smooth and accurate testing experience.
The Meter Itself
The Accu-Chek Guide meter is a compact, portable device engineered for convenient blood glucose monitoring. Its sleek design fits comfortably in your hand, and the durable construction ensures longevity. The meter utilizes advanced technology to deliver fast and accurate results, typically within four seconds.
A key feature is its spill-resistant design, offering protection against accidental liquid exposure. The large, backlit display enhances readability, even in low-light conditions. The intuitive button layout simplifies navigation through menus and functions. It operates on standard batteries, easily replaceable when needed.
Beyond basic glucose testing, the meter stores your results, allowing you to track trends and share data with your healthcare provider. Its Bluetooth connectivity (on select models) enables seamless data transfer to compatible smartphones.
Lancing Device & Lancets
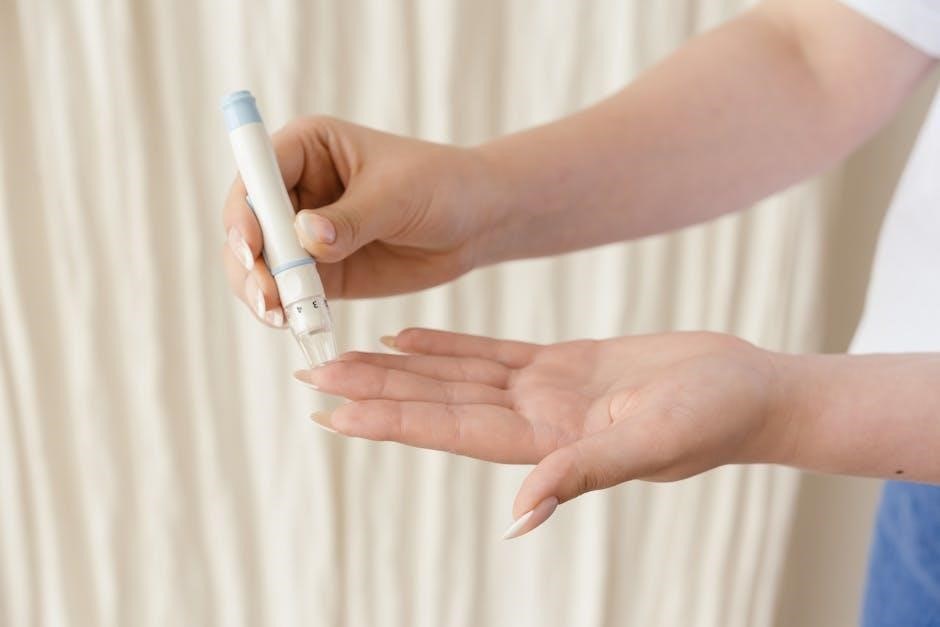
The Accu-Chek Guide lancing device is designed for comfortable and nearly painless blood sampling. It features adjustable depth settings, allowing you to customize the penetration level based on your skin type and preference. This minimizes discomfort and optimizes blood flow.
Accu-Chek lancets are single-use, sterile devices ensuring hygiene and preventing infection. They are specifically engineered to work with the Accu-Chek Guide lancing device, providing consistent and reliable performance. The device holds up to six lancets for convenience, reducing the need for frequent reloading.
Proper technique is crucial for minimizing pain. Rotate puncture sites with each test to avoid skin irritation. Always use a fresh, sterile lancet for each measurement. Safe disposal of used lancets is essential – utilize a sharps container.
Test Strips & Chip
Accu-Chek Guide test strips are a vital component, reacting with your blood sample to provide accurate glucose readings. Each strip contains a unique code, read by the meter via the test strip chip, ensuring compatibility and precision. Always check the expiration date on both the strips and the chip.
The test strip chip is inserted into the meter to calibrate it for the specific batch of test strips you are using. This eliminates the need for manual coding, reducing the risk of errors. A new chip is required each time you change to a new box of test strips.
Store test strips in a cool, dry place, and keep the container tightly closed to protect them from moisture and air; Do not use damaged or expired strips, as this can lead to inaccurate results. Proper storage is key to reliable performance.
Setting Up Your Accu-Chek Guide
Before your first test, a few simple setup steps are necessary to ensure accurate readings; Begin by inserting the appropriate test strip chip into the designated port on the meter. The chip calibrates the meter to the specific batch of test strips, vital for precision.
Next, you’ll need to set the date and time. This information is crucial for accurate tracking of your blood glucose levels and creating a comprehensive history. Navigate through the meter’s menu using the side buttons to adjust these settings.
Optionally, you can pair your Accu-Chek Guide with a compatible smartphone via Bluetooth. This allows for seamless data transfer and access to the mySugr app for detailed analysis and reporting. Refer to the app’s instructions for pairing guidance.
Inserting the Test Strip Chip
The test strip chip is essential for accurate blood glucose monitoring with your Accu-Chek Guide. Locate the chip port on the side of the meter – it’s clearly marked. Ensure the meter is turned off before inserting or removing a chip.
To insert, gently align the chip with the port, noting the correct orientation (usually indicated by arrows or a specific shape). Push the chip in firmly until it clicks into place. Do not force it; if it doesn’t slide in easily, double-check the alignment.
The meter will automatically recognize the new chip and display a confirmation message; Each chip is coded for a specific batch of test strips, ensuring compatibility and reliable results. Always use a new chip when you change your box of test strips.
Setting the Date and Time
Accurate date and time settings are crucial for correctly tracking your blood glucose readings and creating a reliable history. To set the date and time, first, ensure the meter is turned on. Navigate to the ‘Settings’ menu using the meter’s buttons – refer to the meter’s display for specific instructions.
Within the ‘Settings’ menu, select ‘Date’ and ‘Time’ options. Use the up and down buttons to adjust the year, month, day, hour, and minute. Confirm each selection by pressing the center button. Pay close attention to AM/PM settings.
Once the date and time are correctly set, save the changes. The meter will display the updated date and time on the home screen, confirming successful configuration. Correct settings ensure accurate data logging and analysis.
Pairing with a Smartphone (Optional)
The Accu-Chek Guide meter offers optional connectivity with compatible smartphones via Bluetooth. This allows for seamless data transfer and utilization of the mySugr app for enhanced diabetes management. To begin, download and install the mySugr app from your device’s app store.
Ensure Bluetooth is enabled on your smartphone. On the Accu-Chek Guide meter, navigate to the ‘Settings’ menu and select ‘Connect’ or ‘Bluetooth’. The meter will enter pairing mode, becoming discoverable by your smartphone. Within the mySugr app, follow the on-screen prompts to search for and connect to your Accu-Chek Guide meter.

A pairing code may be required; confirm it on both devices. Once paired, your readings will automatically sync to the app, providing detailed insights and reports.
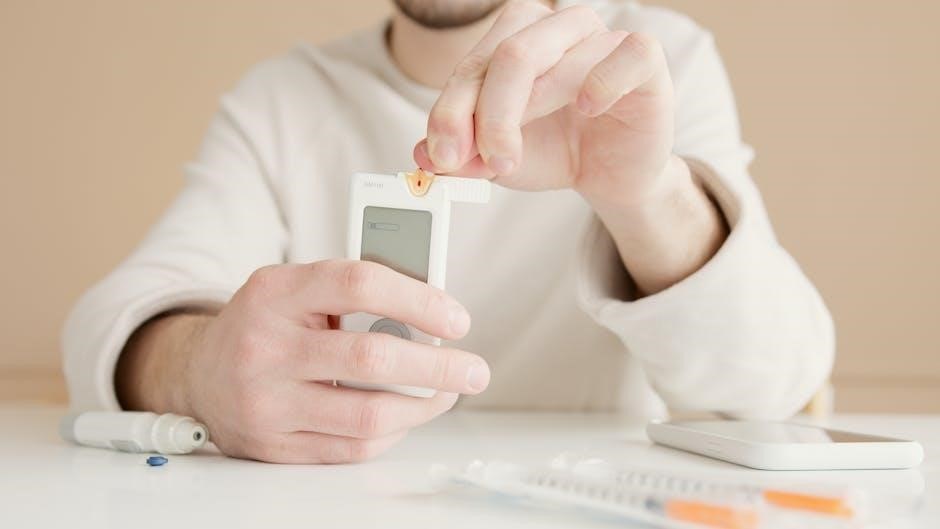
Performing a Blood Glucose Test – Step-by-Step
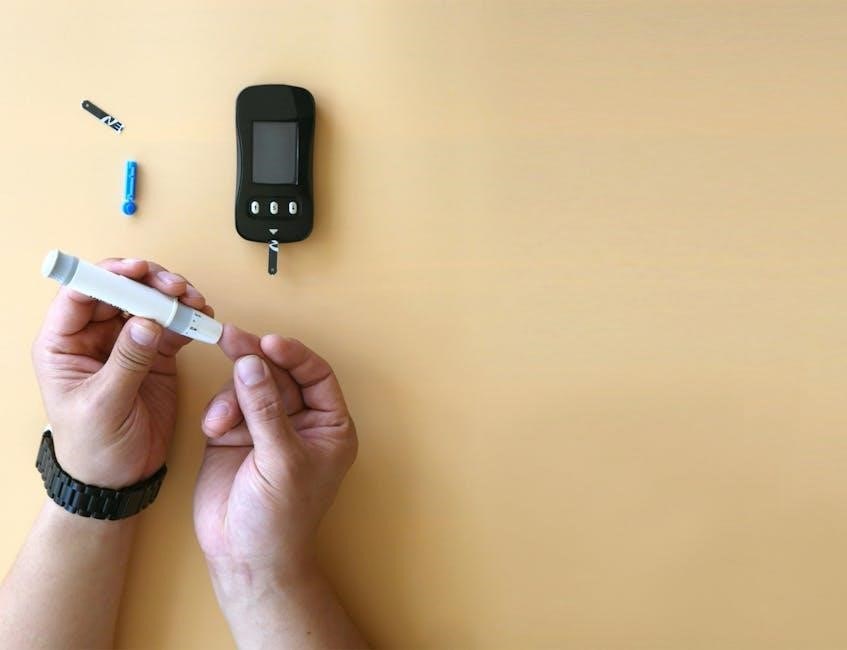
Testing with your Accu-Chek Guide is straightforward. First, ensure your hands are clean and dry. Insert a test strip into the meter; it will automatically turn on. Prepare the lancing device with a fresh lancet, adjusting the depth setting as needed for your skin type.
Using the lancing device, gently prick the side of your fingertip. Avoid squeezing the finger excessively, as this can affect the accuracy of the result. Gently touch the blood drop to the designated area on the test strip. The meter will begin counting down, displaying the remaining seconds.
Within five seconds, your blood glucose reading will appear on the screen. Record your result and any relevant information, such as meal times or medication dosages.
Washing Your Hands
Proper hand hygiene is crucial for accurate blood glucose readings. Before each test, thoroughly wash your hands with warm water and soap. Scrub for at least 20 seconds, ensuring you clean between your fingers and under your nails. Residue from food, lotions, or other substances can significantly alter test results.
Rinse your hands completely, removing all traces of soap. Dry your hands thoroughly with a clean towel. Avoid using hand sanitizers immediately before testing, as the alcohol content can interfere with the accuracy of the reading.
If your hands are cold, warm them up slightly before testing to encourage blood flow. Clean, dry hands are essential for obtaining a reliable blood sample and ensuring the accuracy of your Accu-Chek Guide meter.
Preparing the Lancing Device
First, remove the cap from the Accu-Chek Guide lancing device. Insert a new, sterile lancet firmly into the lancing device, twisting it gently to ensure it’s securely in place. Avoid reusing lancets, as this can cause pain and increase the risk of infection.
Next, adjust the depth setting on the lancing device. Start with a shallower setting and increase it if you consistently have difficulty obtaining a sufficient blood sample. The appropriate depth depends on your skin type and thickness.
Replace the cap on the lancing device. Cock the device by pressing the release button, preparing it for use. Always have a new lancet ready before performing a test. Proper preparation ensures a comfortable and efficient blood sampling process with your Accu-Chek Guide.
Obtaining a Blood Sample
Choose a testing site – typically the side of a fingertip is recommended, as it generally has fewer nerve endings. Avoid using the very tip or center of the finger. Gently massage your finger towards the chosen site to encourage blood flow.

Press the lancing device firmly against your fingertip, then press the release button. A quick, controlled puncture will create a small drop of blood. If the initial attempt doesn’t yield enough blood, gently squeeze the finger – avoid excessive squeezing, as this can affect the accuracy of the reading.
Wipe away the first drop of blood with a clean, dry cloth, as it may contain tissue fluid that could interfere with the test. A second, fresh drop is ideal for accurate results with your Accu-Chek Guide meter.
Applying Blood to the Test Strip
Hold the Accu-Chek Guide test strip with the gray side facing upwards. Gently touch the edge of the blood drop to the designated sample area on the test strip. The strip will automatically draw the required amount of blood via capillary action – do not smear or wipe the blood onto the strip.
Ensure the sample area is completely filled; insufficient blood will result in an error message. Avoid applying too much blood, as this can also cause errors. The meter will display a countdown timer once the blood application is successful, indicating the test is in progress.
Keep the meter steady and avoid disturbing it during the testing process. Do not touch the test strip while the meter is analyzing the sample.
Reading Your Results
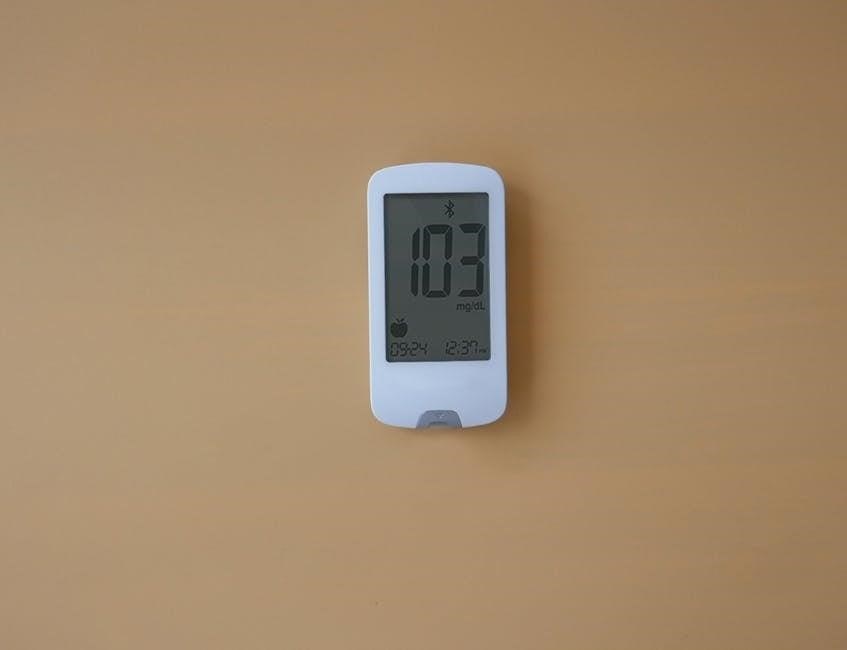
After the 5-second countdown, your blood glucose result will be clearly displayed on the Accu-Chek Guide meter’s screen. The reading will be shown in milligrams per deciliter (mg/dL) or millimoles per liter (mmol/L), depending on your meter’s settings.
The meter also displays a visual indicator to help you quickly understand if your result falls within your target range – high, low, or within range. Pay attention to these indicators alongside the numerical value.
The date and time of the test are automatically recorded alongside the result. Ensure the meter is held at eye level for accurate reading. Note the result immediately, or use the meter’s memory function to review it later.
Understanding Your Results & Target Ranges
Your blood glucose results provide valuable insights into how your body is processing sugar. Target ranges vary depending on individual factors, including your age, overall health, and diabetes management plan – always consult your healthcare provider for personalized goals.
Generally, a target range for individuals with diabetes before meals is 80-130 mg/dL (4.4-7.2 mmol/L), and 180 mg/dL (10.0 mmol/L) or less two hours after starting a meal. Understanding what influences your readings – food intake, exercise, stress, and medication – is crucial.
Consistent monitoring helps identify patterns and allows for timely adjustments to your lifestyle or treatment plan. Keep a log of your results and discuss them regularly with your doctor to optimize your diabetes control.
Memory Function & Reviewing Past Readings
The Accu-Chek Guide meter conveniently stores your blood glucose readings, allowing you to track your progress over time. This feature is invaluable for identifying trends and understanding how different factors impact your levels. The meter typically holds up to 500 readings, providing a comprehensive history.
To access your past results, use the up and down arrow buttons on the meter to scroll through your testing history. You can also view average readings calculated over specific periods – usually 7, 14, or 30 days – offering a broader perspective on your glucose control.
Regularly reviewing your data with your healthcare provider is essential for making informed decisions about your diabetes management plan. The stored data provides a valuable tool for collaborative care.
Accessing Test Results History
To view your stored test results on the Accu-Chek Guide, begin by ensuring the meter is powered on. Press the ‘Review’ button – often indicated by a clock or history icon – to enter the memory function. The most recent reading will appear first.
Use the up and down arrow buttons to navigate through your previous test results. Each screen displays the date and time of the test, along with your blood glucose value. The meter will typically show 10 readings at a time, allowing for easy scrolling.
If you hold down the up or down arrow buttons, the meter will scroll through the readings more quickly. Remember to note the date and time alongside each value for accurate tracking and discussion with your healthcare team.
Average Blood Glucose Calculation
The Accu-Chek Guide meter automatically calculates your average blood glucose levels, providing a valuable overview of your control over time. This feature typically displays averages for 7, 14, and 30 days.
To access these averages, navigate to the ‘Review’ function within the meter’s menu. After scrolling through your individual readings, continue pressing the ‘Review’ button until the average values appear. The meter will clearly indicate the time period for each average displayed (e.g., 7-day average).
These averages are helpful for identifying trends and making informed decisions about your diet, exercise, and medication, in consultation with your doctor. Regularly monitoring these values contributes to effective diabetes management.
Troubleshooting Common Issues
Encountering problems with your Accu-Chek Guide? Several common issues have straightforward solutions. If the meter displays an error message, refer to the section detailing error codes for specific guidance. Inaccurate readings often stem from expired or damaged test strips – always check the expiration date and ensure proper storage.
Difficulty obtaining a sufficient blood sample is another frequent concern. Ensure proper lancing device settings and consider alternating finger puncture sites. If the meter won’t turn on, verify the batteries are correctly installed and have sufficient charge.
For connectivity issues when pairing with a smartphone, ensure Bluetooth is enabled on both devices and that the Accu-Chek Connect app is up-to-date. If problems persist, consult the full user manual or contact Accu-Chek support.
Error Messages & What They Mean
Your Accu-Chek Guide meter utilizes error messages to alert you to potential problems. “Strip Error” indicates an issue with the test strip – check expiration, storage, and ensure it’s properly inserted. “System Error” suggests a more significant issue; try restarting the meter;
“Insufficient Sample” means you didn’t apply enough blood to the test strip; repeat the test with a larger drop. “Hematocrit Error” can occur if your hematocrit level is too high or low, potentially affecting accuracy – consult your healthcare provider.
“Chip Error” signifies a problem with the test strip chip; reinsert it or try a new chip. Always refer to the meter’s user manual for a complete list of error codes and their corresponding solutions. If an error persists, contact Accu-Chek customer support for assistance.
Inaccurate Readings – Potential Causes
Several factors can contribute to inaccurate blood glucose readings with your Accu-Chek Guide. Improper test strip storage – exposure to heat, humidity, or direct sunlight – can compromise their integrity. Expired test strips must be discarded. Insufficient blood sample size is a common issue; ensure a full, raised drop is applied.
Contamination of the test strip with cleaning solutions or food particles will also yield incorrect results. Dehydration or extreme temperatures can affect blood flow and glucose levels. Incorrect meter calibration, though rare, can occur.
Finally, certain medications or medical conditions can interfere with readings. If you consistently experience discrepancies, consult your healthcare provider to rule out underlying causes and ensure proper meter usage.
Maintaining Your Accu-Chek Guide
Regular maintenance ensures the accuracy and longevity of your Accu-Chek Guide meter. Clean the meter regularly with a soft, slightly damp cloth; avoid harsh chemicals or abrasive cleaners. Do not immerse the meter in water. Store the meter in a cool, dry place, away from extreme temperatures and direct sunlight.
Periodically check the battery level and replace it when low to prevent interruptions in testing. Keep the test strip port free of debris. The lancing device should also be cleaned after each use to prevent infection.
Always verify your test strip chip is correctly inserted and compatible with your meter. Following these simple steps will help maintain optimal performance and reliable results for consistent diabetes management.
Disposal of Used Lancets and Test Strips
Proper disposal of used lancets and test strips is crucial for safety and environmental responsibility. Used lancets are considered sharps and must never be thrown in regular trash. Utilize an FDA-cleared sharps container for safe containment; these are available at pharmacies.
Once the sharps container is full, follow your local regulations for proper disposal – often through medical waste programs or designated collection sites. Used test strips, while not sharps, should also be disposed of responsibly.
Check with your local waste management authorities regarding guidelines for medical waste disposal in your area. Never flush test strips down the toilet. Safe disposal protects sanitation workers, family members, and the environment.