GE Oven Manual: Self-Clean Feature ─ A Comprehensive Guide (Updated 02/15/2026)
Today, 02/15/2026, this guide details GE oven self-cleaning, covering models, troubleshooting, safety, and the future of GE Aerospace & Vernova.
The self-clean feature on your GE oven is designed for convenience, eliminating the need for manual scrubbing. However, understanding its operation and proper usage is crucial for optimal performance and safety. This guide, updated on February 15, 2026, provides a comprehensive overview of the self-clean cycle across various GE oven models.
As GE transitions with the spinoffs of GE Aerospace and GE Vernova, accessing specific model manuals via GE.com’s updated standalone sites (GE Aerospace, GE Vernova, GE HealthCare) is essential. This feature utilizes high temperatures to burn off food residue, transforming it into ash for easy removal. Proper preparation, including rack removal and ventilation, is key. We’ll cover troubleshooting common issues like heating problems, smoke, and error codes, ensuring a safe and effective cleaning process.
Understanding GE Oven Models & Manual Access
GE offers a diverse range of oven models, each potentially with slight variations in self-clean functionality. Therefore, consulting your specific oven’s manual is paramount. With GE’s recent restructuring into GE Aerospace, GE Vernova, and GE HealthCare, accessing these manuals has evolved.
GE.com now directs users to dedicated websites for each company. Locate your model number – typically found on the oven frame – and then navigate to the appropriate standalone site (GE Aerospace, GE Vernova, or GE HealthCare) to download the corresponding manual. These manuals detail specific self-clean cycle instructions, safety precautions, and troubleshooting steps tailored to your appliance. Utilizing the correct manual ensures safe and effective operation of the self-clean feature, maximizing its benefits and preventing potential issues.
The Self-Clean Cycle: How It Works
The GE oven self-clean cycle operates at extremely high temperatures – typically exceeding 880°F (470°C) – to incinerate food residue and spills within the oven cavity. This intense heat converts baked-on grime into a fine ash. During the cycle, the oven door automatically locks for safety, preventing accidental opening.
The process utilizes specialized oven components, including self-clean baffles, designed to absorb oil vapors generated during the high-heat cleaning. These baffles prevent smoke and odors from escaping into the kitchen. Once the cycle completes and the oven cools, a small amount of ash remains, easily wiped away with a damp cloth. Proper ventilation is crucial during operation.
The Science Behind Self-Cleaning Ovens
Self-cleaning ovens leverage the principles of thermal decomposition, a chemical process where heat breaks down organic matter. At temperatures exceeding 880°F, food residues undergo rapid oxidation, reacting with oxygen in the air. This reaction transforms fats, sugars, and proteins into simpler compounds like carbon dioxide, water vapor, and ash.
The high heat also ensures complete combustion, minimizing lingering odors. Specialized oven materials and insulation are critical to containing these extreme temperatures. Self-clean baffles play a role by absorbing oil vapors, preventing them from contributing to smoke. This scientific process efficiently eliminates the need for manual scrubbing and harsh chemical cleaners.
Benefits of Using the Self-Clean Feature
The self-clean feature offers significant convenience, eliminating the arduous task of manually scrubbing baked-on food residue. This saves valuable time and effort, particularly after large meals or holiday cooking. It also reduces reliance on harsh chemical oven cleaners, promoting a healthier kitchen environment.
Furthermore, the high temperatures achieved during the self-clean cycle effectively sanitize the oven interior, eliminating bacteria and odors. Properly maintained self-clean baffles contribute to efficient vapor absorption, enhancing the cleaning process. This feature preserves the oven’s performance and extends its lifespan, offering long-term benefits for homeowners.
Preparing Your GE Oven for Self-Cleaning
Before initiating the self-clean cycle, thorough preparation is crucial for optimal results and safety. Remove all oven racks, baking stones, and any cookware or aluminum foil from the oven interior. Wipe up any large spills or loose debris from the oven floor. Ensure the oven door seal is clean and free of obstructions to maintain a proper seal during the high-temperature cycle.
Check for any items lodged within the self-clean baffles, as these can potentially cause smoke or damage. Proper ventilation is essential; open kitchen windows or use a range hood to dissipate any odors. This preparation ensures a safe and effective self-cleaning process.
Removing Oven Racks and Accessories
Prior to starting the self-clean cycle, complete removal of oven racks and all accessories is absolutely necessary. The intense heat generated during self-cleaning can warp or discolor the racks, potentially damaging their finish. Carefully slide out each rack, ensuring it’s completely clear of the oven cavity. Remove any baking stones, broiler pans, temperature probes, or other items stored inside.
Leaving items inside can also create smoke or interfere with the cleaning process. Refer to your oven’s manual for specific rack removal instructions, as some models may have unique designs. Proper removal safeguards your oven components and ensures a thorough clean.
Ensuring Proper Ventilation During Self-Clean
Adequate ventilation is crucial when utilizing the self-clean function. The high temperatures involved can release odors and potentially some smoke, even in a properly functioning oven. Open nearby windows or activate your kitchen’s exhaust fan to maintain good air circulation. This minimizes any unpleasant smells and ensures a comfortable environment during the cycle.
Avoid prolonged exposure to fumes. Individuals with respiratory sensitivities, such as asthma, should take extra precautions. Proper ventilation safeguards indoor air quality and contributes to a safer self-cleaning experience. Always prioritize a well-ventilated kitchen space.
Initiating the Self-Clean Cycle
Before starting, ensure the oven is completely empty, and racks/accessories are removed (refer to the removal section). Press the “Self-Clean” button on your GE oven’s control panel. You may be prompted to select a clean time – options typically range from 2 to 4 hours, depending on soil level. Confirm your selection, and the door will automatically lock for safety.
Do not attempt to open the door during the cycle. The oven will automatically begin heating to the self-clean temperature. Refer to your specific model’s manual for detailed instructions, as control panel layouts can vary.

Step-by-Step Instructions for Starting Self-Clean
First, verify the oven is empty and racks are removed. Press the “Self-Clean” button; a timer selection screen will appear. Choose the cycle duration – 2 hours for light soil, 4 for heavier buildup. Press “Start” or “OK” to confirm. The oven door will automatically lock, and a pre-clean heating phase will begin.
Avoid interrupting the cycle. Once complete, the oven will cool, and the door will unlock automatically. Allow sufficient cooling time before wiping away any ash residue. Consult your oven’s manual for model-specific details and safety precautions during this process.
Self-Clean Cycle Duration and Temperature
The self-clean cycle duration varies based on soil level, typically ranging from 2 to 4 hours. Lighter soil requires a shorter cycle, while heavier buildup necessitates the longer duration. During self-clean, GE ovens reach extremely high temperatures, often exceeding 880°F (470°C). This intense heat effectively carbonizes food residue into ash.
These high temperatures are crucial for the process, but also necessitate strict safety precautions. Always ensure proper ventilation and keep children and pets away from the oven during operation. Refer to your specific model’s manual for precise temperature and timing details.
Troubleshooting Common Self-Clean Issues
Several issues can arise during the self-clean cycle. If the oven isn’t heating, verify the door is fully latched – it’s a safety feature preventing operation if ajar. Smoke or a burning smell is normal initially, but excessive amounts warrant investigation and potential cycle interruption. Error codes displayed indicate specific problems; consult your oven’s manual for decoding.
Common codes relate to door lock malfunctions or temperature sensor failures. If issues persist, don’t attempt self-repair; contact a qualified technician. Remember, a malfunctioning self-clean cycle can pose safety risks.
Oven Not Heating During Self-Clean
If your GE oven fails to heat during the self-clean cycle, the first step is to ensure the oven door is securely closed and latched. The self-clean function incorporates a safety interlock; it won’t initiate if the door isn’t properly sealed. Verify the function itself was correctly selected and the appropriate temperature setting was chosen.
If the door is secure and the settings are correct, the issue might be with the oven’s heating element or a faulty control board. The function or the temperature may not have been set correctly. Contact a qualified service technician for diagnosis and repair.
Smoke or Burning Smell During Self-Clean
A small amount of smoke and a burning smell during the self-clean cycle are often normal, resulting from food residue being reduced to ash. However, excessive smoke warrants immediate attention. Ensure proper ventilation by opening windows or using a range hood. The self-clean cycle absorbs oil vapors generated during cooking with the self-cleaning feature, but large spills can contribute to more smoke.
If the smell is acrid or the smoke is excessive, immediately stop the cycle and disconnect the oven’s power. Inspect for any remaining large food particles that may have been missed before initiating the cycle. Contact a service technician if the issue persists.
Error Codes Related to Self-Clean Function
GE ovens utilize error codes to diagnose issues during the self-clean cycle. While specific codes vary by model, common errors indicate problems with the door latch mechanism, temperature sensor, or control board. A locked door during a cycle is normal, but an error related to the latch suggests a malfunction preventing proper sealing.
Consult your oven’s specific manual for a complete list of error codes and their corresponding solutions. Some codes may require resetting the oven or contacting a qualified service technician for repair. Ignoring error codes can lead to further damage or unsafe operation.
Maintaining Your Oven After Self-Clean
Post self-clean, allow ample cooling time before opening the oven door – the lock will release automatically. Once cool, a light ash residue will remain; wipe this away with a damp cloth. Inspect and reinstall the self-clean baffles, ensuring proper placement for optimal performance. Regularly cleaning the oven door seal prevents smoke leakage during future cycles.
Remember, the self-clean cycle’s effectiveness relies on properly functioning components. Address any error codes promptly. Consistent maintenance extends your oven’s lifespan and ensures safe, efficient operation. Prioritize safety and follow all manual guidelines.
Cooling Down Period and Door Lock
Following the self-clean cycle, a significant cooling down period is essential. The oven door will remain locked until the internal temperature decreases to a safe level – do not force it open. This locking mechanism is a crucial safety feature, preventing burns. The duration of the cooling period varies based on cycle length and oven model.
During this time, avoid obstructing the oven’s ventilation. Once cooled, the door will unlock automatically. Never attempt to disable or bypass the door lock; it’s designed to protect you and ensure safe operation. Patience during cooling is paramount.
Wiping Away Ash Residue
After the cooling down period and the door unlocks, you’ll likely find a fine ash residue inside the oven. This is a normal byproduct of the self-clean process, consisting of carbonized food particles. Allow the oven to fully cool before attempting to remove this residue.
Use a damp cloth to gently wipe away the ash, avoiding abrasive cleaners or scouring pads that could damage the oven’s interior. For stubborn spots, a paste of baking soda and water can be effective. Ensure all residue is removed before using the oven for cooking again.
Self-Clean Baffle Installation & Maintenance
The self-clean baffle plays a crucial role in directing heat and protecting oven components during the self-clean cycle. Proper installation is vital for optimal performance. To install, carefully position the side rack, then secure the self-cleaning baffle according to the diagram provided in your oven’s manual.
Regularly inspect the baffle for damage or misalignment. A damaged baffle can lead to uneven heating or potential oven issues. Maintenance involves ensuring it’s securely in place and free from excessive buildup. Replace if cracked or significantly worn.
Identifying and Replacing Self-Clean Baffles
Identifying a faulty self-clean baffle involves visual inspection for cracks, warping, or significant deterioration. These baffles, typically matte in color and porous, protect oven components during the high-heat self-clean cycle. If damage is detected, replacement is necessary to maintain oven functionality and prevent potential issues.
To replace, first disconnect power to the oven. Carefully remove the old baffle, noting its orientation. Install the new baffle, ensuring it’s securely positioned as per your oven’s manual. Proper installation is crucial for directing heat effectively and protecting the oven’s interior.
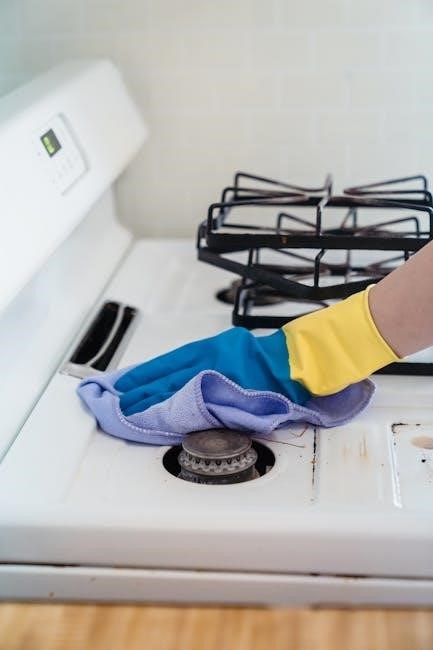
Cleaning the Oven Door Seal
Maintaining a clean oven door seal is vital for efficient heat retention during both baking and the self-clean cycle. Residue buildup can compromise the seal, leading to temperature fluctuations and potentially affecting cooking performance; Regularly inspect the seal for food particles, grease, or ash.
To clean, use a damp cloth with mild dish soap. Gently wipe the entire seal, paying attention to crevices where debris accumulates. Avoid abrasive cleaners, as they can damage the seal’s integrity. Ensure the seal is completely dry before operating the oven. A properly maintained seal ensures optimal oven performance.
GE Oven Safety Precautions During Self-Clean
Prioritize safety during the self-clean cycle. Avoid damage to oven components by ensuring proper preparation – remove racks and accessories beforehand. The high temperatures generated can pose risks if precautions aren’t followed. Always supervise children and pets during operation, utilizing child safety locks if available.
Never manually open the oven door during the cycle; the locking mechanism prevents this for safety. Be aware of potential smoke or odors, ensuring adequate ventilation. If unusual smells persist, discontinue the cycle and consult a technician. Following these guidelines ensures a safe self-cleaning experience.
Avoiding Damage to Oven Components
Protect your GE oven during self-clean by meticulously removing all racks, baking stones, and any aluminum foil. These items can warp, discolor, or even damage the oven’s interior at high temperatures. Ensure the oven door seal remains clean and intact to maintain proper heat containment. Avoid spills or large food debris before initiating the cycle, as they can create excessive smoke.
Regularly inspect and maintain the self-clean baffles, replacing them if damaged. Proper ventilation is crucial; ensure the kitchen is well-ventilated during operation. Following these steps minimizes the risk of component failure and extends your oven’s lifespan.
Child Safety Locks and Self-Clean
Prioritize child safety when utilizing the self-clean feature on your GE oven. The oven door locks automatically during the cycle due to extremely high temperatures, preventing accidental opening. Never attempt to force the door open while the self-clean cycle is active. Educate children about the dangers of a hot oven and the self-clean function.
Ensure the control panel is inaccessible to young children to prevent accidental cycle initiation. Supervise the area during and immediately after the self-clean cycle until the oven has completely cooled. A locked door is a critical safety feature; do not disable it.
GE Aerospace, GE Vernova & GE HealthCare – Company Updates
GE’s transformation into three independent public companies – GE Aerospace, GE Vernova, and GE HealthCare – marks a new era. This strategic shift impacts GE’s future, with GE Aerospace now operating as an investment-grade entity following the GE Vernova spin-off. GE Aerospace is investing over $650M in manufacturing and supply chain enhancements.
While these changes don’t directly alter oven functionality, they represent GE’s commitment to innovation. Access updated information on each company via their standalone websites: GE Aerospace, GE Vernova, and GE HealthCare. These updates reflect GE’s evolving focus.

GE Financial Reports & Investor Relations
For comprehensive insights into GE’s financial performance and future outlook, access the latest investor relations materials. Download GE’s 2023 Annual Report and 10-K filing to review the final shareholder letter, outlining the current state of GE and the strategic direction of GE Aerospace and GE Vernova.
GE.com now directs users to the individual company websites for focused information. Explore quarterly earnings reports and access detailed financial data through the dedicated GE investor relations portal. These resources provide transparency and support informed investment decisions regarding the newly structured companies.
GE’s Innovations in Engine Technology (GE90 Turbofan)
GE Aerospace is pioneering advancements in engine technology, exemplified by the revolutionary GE90 turbofan. This engine marks a significant leap forward through the incorporation of lightweight carbon fiber composite components – a first in jet engine design. This innovation substantially reduces engine weight, directly contributing to improved fuel efficiency and enhanced performance characteristics.
The GE90 sets new standards for fuel burn, demonstrating GE’s commitment to sustainable aviation solutions. These material science breakthroughs translate to operational cost savings and a reduced environmental footprint, showcasing GE’s dedication to both technological leadership and responsible engineering practices.
Carbon Fiber Composites in GE Jet Engines
GE Aerospace’s integration of carbon fiber composites into jet engine construction represents a pivotal advancement in aerospace materials science. These lightweight materials offer a superior strength-to-weight ratio compared to traditional metals, enabling significant reductions in engine weight and improved fuel efficiency. The GE90 turbofan was the first jet engine to utilize these components extensively.
This innovation not only enhances performance but also contributes to a smaller environmental impact through reduced fuel consumption. GE’s commitment to carbon fiber technology underscores its dedication to pushing the boundaries of engine design and delivering sustainable solutions for the aviation industry.
Microwave Oven Turntable Troubleshooting
Addressing a malfunctioning microwave oven turntable often involves simple checks. If the turntable emits noise during operation, investigate potential causes like a loose turntable motor. Tighten any securing screws to resolve this issue. Alternatively, the motor itself might be faulty, requiring replacement for proper function.
Ensure the turntable and its support ring are correctly positioned within the microwave cavity. Proper alignment is crucial for smooth rotation. Consistent troubleshooting and maintenance will ensure optimal performance and extend the lifespan of your GE microwave oven.
Microwave Oven Noise Issues
Unusual noises emanating from your GE microwave oven can indicate several potential problems. A common issue involves the turntable, where a loose motor can generate disruptive sounds. Tightening the motor’s securing screws is often a quick fix. However, a failing motor may necessitate replacement to restore quiet operation.
Beyond the turntable, inspect the waveguide cover for damage or looseness, as this can also contribute to noise. Addressing these issues promptly ensures efficient and peaceful microwave use. Regular maintenance and careful observation can prevent escalating problems.
Cleaning the Microwave Cavity
Maintaining a clean microwave cavity is crucial for optimal performance and hygiene. Regularly wipe down the interior surfaces with a damp cloth and mild detergent to remove food splatters and residue. For stubborn stains, heat a cup of water with lemon juice or vinegar for a few minutes, then wipe clean – the steam loosens debris.
Avoid abrasive cleaners, as they can damage the interior coating. Ensure the microwave is unplugged during cleaning. A clean cavity not only improves cooking results but also prevents unpleasant odors and potential safety hazards. Consistent cleaning extends the lifespan of your GE microwave.
Oil Vapor Absorption & Oven Components
During the self-cleaning cycle, significant heat breaks down food residue, releasing oil vapors. Certain oven components, particularly the self-clean baffles, are specifically designed to absorb these vapors. These baffles, typically matte and porous, prevent oil from redepositing onto the oven’s interior surfaces.
Regular inspection and maintenance of these baffles are essential for efficient self-cleaning. Over time, they can become saturated and require replacement. Proper baffle function minimizes smoke and odors during the cycle, ensuring a thorough clean and extending the life of your GE oven’s internal components.
GE’s History and Future Outlook
GE’s legacy of innovation extends from pioneering jet engine technology – like the GE90 turbofan utilizing carbon fiber composites – to modern appliance solutions, including advanced self-clean oven features. Today, February 15, 2026, marks a pivotal shift as GE transforms into three independent public companies: GE Aerospace, GE Vernova, and GE HealthCare.
This strategic restructuring empowers each entity to focus on its core strengths and accelerate growth. Accessing the 2023 Annual Report and investor relations resources provides insight into GE’s financial performance and future direction, demonstrating a continued commitment to technological advancement and customer satisfaction.
Accessing GE Standalone Company Websites
Following the separation, GE now operates as three distinct, publicly traded companies. For detailed information regarding GE Aerospace, visit their dedicated website. Similarly, explore GE Vernova’s site for updates on energy solutions and GE HealthCare for healthcare innovations.
GE.com has been updated to serve as a portal to these independent entities. Accessing these standalone websites provides the most current information on each company’s products, services, investor relations, and future outlook. This includes details on manufacturing investments exceeding $650M by GE Aerospace and insights from the latest annual reports.
Understanding the Three-Terminal Switch (Oven)
If your GE oven’s self-clean function isn’t working, or the oven light or fan fails to activate, a faulty three-terminal switch could be the culprit. This video demonstration illustrates how to effectively test this crucial component found in both gas and electric ovens.
The switch controls power distribution to various oven functions. Proper testing involves verifying continuity between terminals to ensure correct operation. Addressing a malfunctioning switch is a common fix for self-clean issues, restoring functionality and ensuring safe oven operation. Remember safety first when working with electrical components!
Testing Oven Switches for Functionality
To diagnose issues with your GE oven’s self-clean cycle or other functions, testing the oven switches is essential. A multimeter is the primary tool for this process, allowing you to check for continuity across the switch’s terminals. Disconnect power before beginning any testing!
Specifically, verify continuity when the switch is in each position (on/off). Lack of continuity indicates a faulty switch requiring replacement. This simple test can pinpoint the source of problems, saving time and potentially costly repairs. Always consult a qualified technician if you’re uncomfortable performing electrical tests.

GE’s Commitment to Manufacturing Investment
GE Aerospace’s recent announcement of over $650 million in manufacturing facility and supply chain investments underscores a strong commitment to future innovation. This dedication extends to the production of advanced oven technologies, including components vital for the self-clean feature; These investments ensure continued quality and reliability in GE ovens.
By bolstering domestic manufacturing, GE aims to enhance responsiveness to customer needs and maintain a competitive edge. This commitment translates to improved oven performance, durability, and the ongoing development of cutting-edge self-cleaning systems for years to come.