Intex Pool Pump Instructions Manual: A Comprehensive Guide
This manual provides detailed guidance for Intex pool pump models, including installation, operation, troubleshooting, and winterizing procedures for optimal pool maintenance.
Understanding Your Intex Pool Pump
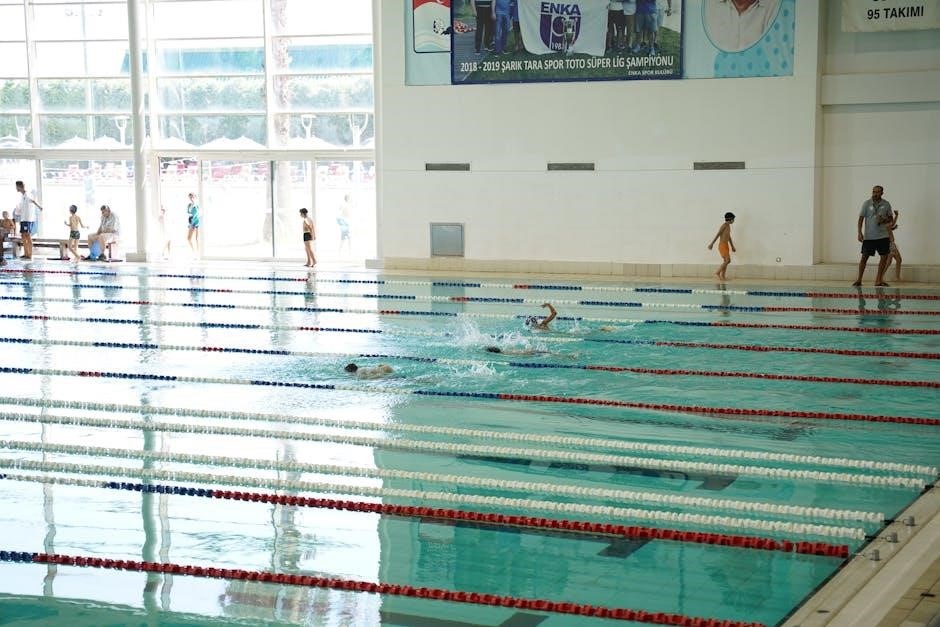
Intex pool pumps are essential for maintaining clean and healthy swimming pool water. These pumps circulate water, drawing it through the filtration system to remove debris, algae, and impurities. Understanding your pump’s function is crucial for efficient operation and longevity. Different models, like the 28634 (2500 GPH) and 26644 (4m3/hr), offer varying flow rates suited for different pool sizes;
The 26644 model boasts a 4m3 per hour capacity, while the 28634 features 1.5″ (38mm) hose connections, ideal for compatibility with SunSpring pool heat pumps. Proper pump selection ensures adequate water circulation and effective filtration, contributing to a safe and enjoyable swimming experience. Regular maintenance, as outlined in this manual, will maximize performance.
Pump Model Identification
Accurate identification of your Intex pool pump model is the first step towards proper maintenance and repair. Common models include the 28634 (2500 GPH) cartridge filter pump and the 26644 (4m3/hr) sand filtration set. The 28634 model is particularly well-suited for use with Intex heat pumps due to its 1.5″ hose connections.
The 26644 features a 254mm diameter tank and requires 8.5kg of glass media (sold separately). Locate the model number on the pump housing – this number is vital when ordering replacement parts or seeking specific troubleshooting advice. Knowing your pump’s specifications, like flow rate and horsepower, ensures compatibility with other pool equipment.
Safety Precautions
Prioritize safety when installing and operating your Intex pool pump. Always disconnect the power supply before performing any maintenance or inspection. Ensure proper grounding to prevent electrical shock – a critical requirement for all electrical pool equipment. Never operate a damaged pump or cord.
Keep the pump area dry and well-ventilated. Do not attempt to modify the pump in any way, as this could compromise its safety features. Supervise children and pets around the pump area. Adherence to these precautions will minimize the risk of injury and ensure the longevity of your Intex pool pump system.
Component Overview
The Intex pool pump system comprises several key components. These include the pump housing, which protects the motor and impeller, and the filter – available in cartridge or sand variations – responsible for water purification. Essential hose connections facilitate water flow between the pump, pool, and filter.
Strainers and baskets capture debris, preventing damage to the pump. Understanding each component’s function is crucial for proper installation and maintenance. Models like the 26644 feature a 254mm diameter tank, while the 28634 utilizes a cartridge filter with 1.5” hose connections. Familiarize yourself with your specific model’s parts.
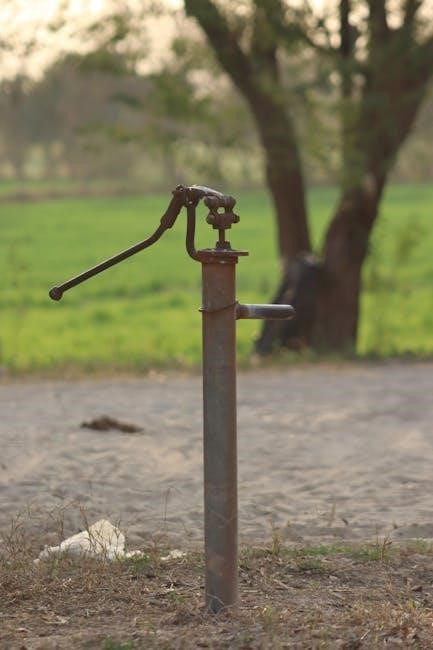
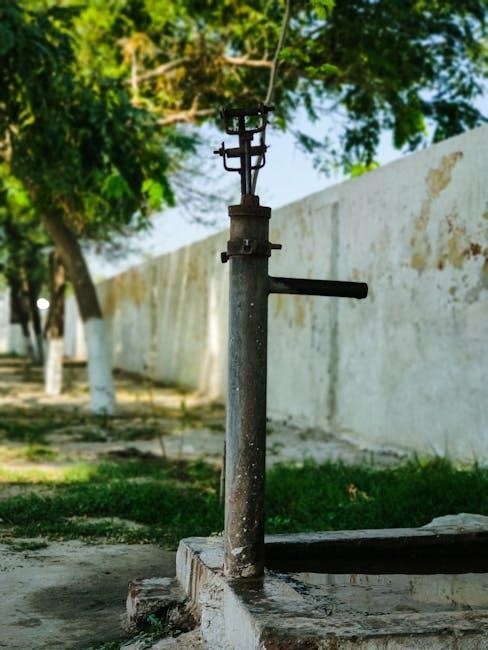
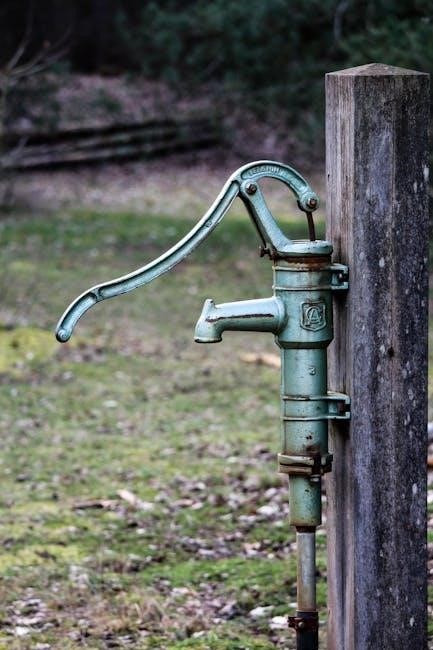
Pump Housing
The pump housing serves as the protective exterior of the Intex pool pump, shielding the internal motor and impeller from the elements and potential damage. Constructed from durable plastic, it’s designed to withstand outdoor conditions. The housing also incorporates mounting points for secure placement and features openings for hose connections and access to the strainer basket.
Regular inspection of the housing for cracks or damage is recommended. Maintaining its integrity ensures optimal pump performance and longevity. Different models, like the 28634 and 26644, may have slight variations in housing design, but the core function remains consistent: robust protection for vital pump components.
Filter Type (Cartridge, Sand, etc.)
Intex pool pumps commonly utilize either cartridge or sand filtration systems, each offering distinct advantages. Cartridge filters, like those found in the Model 28634, are known for their fine filtration capabilities and ease of use, requiring periodic cleaning or replacement of the cartridge itself. Sand filters, exemplified by the Model 26644, employ sand media to trap debris and necessitate regular backwashing to maintain efficiency.
The choice between these systems depends on pool size, usage, and maintenance preferences. Glass media is also an option for sand filters, offering improved filtration. Understanding your filter type is crucial for proper operation and maintenance, ensuring consistently clean pool water.
Hose Connections
Proper hose connections are vital for efficient pump operation and preventing leaks. Intex pumps typically feature 1.5-inch (38mm) hose connections, as seen in the Model 28634, making them compatible with standard pool hoses and accessories. Ensure hoses are securely attached to both the pump inlet and outlet, utilizing hose clamps for a watertight seal.
Carefully align the hose with the connection point to avoid kinking or obstruction. When connecting to the pool’s plumbing, verify compatibility and use appropriate adapters if necessary. Regularly inspect hose connections for wear and tear, replacing damaged hoses promptly to maintain optimal performance.
Strainers & Baskets
Intex pool pumps incorporate strainers and baskets to capture debris, protecting the pump impeller and ensuring efficient water flow. These components prevent leaves, hair, and other particles from entering the pump housing, which could cause damage or reduced performance. Regularly inspect and clean the pump strainer basket – frequency depends on pool usage and surrounding environment.
A clogged strainer restricts water flow, potentially leading to pump overheating or failure. Remove the basket, rinse thoroughly with a garden hose, and reinstall securely. Maintaining clean strainers extends pump life and optimizes filtration effectiveness, contributing to a cleaner and healthier pool.
Installation Guide
Proper pump installation is crucial for reliable operation. This section details pump placement, hose connections, electrical setup, and grounding for safe, efficient use.
Pump Placement
Selecting the right location for your Intex pool pump is essential for performance and longevity. Position the pump on a firm, level surface, protected from direct sunlight and inclement weather. Ensure adequate ventilation around the unit to prevent overheating.
Ideally, the pump should be as close to the filter and pool as possible to minimize hose length and potential flow restriction. Avoid placing the pump in a confined space or near flammable materials.
Consider accessibility for maintenance and servicing when choosing a location; A dry, well-drained area is preferable to prevent corrosion and electrical hazards. Remember to allow sufficient space for hose connections and access to the pump’s controls.
Hose Connection Procedures
Proper hose connections are crucial for efficient pump operation and preventing leaks. Begin by ensuring all connections are clean and free of debris. Attach the intake hose to the pump’s inlet, securing it with a hose clamp to prevent slippage.
Connect the outlet hose to the pump’s outlet, again using a hose clamp for a secure fit. Verify that the hoses are not kinked or twisted, as this restricts water flow.
For models like the 28634 (2500 GPH) with 1.5” (38mm) connections, ensure compatibility with your filter and pool plumbing. Double-check all connections for tightness before starting the pump to avoid water loss and potential damage.
Electrical Connection
Before connecting the pump, always ensure the power supply matches the pump’s voltage requirements. Never use extension cords; a dedicated, grounded circuit is essential for safety and performance.
The Intex 2500 GPH (28634) and 4m3/hr (26644) models are designed for standard household current, but verify compatibility.
If using with a heat pump like the Hot Splash 3.75kw, confirm the pump’s flow rate meets the heat pump’s requirements. Always disconnect power before performing any electrical work. Improper electrical connections can cause serious injury or damage the pump; consult a qualified electrician if unsure.
Grounding Requirements
Proper grounding is critical for safety when operating your Intex pool pump. The pump must be connected to a grounded electrical outlet to prevent electric shock. Never remove the grounding pin from the plug.
Ensure the electrical circuit is properly grounded according to local electrical codes.
If you are unsure about grounding procedures, consult a qualified electrician. A faulty ground connection can create a dangerous situation. Regularly inspect the grounding connection for corrosion or damage. Ground Fault Circuit Interrupters (GFCIs) are highly recommended for added protection, especially near water. Always prioritize electrical safety when installing and operating your pump.
Voltage Compatibility
Confirm your Intex pool pump’s voltage requirements before operation. Using an incompatible voltage can severely damage the pump motor and void the warranty. Most Intex pumps are designed for standard household voltage, typically 110-120V in North America.
Always check the pump’s label for specific voltage information.
Do not attempt to modify the pump to operate on a different voltage. Using a voltage transformer may be necessary if your local voltage differs. Incorrect voltage can also create a fire hazard. Ensure the power supply matches the pump’s specifications to guarantee safe and efficient operation. Prioritize voltage compatibility for long-lasting performance.
Operation Instructions
Proper pump operation involves priming, starting, stopping, and regular filter maintenance. Following these steps ensures efficient water circulation and a clean, enjoyable pool experience.
Priming the Pump
Priming is crucial for initial pump startup and after maintenance. Ensure the pump housing is filled with water before operation to prevent damage. Begin by opening the pump’s strainer basket and filling it completely with water. Next, slowly fill the pump housing itself with water, using the hose connection if necessary.
Replace the strainer basket lid securely. Then, turn on the pump for a short period, allowing it to draw water through the system. If the pump doesn’t prime after a few attempts, check for air leaks in the hose connections and ensure all valves are in the correct position for circulation. A properly primed pump will operate quietly and efficiently, maintaining optimal water flow.
Starting and Stopping the Pump
To start the pump, verify all connections are secure and the pump is adequately primed. Ensure the electrical connection is stable and meets grounding requirements. Switch on the power supply to initiate pump operation, observing for any unusual noises or vibrations. Regularly monitor the pump during initial use to confirm proper functionality.
When stopping the pump, always disconnect the power supply before performing any maintenance or adjustments. Avoid abrupt shutdowns, as this can cause pressure surges. Allow the pump to run briefly after use to clear water from the lines, preventing freezing in colder climates. Proper starting and stopping procedures extend pump lifespan.
Filter Cleaning & Maintenance
Regular filter cleaning is crucial for maintaining optimal pump performance and water clarity. The frequency depends on pool usage and debris levels. For cartridge filters (like Model 28634), remove the cartridge and rinse thoroughly with a garden hose, avoiding high pressure that could damage the filter media. Sand filters (like Model 26644) require backwashing – reversing the water flow to flush out accumulated dirt.
Inspect filter components for wear and tear during cleaning. Replace cartridges when they become excessively soiled or damaged. Backwashing frequency depends on pressure gauge readings; follow manufacturer guidelines. Consistent maintenance ensures efficient filtration and prolongs the pump’s operational life.
Cartridge Filter Cleaning

Cleaning the cartridge filter (Model 28634) is a straightforward process vital for maintaining water quality. First, power off the pump and release any pressure. Remove the filter cartridge and use a garden hose with a nozzle to spray away debris, working from top to bottom. Avoid using high-pressure settings, as this can damage the delicate filter fibers.
For stubborn dirt, a filter cleaning solution can be used, following the product’s instructions carefully. Rinse thoroughly after applying the solution; Inspect the cartridge for tears or damage; replace if necessary. A clean cartridge ensures efficient filtration and extends the pump’s lifespan.
Sand Filter Backwashing
Backwashing is crucial for cleaning sand filters (like those in some Intex sets, Model 26644) and restoring optimal performance. Begin by turning off the pump. Rotate the multiport valve to the “Backwash” position. Ensure the waste line is properly connected and directed away from the pool area. Turn the pump back on and allow it to run for 2-3 minutes, or until the water in the sight glass runs clear.
Then, turn off the pump again, set the valve to “Rinse” and run for about 30 seconds. Finally, return the valve to the “Filter” position and resume normal operation. Regular backwashing maintains water clarity and extends the life of the sand media.
Flow Rate Adjustment
Adjusting the flow rate is vital for efficient pool operation and compatibility with accessories like Intex heat pumps. Models like the 28634 (2500 GPH) and 26644 (4m3/hr) deliver specific flow rates. Ensure the pump’s output meets the heat pump’s requirements; insufficient flow can damage the heater.
Flow rate isn’t directly adjustable on most Intex pumps, but can be influenced by valve positions and filter cleanliness. A clogged filter restricts flow. Monitor the flow visually and ensure adequate circulation throughout the pool; Proper flow ensures effective filtration and chemical distribution for a clean and healthy swimming environment.
Troubleshooting Common Issues
Addressing pump problems like failure to start, low flow, leaks, or unusual noises is crucial for maintaining a functional and enjoyable pool experience.
Pump Not Starting
If your Intex pool pump fails to start, first verify the power supply. Ensure the pump is properly plugged into a functioning electrical outlet and that the circuit breaker hasn’t tripped. Check for any loose connections in the power cord.
Next, confirm the pump has been adequately primed – air pockets can prevent operation. Inspect the strainer basket for obstructions; a clogged basket restricts water flow and can hinder startup. Also, examine the pump housing for any visible damage.
If these steps don’t resolve the issue, consult the pump’s wiring diagram to ensure correct electrical connections. A faulty capacitor or motor might require professional repair or replacement. Remember safety first – disconnect power before any inspection!
Low Water Flow
Experiencing low water flow with your Intex pool pump? Begin by checking the strainer basket and pump basket for debris – leaves, dirt, and hair commonly cause restrictions. A clogged filter, whether cartridge or sand, is a frequent culprit; clean or backwash as needed.
Inspect the hose connections for kinks or blockages, ensuring a clear path for water. Verify the pump is fully primed, as air in the system reduces flow. Confirm the multi-port valve (if applicable) is set to the correct filtration position.
If flow remains low, consider the pump’s impeller; it may be damaged or worn. For heat pump compatibility, ensure adequate flow rate is maintained.
Leaking Connections
Discovering leaks around your Intex pool pump connections? First, power off the pump before inspecting. Tighten all hose clamps securely, ensuring they are properly positioned on the hoses. Examine the hoses themselves for cracks or wear, replacing them if necessary.
Check the O-rings and seals around the pump housing and connections; these can dry out and cause leaks. Apply a silicone-based lubricant to the O-rings before reassembling. Verify that the drain plug is tightly closed.
If leaks persist, inspect the threads on the connections for damage. Ensure compatibility with heat pump connections, using appropriate fittings.
Unusual Noises
Hearing strange sounds from your Intex pool pump? Immediately power down the unit and investigate. Rattling often indicates loose components – check the pump housing and impeller area for debris. A humming sound with no water flow suggests priming is needed, or a blockage exists.
Grinding noises can signify impeller damage or wear, potentially requiring pump replacement. Whining sounds might point to a failing motor bearing. Ensure proper water flow, especially when used with a heat pump, as insufficient flow can cause noise.
Regularly inspect for obstructions and maintain clean strainers to prevent unusual sounds.

Winterizing Your Intex Pool Pump
Proper winterization protects your pump from freezing damage. Drain all water, clean thoroughly, and store indoors to ensure longevity and reliable spring startup.
Draining and Cleaning
Before storing your Intex pool pump for the winter, complete draining is crucial. Disconnect all hoses and use a wet/dry vacuum to remove any remaining water from the pump housing, filter compartment, and impeller area.
Thoroughly clean the pump housing with a mild detergent and soft brush, removing any debris or buildup. Inspect the strainer basket and remove any leaves, dirt, or other obstructions. For sand filters, backwash one last time before disassembly.
Cartridge filters should be removed and cleaned separately, ensuring all traces of algae and grime are eliminated. Allow all components to dry completely before storage to prevent mold or mildew growth, extending the pump’s lifespan.
Storage Recommendations
Proper storage is vital for maintaining your Intex pool pump’s longevity. Once completely dry, store the pump in a cool, dry, and protected indoor location, shielded from freezing temperatures and direct sunlight.
Avoid storing the pump in a damp basement or shed where moisture can accumulate. Consider using a plastic storage bin to further protect it from dust and pests.
Store the filter separately, ensuring it’s also clean and dry. Keep the pump’s manual and any replacement parts readily accessible for easy reference during the next pool season. Proper storage ensures a quick and efficient setup when warmer weather returns.
Intex Pump Model Specifications Comparison
Comparing models like the 28634 (2500 GPH) and 26644 (4m3/hr) reveals differences in flow rate, tank size, and compatibility with Intex heat pumps.
Model 28634 (2500 GPH) Details
The Intex Cartridge pump, Model 28634, is a popular choice for maintaining above-ground swimming pools up to 24 feet in size. This pump boasts a flow rate of 2500 gallons per hour (GPH), translating to approximately 7.2 cubic meters per hour.
Notably, it features 1.5-inch (38mm) hose connections, making it particularly well-suited for integration with SunSpring pool heat pumps. This compatibility ensures efficient heat distribution throughout the pool. The pump utilizes a cartridge filtration system, requiring periodic cleaning to maintain optimal performance.
Users should regularly inspect and clean the cartridge to prevent reduced water flow and ensure the longevity of the pump. Proper maintenance, as detailed in the full instructions manual, is crucial for reliable operation.
Model 26644 (4m3/hr) Details
The Intex Pool Filter Pump, Model 26644, is designed for all above-ground swimming pools, offering a robust sand filtration system. This model delivers a flow rate of 4 cubic meters per hour (4m3/hr), effectively circulating water throughout the pool. It features a 254mm diameter tank, providing ample space for the filtration media.
This pump requires 8.5kg of glass media (sold separately) for optimal filtration. The pump itself operates on 0.25 horsepower, balancing power and efficiency. When considering compatibility with Intex heat pumps, verifying the flow rate meets the heat pump’s requirements is essential.
Regular maintenance, including backwashing the sand filter, is vital for maintaining water clarity and pump performance, as outlined in the comprehensive manual.
Compatibility with Intex Heat Pumps
Ensuring compatibility between your Intex pool pump and heat pump is crucial for efficient pool heating. Specifically, the flow rate of the pump must meet or exceed the minimum requirement specified by the Intex heat pump model you are using.
For example, the Intex Cartridge pump Model 28634, with its 1.5-inch (38mm) hose connections, is well-suited for use with SunSpring pool heat pumps. However, always double-check the heat pump’s documentation.
Model 26644 (4m3/hr) also requires flow rate verification before connecting to a heat pump. Insufficient flow can damage the heat pump or reduce its heating efficiency. Proper flow ensures optimal heat transfer and consistent water temperature.