Munchkin Bottle Sterilizer Instructions: A Comprehensive Guide
Navigating parenthood demands safe, effective bottle sterilization; this guide details Munchkin sterilizers – Steam Guard, Clean Electric, and UV Mini – ensuring optimal hygiene for your little one.
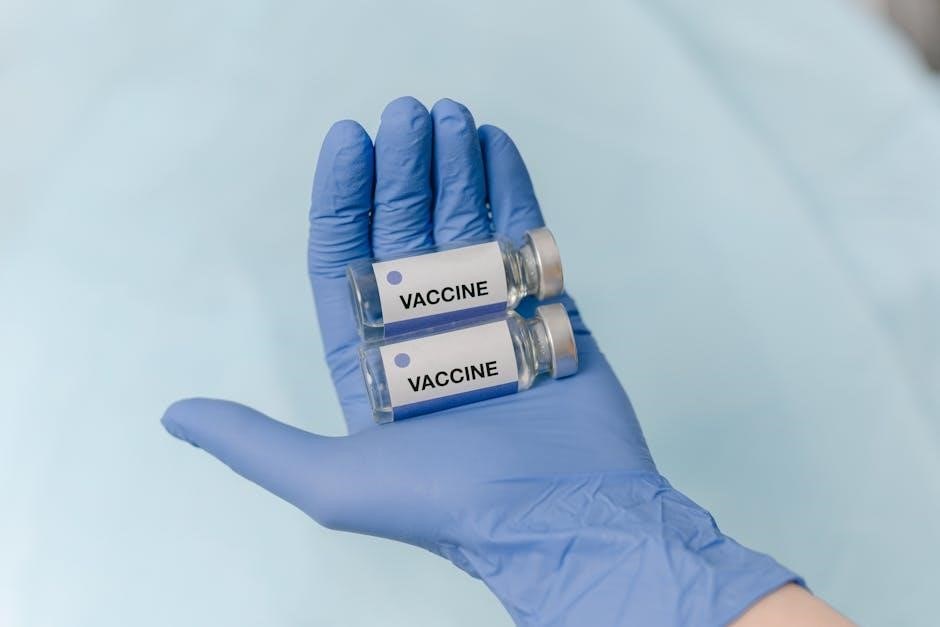
Munchkin bottle sterilizers are designed to provide parents with a convenient and reliable method for eliminating harmful bacteria and viruses from baby bottles, nipples, pacifiers, and other essential feeding accessories. Ensuring proper sterilization is crucial during a baby’s first months, as their immune systems are still developing, making them more susceptible to illness.
Munchkin offers a range of sterilizers to suit different needs and preferences, including microwave steam sterilizers, electric steam sterilizers, and portable UV sterilizers. These products utilize various technologies – from the power of steam to UV-C light – to achieve a high level of hygiene. Each sterilizer is engineered with safety and ease of use in mind, offering features like automatic shut-off and child-safe designs. Choosing the right Munchkin sterilizer can significantly contribute to your baby’s health and well-being, providing peace of mind during feeding time.
Types of Munchkin Bottle Sterilizers Available
Munchkin caters to diverse parenting lifestyles with three primary sterilizer types. The Steam Guard Microwave Sterilizer offers a quick and economical solution, utilizing steam generated within a microwave for effective sanitization. It’s compact and ideal for travel. Next, the Clean Electric Sterilizer provides a hands-free, automated experience, consistently delivering sterilized items with a simple push of a button and automatic shut-off.
Finally, the UV Mini Sterilizer is a portable powerhouse, employing UV-C light to eliminate germs on pacifiers and nipples in under a minute. This is perfect for on-the-go sanitizing. Each type addresses different needs – speed, convenience, or portability – while all maintaining Munchkin’s commitment to safety and efficacy. Selecting the best option depends on your routine and priorities.
Steam Guard Microwave Sterilizer: Overview
The Munchkin Steam Guard Microwave Sterilizer is a cost-effective and space-saving solution for sanitizing baby bottles, nipples, and accessories. This sterilizer utilizes the power of steam, generated within your microwave, to eliminate 99.9% of bacteria and viruses. It’s designed to hold multiple bottles and components simultaneously, streamlining the cleaning process.
Its simple design requires minimal assembly and is incredibly easy to use. Adding the correct amount of water is crucial for optimal steam production. The Steam Guard is compatible with most microwave ovens, offering a convenient way to ensure your baby’s feeding items are hygienically clean. Always refer to the included instructions for specific microwave settings and sterilization times.
Clean Electric Sterilizer: Overview
The Munchkin Clean Electric Sterilizer offers a convenient, hands-free approach to bottle and accessory sanitation. This electric model utilizes steam to effectively kill 99.9% of harmful bacteria and viruses, providing a hygienic clean for your baby’s essentials. It features a spacious interior capable of accommodating a variety of bottle sizes and shapes, alongside pacifiers, nipples, and even small toys.
A key benefit is its automatic shut-off feature, ensuring safety and energy conservation once the sterilization cycle is complete. The Clean Electric Sterilizer simplifies the process, eliminating the need for a microwave. Regular descaling is recommended to maintain optimal performance and longevity of the unit.
UV Mini Sterilizer: Overview
The Munchkin UV Mini Sterilizer provides a rapid and portable solution for sanitizing small baby items. Utilizing UV-C light technology, it effectively eliminates 99% of bacteria and viruses – including Staph and E. coli – from pacifiers and bottle nipples in just 59 seconds. This compact sterilizer is ideal for on-the-go use, offering peace of mind when traveling or away from home.
Safety is paramount; the UV light automatically shuts off when the unit is opened, preventing exposure. It’s designed for specific items like nipples and pacifiers, and should only be used as directed in the manual. The UV Mini Sterilizer offers a quick, chemical-free sanitizing option.
Setting Up Your Munchkin Bottle Sterilizer
Proper setup is crucial for effective sterilization; this section guides you through unboxing, cleaning, and water preparation for your chosen Munchkin model.
Unboxing and Component Identification
Upon opening your Munchkin bottle sterilizer, carefully remove all components from the packaging. Ensure you have the sterilizer base (for electric or microwave models), a removable rack or tray, and potentially a measuring cup – crucial for accurate water levels.
For the Steam Guard Microwave Sterilizer, verify the presence of the steam guard itself. The Clean Electric Sterilizer will include a power cord. The UV Mini Sterilizer should contain the unit and a USB charging cable.
Inspect each part for any damage incurred during shipping. Refer to the included product manual for a detailed diagram identifying each component. Familiarizing yourself with these parts before first use will streamline the setup and operation process, guaranteeing optimal performance and safety.
Preparing for First Use: Cleaning the Sterilizer
Before sterilizing baby items for the first time, thoroughly clean the Munchkin sterilizer itself. Use warm, soapy water to wash the base, rack, and any removable parts. Rinse completely to remove all soap residue, as any remaining traces could potentially contaminate sterilized items.
For the Steam Guard and Clean Electric Sterilizers, pay close attention to the water reservoir, ensuring it’s free of debris. The UV Mini Sterilizer’s interior can be wiped down with a damp cloth.
Avoid abrasive cleaners or scouring pads, as these can damage the sterilizer’s surfaces. Allow all components to air dry completely before use. This initial cleaning step is vital for maintaining hygiene and ensuring the sterilizer functions effectively from the outset.
Water Requirements: Distilled vs. Tap Water
Munchkin bottle sterilizers generally recommend using distilled water for optimal performance and longevity. Distilled water lacks minerals that can cause scale buildup within the sterilizer, particularly in electric steam models. This buildup can reduce efficiency and potentially damage the unit over time.
While some models can technically use tap water, it’s crucial to understand the potential drawbacks. Tap water’s mineral content necessitates more frequent descaling. If using tap water, consistently monitor for scale and descale as needed.
Always check your sterilizer’s specific instructions. Using the correct water type ensures effective sterilization and prolongs the life of your Munchkin product.
Using the Steam Guard Microwave Sterilizer
The Steam Guard utilizes microwave steam for quick sterilization; add water, load items, set the microwave, and ensure safe removal after cooling.
Adding Water to the Steam Guard
Proper water measurement is crucial for effective sterilization with the Munchkin Steam Guard. Begin by removing the included rack from the sterilizer base. Carefully pour precisely 7 fluid ounces of water into the reservoir. Distilled water is generally recommended to minimize mineral buildup and prolong the sterilizer’s lifespan, though tap water can be used if distilled isn’t available.
Ensure accurate measurement using the provided measuring cup, or a similar kitchen tool, to avoid under or overfilling. Insufficient water may result in incomplete sterilization, while excessive water could potentially spill during the process. Once the water is added, replace the rack securely into the base, preparing it to hold the bottles and accessories ready for sterilization.
Loading Bottles and Accessories
Efficient loading maximizes the Steam Guard’s capacity. After adding water and replacing the rack, arrange bottles, nipples, and other accessories facing downwards. This ensures steam reaches all interior surfaces for thorough sterilization. Ensure items aren’t overcrowded; leave space between each item for optimal steam circulation.
Smaller components, like nipples and rings, can be placed on the upper rack or within the bottles themselves. Avoid placing items directly on the bottom of the sterilizer, as this can hinder steam distribution. Check for obstructions – ensure nothing blocks the steam vents. Proper loading is key to achieving 99.9% bacteria elimination, providing peace of mind for your baby’s health.
Microwave Settings and Sterilization Time
Optimal sterilization with the Steam Guard requires specific microwave settings. Generally, a microwave wattage of 800-1000W is recommended. Sterilization times vary: for most microwaves, 3-6 minutes is sufficient. However, consult your microwave’s manual for precise power level adjustments.
Lower wattage microwaves may require longer sterilization times, potentially up to 8-10 minutes. Avoid over-sterilizing, as it won’t enhance effectiveness and could potentially damage items. Always use the provided measuring cup to ensure the correct water level. After the cycle, allow the sterilizer to cool completely before opening, preventing burns.
Cooling Down and Safe Removal
Post-sterilization, allowing the Steam Guard to cool is crucial for safety. The contents and sterilizer itself will be extremely hot. Resist the urge to open it immediately; a cooling period of at least 10-15 minutes is recommended. This prevents accidental burns from steam or hot items.
Use oven mitts or tongs when carefully removing bottles and accessories. Avoid touching the interior surfaces of the sterilizer until it’s completely cool. Inspect items for any damage before use. Proper cooling ensures a safe handling experience, protecting both you and your baby. Discard any remaining water after cooling, preventing accidental ingestion.
Using the Clean Electric Sterilizer
The Clean Electric Sterilizer offers convenient, automated sanitation. Simply fill the reservoir, arrange items, power on, and let the cycle eliminate germs effectively.
Filling the Water Reservoir
Proper water levels are crucial for effective sterilization with the Clean Electric Sterilizer. Begin by locating the water reservoir, typically found at the base of the unit. Carefully remove the reservoir, ensuring the sterilizer is unplugged for safety.
Using the provided measuring cup – or a similar accurate measuring tool – pour the correct amount of water into the reservoir. Generally, 4 fluid ounces (approximately 120ml) are required for optimal steam generation. Distilled water is highly recommended to minimize mineral buildup and prolong the life of the sterilizer, though tap water can be used if distilled isn’t available.
Avoid overfilling, as this could lead to water spillage during operation. Once filled, securely replace the reservoir back into the sterilizer base, ensuring it’s properly seated before proceeding. Always double-check the water level before each sterilization cycle to guarantee consistent performance.
Arranging Bottles and Accessories
Efficient arrangement within the Clean Electric Sterilizer maximizes steam exposure for thorough cleaning. First, ensure all bottle components – bottles, nipples, rings, caps – are disassembled. Place larger items, like bottles, upside down on the provided rack.
Smaller items, such as nipples and rings, should be placed in the designated accessory tray, ensuring they don’t obstruct steam flow. Avoid overcrowding; items need space for steam to circulate effectively. Do not place items directly on the base of the sterilizer, as this can prevent proper sterilization.
Ensure all items are stable and won’t topple over during the cycle. The sterilizer is designed to accommodate various bottle shapes and sizes, but proper arrangement is key. Always check that nothing is blocking the steam vent before starting the cycle.
Powering On and Sterilization Cycle
Initiating the sterilization cycle on the Clean Electric Sterilizer is straightforward. After arranging bottles and accessories, securely close the lid. Plug the sterilizer into a grounded electrical outlet. Press the power button; a light indicator will illuminate, confirming it’s operational.
The sterilizer will automatically begin the sterilization cycle, typically lasting around 8-10 minutes. During this time, steam will circulate, effectively eliminating 99.9% of germs. Avoid opening the lid during the cycle, as this disrupts the process and releases hot steam.
The sterilizer features an automatic shut-off function, halting the cycle upon completion. A signal, often a beep or light change, indicates the cycle is finished. Allow the contents to cool completely before removing them.
Automatic Shut-Off Feature
Safety and convenience are paramount with the Munchkin Clean Electric Sterilizer, and the automatic shut-off feature exemplifies this. Once the sterilization cycle is complete – typically around 8-10 minutes – the sterilizer will automatically power down. This eliminates concerns about accidental overheating or energy waste.
A clear indicator, usually a change in the power button’s light or an audible beep, signals the cycle’s conclusion and the activation of the shut-off. This feature provides peace of mind, especially for busy parents. Do not attempt to manually override this safety mechanism.
The automatic shut-off ensures the sterilizer doesn’t remain active unnecessarily, prolonging its lifespan and conserving energy. Always allow the unit to cool before handling sterilized items.
Using the UV Mini Sterilizer
The UV Mini Sterilizer utilizes UV-C light to quickly sanitize pacifiers and nipples, killing 99% of bacteria and viruses in under a minute!
Loading Items for UV Sterilization
Preparing items for sterilization with the Munchkin UV Mini Sterilizer is straightforward, but crucial for effectiveness. Ensure items are clean before loading; the UV light disinfects, it doesn’t wash away residue. Pacifiers and bottle nipples fit easily within the compartment, and the sterilizer is also suitable for teethers and mouthguards.
Arrange items so UV light can directly contact all surfaces. Avoid overcrowding, as this can create shadows and hinder complete sterilization. Smaller items can be placed together, but ensure no part is blocked from the UV-C light. The sterilizer’s design accommodates various shapes and sizes, offering flexibility. Remember to only use the sterilizer for intended items, following the manufacturer’s guidelines for optimal results and safety.
Operating the UV Light Cycle
Initiating the UV sterilization cycle on the Munchkin Mini Sterilizer is remarkably simple. After loading the items, securely close the lid – this is vital for safety, as the UV light automatically activates upon closure. Press the power button to begin the 59-second sterilization process. The UV-C light will illuminate, effectively eliminating 99% of bacteria and viruses like Staph and E. coli.
Safety is paramount; the UV light automatically shuts off when the cycle completes or if the lid is opened during operation. This prevents accidental exposure. A visual indicator confirms cycle completion. Avoid looking directly at the UV light, even when the unit is operating. This compact sterilizer offers a quick and convenient way to sanitize small baby essentials on the go.
Safety Features of the UV Sterilizer
The Munchkin UV Mini Sterilizer prioritizes safety with several key features. Most importantly, the UV-C light automatically shuts off if the lid is opened during operation, preventing accidental exposure to the ultraviolet rays. This automatic shut-off also occurs upon cycle completion, ensuring user protection.
Designed with child safety in mind, the unit’s construction prevents easy access to the UV light source. The sterilizer is intended solely for sanitizing compatible items as described in the manual; using unauthorized attachments is strictly prohibited. Always operate the sterilizer according to the provided instructions, and never attempt to disassemble or modify it. Proper use guarantees effective sterilization and safeguards against potential hazards.
Maintenance and Cleaning
Regular upkeep ensures optimal performance; clean routinely, descale electric models to prevent mineral buildup, and address common issues with troubleshooting guidance for longevity.
Regular Cleaning Procedures
Consistent cleaning is vital for maintaining a hygienic sterilization environment. After each use, unplug the electric sterilizer and allow it to cool completely before cleaning. For all Munchkin sterilizers, gently wipe down the interior with a soft, damp cloth. Avoid abrasive cleaners, as they can damage the surfaces.
The removable parts, such as the rack and any trays, should be washed with warm, soapy water. Rinse thoroughly and allow to air dry. Pay close attention to any areas where mineral deposits may accumulate. For the UV Mini Sterilizer, wipe the interior with a dry cloth after each use to remove any residue. Regularly inspect the unit for any signs of damage or wear, and discontinue use if any issues are found. Proper cleaning extends the life of your sterilizer and ensures effective performance.
Descaling the Sterilizer (Electric Models)
Mineral buildup from water can reduce the efficiency of your Munchkin Clean Electric Sterilizer. Descale every 3-6 months, depending on water hardness. A solution of equal parts white vinegar and water is effective. Pour this mixture into the water reservoir, ensuring it covers the heating element.
Run a full sterilization cycle, then allow the solution to sit for 30-60 minutes. Afterwards, discard the solution and rinse the reservoir thoroughly with clean water, running several cycles with just water to remove any vinegar residue. Repeat rinsing until the vinegar smell is gone. Regular descaling maintains optimal performance and prolongs the sterilizer’s lifespan, ensuring consistently sanitized bottles and accessories for your baby.
Troubleshooting Common Issues
If your Munchkin sterilizer isn’t functioning, first check the power connection and ensure the unit is properly assembled. For electric models, verify the water reservoir is filled to the correct level. If using the Steam Guard, confirm the microwave is functioning correctly and the sterilization time is appropriate.
Persistent odors may indicate a need for descaling (electric models). If the UV Mini isn’t activating, check the battery or power source. Always refer to the manual for specific error codes. If issues persist, contact Munchkin customer support for assistance. Never attempt to repair the unit yourself, as this could void the warranty and create a safety hazard.
Safety Precautions
Prioritize safety by reading all instructions before use; keep sterilizers out of children’s reach, and properly dispose of them when no longer needed.
Important Warnings and Cautions
Always supervise sterilizer use and ensure proper ventilation. Never operate a damaged unit or with attachments not recommended by Munchkin. The Steam Guard Microwave Sterilizer gets hot – exercise extreme caution when removing bottles post-sterilization to avoid burns.
Electric models require a grounded outlet; avoid using extension cords. UV Mini Sterilizers feature auto shut-off, but never directly view the UV light. Do not immerse the sterilizer base in water.
Inspect the power cord regularly for damage. Never attempt to repair the sterilizer yourself. Use only distilled or filtered water in electric models to prevent mineral buildup. Ensure the unit is completely cool before cleaning or storing. Follow all safety guidelines to protect both yourself and your baby.
Child Safety Features
Munchkin prioritizes safety; their sterilizers incorporate features to protect little ones. The UV Mini Sterilizer automatically shuts off the UV light when opened, preventing accidental exposure. Electric models often feature cool-touch exteriors, minimizing burn risks.
Steam Guard sterilizers, while requiring caution due to heat, are designed for microwave use, keeping the unit contained. Secure lids and stable bases prevent accidental tipping. Cord storage options on electric models reduce tripping hazards.
Always keep the sterilizer out of reach of children when in operation. Teach older children about the dangers of hot surfaces and electrical appliances. Regularly inspect for any damage that could compromise safety.
Proper Disposal of the Sterilizer
Responsible disposal of your Munchkin bottle sterilizer is crucial for environmental safety. Do not simply discard it with household waste. Electric models contain electronic components and require special handling. Check with your local waste management authority for e-waste recycling programs.
Before disposal, ensure the unit is unplugged and cooled completely. Remove any batteries if applicable, disposing of them separately at a designated battery recycling location. Plastic components, where recyclable, should be rinsed and placed in the appropriate recycling bin.
Consider donating a functioning sterilizer to a charity or another parent if it’s still in good working order. This extends its lifespan and reduces waste. Always follow local regulations regarding appliance disposal.