Speed Queen Dryer Troubleshooting Manual: A Comprehensive Guide
This manual provides detailed guidance for diagnosing and resolving issues with Speed Queen dryers, referencing error codes and offering repair solutions.
Understanding Your Speed Queen Dryer Model
Before diving into troubleshooting, identifying your specific Speed Queen dryer model is crucial. Model numbers are typically located on a label inside the dryer door or on the back panel. This information is essential for accessing the correct service manual and parts diagrams. Different models may have varying components and error code interpretations.
Speed Queen dryers are known for their durability and commercial-grade construction. However, like any appliance, they can experience issues. Understanding the dryer’s features, such as gas or electric operation, and control panel functions will aid in accurate diagnosis. Referencing the dryer’s original user manual, if available, can provide valuable insights into its operation and maintenance requirements.
Locating the Error Code Display
Speed Queen dryers utilize an error code system to signal malfunctions, aiding in efficient troubleshooting. The location of the error code display varies depending on the model. Typically, the digital display panel on the control console will illuminate with a specific error code when a problem arises.
Some older models might use flashing LED lights to communicate error codes. In these cases, consult the service manual to decipher the flashing pattern. Carefully observe the display immediately after the dryer stops functioning, as the code may not remain visible continuously. Documenting the error code accurately is vital for targeted repair efforts and parts ordering.

Common Speed Queen Dryer Error Codes
Speed Queen dryers employ a range of error codes to pinpoint specific issues. Understanding these codes is crucial for effective repair. Common codes include E1, indicating a temperature sensor problem, and E2, signaling a moisture sensor failure. An E3 code typically points to a heating element malfunction, while E4 suggests a motor overload or failure.
These codes are not exhaustive; the service manual provides a complete list for your specific model. Always refer to the manual for detailed explanations and recommended solutions associated with each error code. Accurate code identification streamlines the troubleshooting process, saving time and resources.
E1: Temperature Sensor Issue
Error code E1 on a Speed Queen dryer indicates a problem with the temperature sensor or its associated circuitry. This sensor monitors the dryer’s internal temperature, ensuring safe and efficient operation. A faulty sensor can cause the dryer to overheat or not heat at all. Troubleshooting involves checking the sensor’s resistance with a multimeter, comparing it to the values specified in the service manual.
Inspect the wiring connections to the sensor for any damage or looseness. A damaged sensor requires replacement. Ensure the control board is functioning correctly, as it can also trigger an E1 code; Proper diagnosis prevents further damage and restores optimal dryer performance.
E2: Moisture Sensor Failure
The E2 error code signals a malfunction within the Speed Queen dryer’s moisture sensing system. This system detects the dampness level of clothes, automatically ending the drying cycle when garments are dry. A failure can lead to clothes remaining wet or the dryer running excessively long. Initial troubleshooting involves cleaning the moisture sensor bars located inside the dryer drum, removing any lint or residue buildup.
If cleaning doesn’t resolve the issue, the moisture sensor itself may be defective and require replacement. Verify the wiring harness connecting to the sensor is secure and undamaged. A faulty control board can also generate an E2 code, necessitating further investigation.
E3: Heating Element Malfunction
An E3 error code on a Speed Queen dryer indicates a problem with the heating element, preventing the dryer from generating heat. This results in clothes remaining damp after a cycle. Begin by checking the heating element for visible breaks or damage using a multimeter to test for continuity. A lack of continuity confirms a failed element requiring replacement.
Before replacing the element, always inspect the thermal fuse and thermistor, as these components protect the heating element and can cause a false E3 code if faulty. Ensure all wiring connections to the heating element are secure and free from corrosion. A defective control board can also trigger this error.
E4: Motor Overload/Failure
The E4 error code signals a motor overload or potential motor failure within your Speed Queen dryer. This often occurs due to excessive load, restricted drum movement, or a failing motor itself. Initially, test the motor using a multimeter for continuity and resistance, comparing readings to the service manual specifications.
Inspect the drive belt for proper tension and condition; a slipping or broken belt can strain the motor. Check for obstructions within the drum that might be causing resistance. If the motor tests faulty, replacement is necessary. A malfunctioning control board can also incorrectly trigger an E4 code, so verify its functionality.
Troubleshooting No Heat Issues
Addressing a lack of heat in your Speed Queen dryer requires a systematic approach. Begin by checking the heating element for continuity using a multimeter; a break indicates a need for replacement. Inspect the thermal fuse – a safety device that shuts off power if overheating occurs – and replace it if blown.
For gas dryers, verify the gas valve is receiving power and opening correctly. Ensure the igniter is glowing and the flame sensor is functioning. Electrical issues, like a faulty timer or control board, can also prevent heat generation. Always disconnect power before any internal inspection.
Checking the Heating Element
To assess the heating element, first disconnect the dryer from the power supply. Locate the element housing – typically at the rear of the dryer – and access the element itself. Using a multimeter set to the ohms (Ω) setting, test for continuity across the element’s terminals. A reading of zero or a very low number indicates a functional element.
An infinite or very high resistance reading signifies a broken element, requiring replacement. Visually inspect the element for any signs of damage, such as blistering or breaks. Exercise caution when handling the element to avoid burns.
Inspecting the Thermal Fuse
The thermal fuse is a crucial safety component, protecting against overheating. Disconnect power before accessing it – usually located near the exhaust vent or heating element. Visually inspect the fuse for signs of melting or breakage; a blackened or cracked fuse indicates it has blown and needs replacement.
Use a multimeter set to continuity to confirm its status. A continuous circuit signifies a good fuse, while no continuity means it’s faulty. Replacing a blown fuse addresses the symptom, but identify and correct the underlying cause of overheating to prevent recurrence.
Verifying the Gas Valve (Gas Dryers)
For gas dryers, a malfunctioning gas valve can prevent heating. Always disconnect power and gas supply before inspection. Carefully check the valve for proper operation; you may hear a clicking sound when it opens during a cycle. A lack of clicking suggests a faulty valve or control issue.
Use a multimeter to test the valve’s coil for continuity. No continuity indicates a failed coil. If the coil tests good, the valve itself might be mechanically stuck. Caution: Gas valve repair is best left to qualified technicians due to safety concerns.

Addressing Drum Rotation Problems
If your Speed Queen dryer drum isn’t rotating, several components could be at fault. Begin by checking the drive belt for breaks or looseness; a snapped or slipped belt is a common issue. Next, inspect the motor for signs of overheating or failure – listen for unusual noises during operation.
Also, examine the drum rollers, ensuring they spin freely and aren’t worn or damaged. Restricted roller movement creates friction, hindering drum rotation. A faulty motor capacitor can also prevent the motor from starting, so testing it is crucial. Remember safety first – disconnect power before any inspection!
Examining the Drive Belt
The drive belt connects the motor to the dryer drum, facilitating rotation. To inspect it, disconnect the dryer’s power supply. Access the belt, typically by removing an access panel – consult your Speed Queen dryer service manual for specific instructions. Visually check the belt for cracks, fraying, or signs of wear.
A loose belt indicates tension issues, potentially requiring adjustment or replacement. A broken belt will definitively prevent drum rotation. Ensure the belt is properly seated on both the motor pulley and the drum. Replacing a worn or damaged belt is a relatively straightforward repair, restoring proper drum function.
Testing the Motor
If the drum isn’t rotating, despite a good drive belt, the motor is a prime suspect. Always disconnect power before testing! Use a multimeter to check for continuity within the motor windings. A lack of continuity indicates a failed motor. Some models allow for voltage testing at the motor terminals during a cycle – consult the service manual for specific test points.

Listen for humming sounds when the dryer is powered on; this suggests the motor is receiving power but may be mechanically seized; If the motor fails these tests, replacement is necessary. Motor replacement can be complex; consider professional assistance if you’re uncomfortable with electrical repairs.
Inspecting the Drum Rollers
Worn or damaged drum rollers can cause noise and impede drum rotation. Accessing the rollers typically requires removing the dryer cabinet. Ensure the dryer is unplugged! Manually rotate the drum and observe each roller for smooth, quiet operation. Check for flat spots, cracks, or excessive wobble.
A seized or heavily worn roller will create significant resistance. Replace any rollers exhibiting signs of damage. It’s often recommended to replace all rollers simultaneously, even if only one appears faulty, to maintain balanced drum support and prevent future issues. Proper roller function is crucial for efficient drying.
Moisture Sensor Troubleshooting
Accurate moisture sensing is vital for preventing over-drying and ensuring energy efficiency. If your Speed Queen dryer isn’t detecting moisture correctly, begin by carefully cleaning the moisture sensor bars located inside the dryer drum. Lint buildup can significantly interfere with sensor performance.
Use a clean, damp cloth or rubbing alcohol to gently wipe the bars. If cleaning doesn’t resolve the issue, the moisture sensor itself may be faulty and require replacement. A malfunctioning sensor can lead to excessively long drying times or clothes remaining damp. Testing the sensor with a multimeter may be necessary to confirm its condition.
Cleaning the Moisture Sensor Bars
Lint and fabric softener residue are common culprits behind inaccurate moisture readings. Locate the stainless steel moisture sensor bars inside the dryer drum – typically a vertical pair. Always disconnect the dryer from power before cleaning! Gently wipe the bars with a clean, damp cloth. Avoid abrasive cleaners, as they can damage the sensor surface.
For stubborn residue, lightly dampen the cloth with rubbing alcohol. Ensure the alcohol evaporates completely before restarting the dryer. Regular cleaning – every few months, or more frequently with heavy use – will maintain optimal sensor performance and prevent unnecessary drying cycles. A clean sensor equals efficient drying!
Replacing the Moisture Sensor
If cleaning fails to restore accurate moisture sensing, replacement may be necessary. Always disconnect power before proceeding! Accessing the sensor usually involves removing a panel – consult your Speed Queen dryer’s service manual for specific instructions. Carefully disconnect the wiring harness from the old sensor, noting its orientation for correct re-installation.
Install the new moisture sensor, ensuring a secure connection of the wiring harness. Reassemble the dryer panel. Test the dryer with a load of laundry to verify proper operation. A faulty sensor can cause excessively long drying times or clothes remaining damp; a new sensor resolves this.
Ventilation and Airflow Issues
Proper ventilation is crucial for dryer efficiency and safety. Restricted airflow leads to overheating and potential fire hazards. Begin by inspecting the vent hose – kinks, crushing, or excessive length impede airflow. Ensure the hose is rigid metal or flexible metal, never plastic.
Thoroughly clean the lint filter after each load; a clogged filter dramatically reduces airflow. Verify the vent termination point outdoors is unobstructed by snow, debris, or bird nests. A blocked vent prevents moisture expulsion, lengthening drying times and straining the dryer. Regular maintenance prevents these issues.
Checking the Vent Hose for Blockages
A blocked vent hose is a common cause of dryer inefficiency and potential fire risk. Disconnect the hose from both the dryer and the wall. Visually inspect the entire length for kinks, crushing, or accumulated lint. Use a vacuum cleaner with a hose attachment to remove any visible debris.
For stubborn blockages, a specialized vent cleaning brush can be invaluable. Ensure the brush is appropriately sized for your vent diameter. Carefully insert and rotate the brush to dislodge lint. Reconnect the hose securely, verifying a tight seal at both ends to prevent leaks and maintain optimal airflow.
Cleaning the Lint Filter
A clogged lint filter restricts airflow, leading to longer drying times and potential overheating. Locate the lint filter, typically inside the dryer door or on top of the machine. Remove the filter and thoroughly clean it after every load. Use your fingers or a soft brush to remove all traces of lint.
For a deeper clean, occasionally wash the lint filter with mild soap and water. Ensure it’s completely dry before reinstalling. Inspect the lint filter housing for any accumulated lint and vacuum it out. A clean lint filter is crucial for dryer efficiency and safety, preventing fire hazards.
Ensuring Proper Vent Termination
Correct vent termination is vital for safe and efficient dryer operation. The vent should terminate outdoors, away from windows, doors, and air intakes. Avoid using plastic or vinyl venting, as these can melt or become fire hazards; rigid or flexible metal ductwork is preferred. Ensure the vent hood has louvers that open outward, preventing birds or pests from nesting inside.
Check for proper slope to allow condensation to drain. A blocked or improperly terminated vent can cause moisture buildup, leading to mold growth and reduced dryer performance. Regularly inspect the exterior vent for obstructions and clear them as needed.
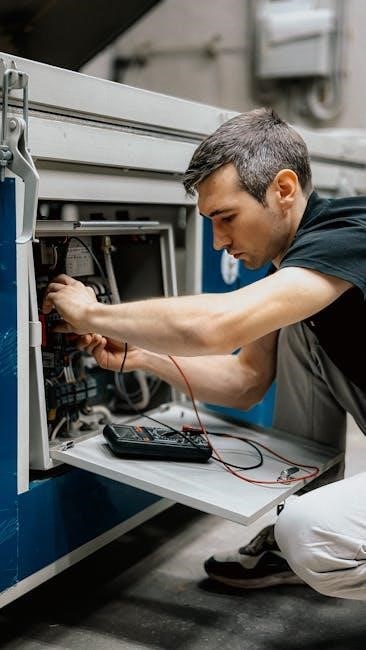
Electrical Component Checks
Before any electrical testing, always disconnect the dryer from the power source! Begin by inspecting wiring connections for looseness, corrosion, or damage. Use a multimeter to test the continuity of wires and components. The timer/control board is a frequent failure point; check for burnt components or a faulty display. Verify the voltage reaching the heating element and motor.
A blown thermal fuse will interrupt the electrical circuit. Carefully examine all wiring harnesses and connectors. Faulty capacitors or relays can also cause operational issues. If unsure, consult a qualified technician for electrical component diagnosis and repair.
Testing the Timer/Control Board
Disconnect power before accessing the timer/control board; Visually inspect for burnt components, swollen capacitors, or damaged traces. Use a multimeter to check for continuity across key terminals, following the wiring diagram. Verify voltage input to the board during operation. A faulty display often indicates a board issue.
Test the board’s functionality by manually advancing the timer through its cycles (if applicable). Look for erratic behavior or unresponsive controls. Replacement is often necessary if significant damage or functional failure is detected. Proper grounding is crucial; ensure connections are secure.
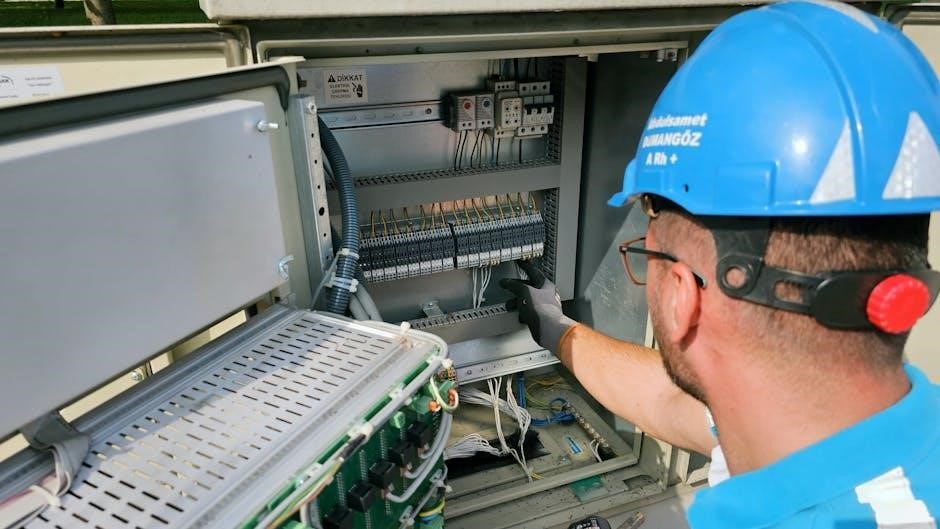
Inspecting Wiring Connections
Always disconnect power before inspecting wiring! Begin by visually examining all wire connections for looseness, corrosion, or damage to the insulation. Gently tug on each wire to confirm a secure fit within its terminal. Pay close attention to connections at the heating element, motor, and control board. Use a wiring diagram as a reference to ensure correct placement.
Check for frayed or broken wires, replacing any that are compromised. A multimeter can verify continuity across wire runs. Loose connections are a common cause of intermittent dryer failures. Secure all connections tightly, and consider using dielectric grease to prevent future corrosion.
Safety Precautions Before Troubleshooting
Prioritize safety! Always disconnect the dryer from the power supply – either unplug it or switch off the circuit breaker – before commencing any troubleshooting or repair work. Gas dryers require shutting off the gas supply valve as well. Wear appropriate safety glasses and gloves to protect against sharp edges and potential electrical hazards.
Never work on a dryer while it’s plugged in. Be mindful of static electricity, especially when handling internal components. Avoid touching exposed wiring. If you are uncomfortable with electrical work, consult a qualified appliance repair technician. Proper ventilation is crucial; avoid inhaling dust or lint during inspection.
Using the Speed Queen Dryer Service Manual
The official Speed Queen Dryer Service Manual (like model 512261) is an invaluable resource. It contains detailed schematics, parts lists, and step-by-step repair procedures specific to your dryer model. Locate the manual online or through authorized Speed Queen parts distributors.
Familiarize yourself with the manual’s layout. Pay close attention to exploded views of components for easier identification. Utilize the troubleshooting flowcharts to systematically diagnose issues. The manual details error code definitions and recommended corrective actions. Always refer to the manual for torque specifications when reassembling parts, ensuring proper functionality and safety.
Resources for Parts and Repair
Finding replacement parts for your Speed Queen dryer is crucial for successful repairs. Authorized Speed Queen parts distributors offer genuine components, ensuring compatibility and quality. Online retailers specializing in appliance parts also provide a wide selection, often at competitive prices.
Consider local appliance repair services for complex issues. Qualified technicians possess the expertise to diagnose and fix problems efficiently. Websites and forums dedicated to appliance repair can offer valuable advice and support from experienced users. Remember to always prioritize safety and disconnect power before attempting any repairs.