Tennant 7100 Parts Manual: A Comprehensive Guide
This manual details the Tennant 7100’s parts‚ offering illustrated lists for ordering replacements and ensuring proper machine servicing and maintenance procedures.
The Tennant 7100 is a robust cleaning machine designed for commercial applications‚ effectively handling both hard floors and carpets. This manual serves as a vital resource for anyone involved in the maintenance and repair of this equipment. Before ordering any replacement parts or supplies‚ always consult the illustrated parts list contained within this guide to ensure compatibility and accuracy.
Understanding the machine’s components and their functions is crucial for efficient servicing. This manual provides detailed information‚ assisting in tasks like exhaust and HEPA filter maintenance‚ side brush installation‚ and proper battery post cable attachment. Remember‚ this machine is intended solely for commercial use.
Understanding the Illustrated Parts List
The illustrated parts list is central to maintaining your Tennant 7100. It provides a visual reference for identifying each component‚ streamlining the ordering process for replacements. Before initiating any repair‚ carefully review the list to pinpoint the exact part needed‚ utilizing model numbers for precise identification.
This list details everything from M8 screws and nuts to ignition keys and charger LED labels. Accurate part numbers are essential for avoiding delays and ensuring compatibility. The manual contains 40 to 66 pages of detailed diagrams and specifications‚ facilitating efficient troubleshooting and upkeep of your cleaning machine.
Importance of Model Numbers When Ordering
Accurate model numbers are paramount when ordering replacement parts for your Tennant 7100. Utilizing the correct model ensures compatibility and prevents receiving incorrect components‚ which can cause delays and further issues. Always reference your machine’s model number before contacting a supplier or placing an order.
The illustrated parts list relies on these numbers for precise identification. Confirming the model avoids confusion‚ especially with similar-looking parts. This meticulous approach guarantees a smooth repair process and maintains the optimal performance of your Tennant 7100 cleaning equipment‚ saving both time and resources.
Safety Precautions for Servicing
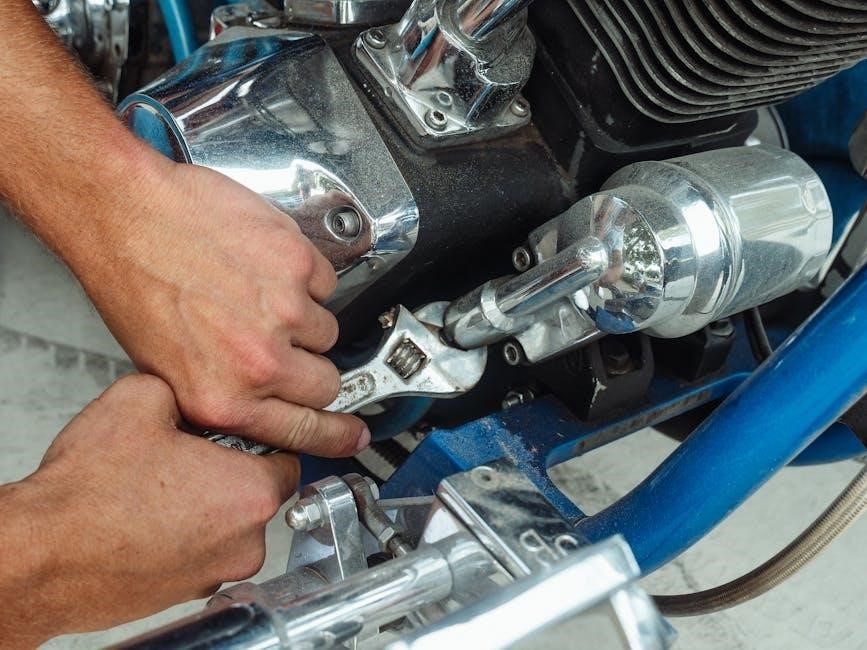
Prior to servicing‚ disconnect the battery and charger‚ and avoid all moving parts. Wear appropriate attire – no loose clothing is permitted during maintenance.
Disconnecting Battery and Charger
Before initiating any maintenance or repair procedures on your Tennant 7100‚ it is absolutely crucial to disconnect both the battery connection and the charger. This precautionary step minimizes the risk of electrical shock or accidental machine activation during servicing.
Ensure the machine is completely powered down. Locate the battery terminals and carefully disconnect the negative terminal first‚ followed by the positive terminal. Subsequently‚ unplug the charger from the power source and disconnect it from the machine.
This simple yet vital procedure safeguards both the technician and the machine‚ preventing potential hazards and ensuring a safe working environment. Always double-check that both power sources are fully disconnected before proceeding.
Avoiding Moving Parts During Maintenance
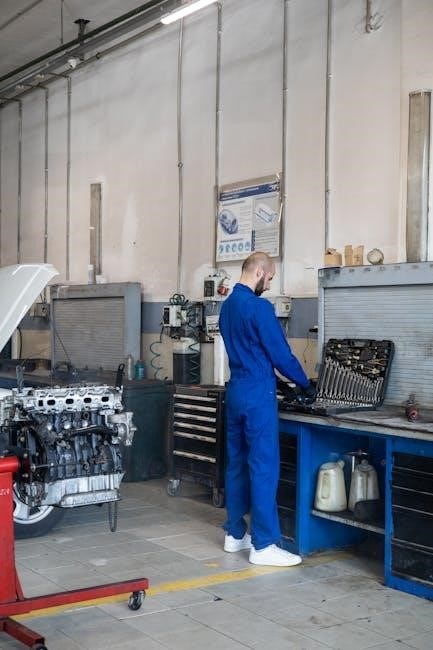
When servicing the Tennant 7100‚ maintaining a safe distance from all moving parts is paramount. The machine contains numerous components that engage during operation‚ posing a potential hazard if contacted during maintenance.
Specifically‚ avoid proximity to brushes‚ belts‚ and any motorized sections. Before initiating any inspection or repair‚ ensure the machine is completely powered down and disconnected from both the battery and charger‚ as previously detailed.
Never reach into areas where moving parts are located‚ and refrain from wearing loose clothing that could become entangled. Prioritize safety by keeping a clear and cautious workspace.
Proper Attire for Servicing (No Loose Clothing)
To ensure safety while servicing the Tennant 7100‚ appropriate attire is crucial. Avoid wearing loose jackets‚ shirts‚ or sleeves that could potentially become caught in moving parts. These garments present a significant entanglement risk‚ leading to injury.
Opt for close-fitting clothing that allows for a full range of motion without posing a hazard. Secure any loose items‚ such as drawstrings or dangling accessories.
Additionally‚ wearing appropriate footwear is essential – closed-toe shoes are recommended to protect your feet. Prioritizing safe clothing choices minimizes risks during maintenance procedures.
Key Components and Their Functions
The Tennant 7100 utilizes exhaust and HEPA filters to capture fine dust‚ protecting the motor from dirt and ensuring optimal cleaning performance.
Exhaust Filter and HEPA Filter Maintenance
Your Tennant vacuum cleaner is equipped with both an exhaust filter and a HEPA filter‚ crucial components for maintaining air quality and protecting the machine’s motor. These filters work in tandem to capture a wide range of particulate matter‚ from large debris to microscopic dust particles. Regular maintenance of these filters is essential for optimal performance and longevity of the Tennant 7100.
Specifically‚ these filters prevent fine dust from reaching and potentially damaging the motor‚ ensuring consistent suction power and extending the machine’s lifespan. It’s important to routinely inspect and replace these filters according to the maintenance schedule outlined in this manual to avoid reduced cleaning efficiency and potential motor failure. Proper filter maintenance contributes significantly to the overall effectiveness of your Tennant 7100.
Side Brush Installation
This section provides instructions for the proper installation of the side brush on your Tennant 7100 floor scrubber. The side brush effectively extends the cleaning path‚ allowing the machine to clean closer to edges and corners‚ improving overall cleaning efficiency. Correct installation ensures optimal brush contact with the floor surface‚ maximizing debris pickup.
To install‚ carefully align the side brush with its designated mounting point and secure it using the appropriate fasteners – typically‚ 2x M8 screws and nuts as detailed in the parts list. Ensure the brush is firmly attached and rotates freely before operation. Regularly inspect the side brush for wear and tear‚ replacing it when necessary to maintain peak cleaning performance.
Battery Post Cable Attachment
Securely attaching the battery post cables is crucial for the reliable operation of your Tennant 7100. Proper connection ensures consistent power delivery to the machine’s components‚ preventing interruptions during cleaning cycles. Always disconnect the battery connection and charger before performing any maintenance on the electrical system‚ prioritizing safety.
When reconnecting‚ firmly attach the cables to the corresponding battery posts‚ ensuring a tight and corrosion-free connection. Refer to the illustrated parts list for correct cable placement; Regularly inspect the connections for looseness or corrosion‚ cleaning the posts as needed; This simple maintenance step extends battery life and prevents potential electrical issues.
Warranty Information for Repair Parts
Tennant provides a 90-day warranty on repair parts after the initial warranty period expires‚ covering defects in materials and workmanship for replacements.
Warranty Period After Expiration
Following the initial warranty’s conclusion‚ Tennant continues to stand behind the quality of its repair parts. Specifically‚ any repair parts supplied by Tennant are warranted against defects in materials or workmanship for a period of ninety (90) days from the date of purchase.
This post-expiration warranty ensures customers receive reliable components for maintaining their Tennant 7100. It’s important to retain proof of purchase to validate warranty claims. This limited warranty doesn’t cover damage resulting from misuse‚ improper installation‚ or normal wear and tear. Contact Tennant directly for complete warranty details and claim procedures.
Repair Parts Warranty Details (90-day Coverage)
Tennant provides a 90-day warranty on all repair parts sold after the initial warranty period expires. This coverage protects against defects in materials and workmanship‚ ensuring the parts function as intended. The warranty begins on the date of purchase‚ providing peace of mind for maintenance and repairs.
To make a claim‚ retain your purchase receipt and contact Tennant’s customer service. This warranty doesn’t cover damage caused by improper installation‚ misuse‚ accidents‚ or normal wear. Tennant reserves the right to inspect any returned part before authorizing a replacement or refund.

Tenancy Agreements and Landlord-Tenant Law (Related Concepts)
Understanding tenancy types—joint or tenancy-in-common—is crucial when dealing with property ownership and lease agreements‚ impacting rights and responsibilities.
Understanding Joint Tenancy
Joint tenancy represents a specific form of property ownership where two or more individuals possess equal shares and rights to the property. A defining characteristic of joint tenancy is the “right of survivorship.” This legally binding principle dictates that upon the death of one joint tenant‚ their ownership interest automatically transfers to the surviving joint tenant(s).
This transfer occurs outside of the probate process‚ streamlining the inheritance process. Consequently‚ the surviving tenant(s) then own the entirety of the property. This differs significantly from tenancy-in-common‚ where an heir would inherit the deceased tenant’s share. Joint tenancy requires four key elements: equal ownership‚ possession‚ interest‚ and the right of survivorship‚ establishing a clear and legally protected ownership structure.
Tenancy-in-Common Explained
Tenancy-in-common offers a more flexible ownership structure compared to joint tenancy‚ allowing individuals to hold varying percentages of a property. Unlike joint tenancy‚ there’s no automatic right of survivorship. When a tenant-in-common passes away‚ their ownership share becomes part of their estate and is distributed according to their will or state intestacy laws.
This means the share doesn’t automatically transfer to the other tenants-in-common. Each tenant-in-common has the right to sell‚ gift‚ or bequeath their share independently‚ without requiring consent from co-owners. This arrangement is suitable for investment properties or situations where owners desire control over their inheritance plans‚ providing greater individual autonomy.
Handling Tenancy Agreements/Leases
After signing a tenancy agreement or lease‚ both landlords and tenants should retain a copy for their records. Carefully review all clauses‚ including rent amount‚ payment schedule‚ lease duration‚ and responsibilities for maintenance and repairs. Document any agreed-upon changes or additions in writing‚ signed by both parties‚ as amendments to the original agreement.
Maintain open communication regarding any issues or concerns that arise during the tenancy. Adhere to the terms outlined in the lease‚ including providing proper notice for termination or renewal. Understanding your rights and obligations under the lease is crucial for a smooth and legally sound landlord-tenant relationship.
Utility and Service Account Responsibilities
Tenants may be responsible for opening and maintaining utility accounts – water‚ drainage‚ and electricity – directly with service companies for the unit.
Tenant Responsibility for Utility Accounts
Understanding utility account obligations is crucial for tenants. Often‚ a tenancy agreement will specify whether the tenant or landlord is responsible for setting up and managing accounts with utility and service providers. This includes essential services like water supply‚ drainage‚ and electricity.
In many cases‚ tenants are required to directly open and maintain accounts with these companies themselves. This ensures consistent service and allows tenants to monitor their consumption and associated costs. It’s vital to clarify these responsibilities within the lease agreement to avoid disputes and ensure a smooth tenancy experience. Failure to address this can lead to service interruptions or unexpected billing issues.
Regulated Tenancies (Part IVA)
A tenancy qualifies as regulated under Part IVA if it meets specific conditions outlined in the Landlord and Tenant (Consolidation) Ordinance.
Conditions for a Regulated Tenancy
Determining a regulated tenancy under Part IVA requires fulfilling all stipulated conditions within the Landlord and Tenant (Consolidation) Ordinance; These tenancies possess specific characteristics differentiating them from other lease agreements. Essentially‚ a tenancy becomes regulated if it meets the criteria established by this legal framework‚ impacting both landlord and tenant rights and responsibilities.
Understanding these conditions is crucial for both parties involved in a tenancy agreement. Failure to recognize a regulated tenancy can lead to legal complications and disputes regarding rent control‚ security of tenure‚ and repair obligations. Careful assessment against the Ordinance’s requirements is therefore paramount.
Landlord’s Rights and Responsibilities
Landlords have access rights for repairs‚ as seen in Leung Wai Ling Isewesg v Success Base Engineering Ltd‚ but no inherent repair duty for tenants.
Right to Access for Repairs (Case Law Example)
Landlords possess the legal right to access a property for necessary repairs‚ but this right doesn’t automatically translate into a responsibility to perform those repairs; This distinction is crucial‚ as highlighted in the case of Leung Wai Ling Isewesg v Success Base Engineering Ltd.
The case summary demonstrates that a landlord’s ability to enter the premises for repair purposes doesn’t imply an obligation to actually undertake the repairs themselves. Tenants should understand this separation of rights and duties when addressing maintenance issues. Access is permitted for assessment and execution of repairs‚ but the landlord isn’t legally bound to complete them.
Distinction Between Access and Repair Duty
A landlord’s right to access a property for repairs is legally separate from any duty to actually make those repairs. While access allows for inspection and potential remediation‚ it doesn’t automatically obligate the landlord to fix the issue. This crucial distinction stems from legal precedent‚ clarifying tenant and landlord responsibilities.
The right of access facilitates necessary maintenance‚ but the repair duty is often determined by the tenancy agreement or applicable legislation. Tenants shouldn’t assume access guarantees repairs; clear communication regarding repair obligations is essential. Understanding this separation prevents misunderstandings and ensures appropriate action is taken.

Machine Usage and Intended Purpose
This Tennant 7100 is designed solely for commercial applications‚ effectively cleaning dry debris and dust from both hard floors and indoor carpeted surfaces.
Commercial Use Only
The Tennant 7100 floor scrubber is specifically engineered and manufactured for demanding commercial environments. Its robust design and powerful cleaning capabilities are intended for professional cleaning applications within businesses‚ industrial facilities‚ and institutional settings. This machine is not designed for residential or personal use‚ as such applications may void any applicable warranties and could lead to premature wear and tear.
Using the machine outside of its intended commercial purpose may compromise its performance and safety features. Operators should be properly trained on its operation and maintenance procedures to ensure optimal results and longevity. Attempting to modify the machine for non-commercial applications is strongly discouraged.
Suitable Surfaces (Hard Floors & Carpets)
The Tennant 7100 is versatile‚ effectively cleaning both hard floor surfaces and carpets. It excels at removing dirt‚ dry debris‚ and dust from a variety of indoor hard floors‚ including tile‚ concrete‚ vinyl‚ and sealed wood. Furthermore‚ the machine is designed to effectively clean low-pile carpets‚ restoring their appearance and removing embedded soil.
However‚ it’s crucial to avoid using the Tennant 7100 on delicate or highly sensitive flooring materials. Always test a small‚ inconspicuous area first to ensure compatibility and prevent potential damage. Proper brush selection and solution dilution are key to achieving optimal cleaning results on different surface types.
Parts List Details
Detailed specifications include M8 screws & nuts‚ ignition key information‚ and charger LED label specifics – essential for accurate part identification and replacement.
M8 Screw and Nut Specifications
The Tennant 7100 utilizes M8 screws and nuts in various assembly points throughout the machine. Ensuring the correct specifications are maintained is crucial for secure fastening and optimal performance. These fasteners are commonly used for attaching components like side brushes and access panels.
When replacing these parts‚ verify the thread pitch and length match the original equipment manufacturer (OEM) standards. Incorrect fasteners can lead to stripping‚ loosening‚ or even component failure; Refer to the illustrated parts list for precise details regarding the quantity and specific type of M8 screws and nuts required for each application within the Tennant 7100. Always use high-quality replacements to guarantee durability and prevent future issues.
Ignition Key Information
The Tennant 7100 floor scrubber requires a functional ignition key for operation‚ controlling power to the machine’s systems. If your original key is lost or damaged‚ a replacement is readily available through Tennant’s parts network. When ordering‚ it’s helpful to have the key code‚ if known‚ to ensure a perfect match.
The manual specifies that 2x ignition keys are included in parts lists. Ensure the replacement key functions smoothly in the ignition switch‚ providing reliable starting and stopping of the machine. A faulty key or ignition switch can prevent operation and require further diagnostics. Always keep a spare key in a secure location to avoid operational downtime.
Charger LED Label Details
The Tennant 7100’s charger utilizes LED indicators to communicate its charging status. A clear‚ legible LED label is crucial for understanding these signals‚ aiding in proper battery maintenance and troubleshooting. The parts manual lists 1x Charger LED label as a replaceable component.
These labels detail what each LED color signifies – for example‚ solid green might indicate a full charge‚ while flashing red could signal an error. If the label is damaged or missing‚ it’s essential to replace it to ensure operators can correctly interpret the charger’s status. Proper understanding prevents overcharging or undercharging‚ maximizing battery life and performance.